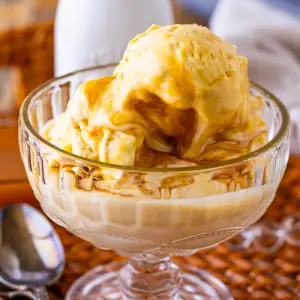
Creamy Butterscotch Ice Cream
This creamy, no-churn butterscotch ice cream combines whipped cream, sweetened condensed milk, and rich butterscotch syrup for a smooth, indulgent dessert. Easy to make, visually appealing with swirled syrup, and freezer-friendly, it’s perfect for satisfying sweet cravings without the need for special equipment.
Equipment
- 1 large mixing bowl
- 1 stand mixer or electric hand mixer
- 9x5-inch loaf pan
- 1 butter knife or skewer
- Aluminum foil
Ingredients
- 2 cups heavy whipping cream
- 14 ounces sweetened condensed milk
- 12 ounces butterscotch syrup
- ½ teaspoon vanilla extract
- Pinch of salt
Instructions
- Chill Your Tools for Perfect Whipping: Before starting, place your large mixing bowl and the beaters of your electric hand mixer or stand mixer in the fridge for at least 10 minutes. Chilling the equipment helps the cream whip faster and creates a lighter, fluffier texture that’s essential for smooth ice cream.
- Whip the Cream to Soft Peaks: Pour the heavy whipping cream into your chilled bowl. Using a stand mixer or hand mixer, whip the cream on high speed until it forms soft peaks. You’ll know it’s ready when the cream has almost doubled in size and, when you lift the beaters, the cream holds a gentle peak that folds over. Be careful not to overwhip, or it will turn into butter!
- Incorporate Sweetened Condensed Milk: Add the sweetened condensed milk to the whipped cream. Using a spatula or mixer on low speed, fold the milk gently into the whipped cream until fully combined. This mixture is the foundation of your creamy ice cream and gives it sweetness and body without the need for an ice cream maker.
- Mix in Butterscotch Syrup, Vanilla, and Salt: Measure half of your butterscotch syrup and pour it into the whipped cream mixture. Add the vanilla extract and a pinch of salt to enhance flavor. Mix gently but thoroughly until the syrup is fully incorporated, ensuring a consistent, rich butterscotch flavor throughout the ice cream.
- Layer the Ice Cream Base: Take a 9×5 inch loaf pan and pour half of your ice cream mixture into it. Smooth the surface with a spatula to create an even base layer. This initial layer will provide a solid foundation for your decorative syrup swirl.
- Add the First Swirl of Butterscotch: Drizzle half of the remaining butterscotch syrup evenly over the top of the ice cream base. This will create pockets of extra flavor and visual appeal once frozen. Using the back of a spoon, gently swirl the syrup into the ice cream in figure-eight motions to achieve a marbled effect.
- Add the Second Layer of Ice Cream: Pour the remaining half of your ice cream mixture over the swirled syrup layer. Smooth it gently with a spatula so the surface is even and ready for the final decorative swirl.
- Finish with the Top Swirl: Drizzle the remaining butterscotch syrup over the top layer. Take a butter knife, skewer, or the back of a spoon to create figure-eight or zigzag patterns across the surface. This step not only adds visual appeal but ensures every scoop has a burst of rich butterscotch flavor.
- Cover and Freeze: Cover the loaf pan tightly with aluminum foil to prevent freezer burn. Place the pan on a flat surface in the freezer and freeze for at least 6 hours, preferably overnight, until the ice cream is completely firm. Keeping the pan level ensures an even freeze for smooth slicing and scooping.
- Serve and Enjoy: When ready to serve, remove the ice cream from the freezer. For easy scooping, dip your ice cream scoop or spoon in hot water, then scoop into bowls or cones. The ice cream should be creamy, smooth, and full of rich butterscotch flavor, perfect for a decadent homemade dessert.
- Optional Taste Test Before Freezing: If you’d like, you can taste a small spoonful before freezing. Adjust sweetness by adding a little extra syrup if desired. This ensures the flavor is just right before the ice cream sets.
Notes
- Chill Everything First: Always chill your mixing bowl and beaters before whipping the cream to ensure a light, fluffy texture.
- Soft Peaks Only: Whip the cream until soft peaks form; overwhipping can turn it into butter.
- Swirl Strategically: Use a skewer or the back of a spoon to create figure-eight or zigzag patterns with the syrup for a visually appealing marbled effect.
- Flat Freezing Matters: Keep your loaf pan on a level surface in the freezer to ensure even setting.
- Warm Scoop Tip: Dip your scoop or spoon in hot water before serving for smooth, perfect scoops.
