All products are selected by our editorial team for quality. If you buy through our links, we may earn a small commission at no extra cost to you.
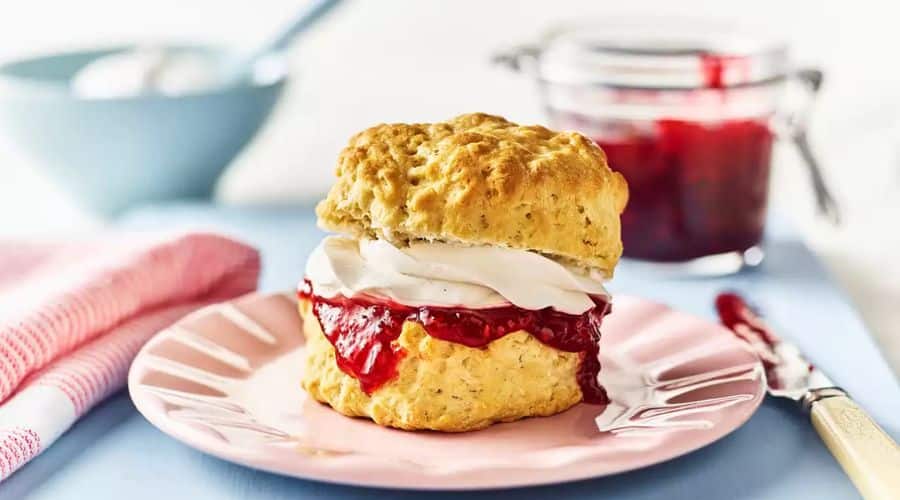
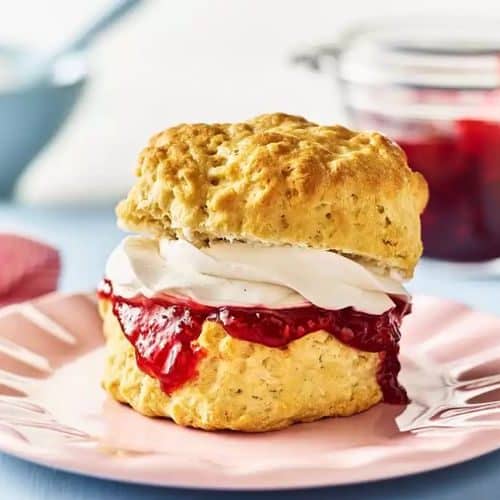
Vegan scones are a delightful twist on a classic treat, offering the same flaky, tender texture as traditional scones without the use of dairy or eggs.
They are perfect for anyone following a plant-based diet or anyone simply looking to try a healthier, cruelty-free version of this beloved pastry.
These vegan scones can be enjoyed for breakfast, afternoon tea, or as a snack, making them incredibly versatile.
You can enjoy them plain or with your favorite vegan butter, jam, or even a cup of your favorite tea.

Ingredients: What You’ll Need to Make Vegan Scones
To make delicious vegan scones, you’ll need a few basic ingredients.
Start with all-purpose flour as the base. This helps give the scones their light and airy texture.
Add sugar for a slight sweetness to balance the other ingredients. Granulated sugar works best, but you can experiment with alternatives if needed.
Baking powder is essential for leavening the scones and giving them a fluffy rise.
A pinch of salt helps enhance the flavors and balance the sweetness.
For the wet ingredients, you’ll need plant-based butter, which should be cold and cut into small pieces. This creates that signature flakiness.
Next, use any unsweetened non-dairy milk, like almond, soy, or oat milk. This adds moisture and richness without the need for dairy.
Vanilla extract adds a subtle sweetness and enhances the overall flavor of the scones.
If you like, you can include raisins, currants, chocolate chips, or even chopped nuts to give the scones a bit of extra flavor and texture.
Equipment You’ll Need to Make Vegan Scones
Making vegan scones requires a few simple tools that you likely already have in your kitchen.
Start with a large mixing bowl for combining your dry ingredients.
You’ll also need a separate bowl for wet ingredients if you’re measuring them separately.
A pastry cutter or a fork is essential for cutting the cold butter into the dry ingredients. If you don’t have a pastry cutter, a fork or your hands will work just as well.
Prepare a baking sheet lined with parchment paper to prevent the scones from sticking during baking.
Finally, you’ll need an oven to bake the scones to golden perfection. A cooling rack will also be handy to let the scones cool after baking.
Step-by-Step Instructions: How to Make Perfect Vegan Scones
Step 1: Preheat the Oven and Prepare Your Baking Sheet
Before you begin, preheat your oven to 400°F (200°C).
This ensures that your scones bake evenly and rise to perfection.
Line a baking sheet with parchment paper. This helps prevent the scones from sticking to the pan, making cleanup easier.
Step 2: Mix the Dry Ingredients
In a large mixing bowl, sift or whisk together the flour, sugar, baking powder, and salt.
Sifting helps prevent clumps and ensures a smoother dough.
Step 3: Add the Plant-Based Butter
Cut the cold plant-based butter into small cubes. Add the butter to the flour mixture.
Using a pastry cutter or a fork, cut the butter into the flour until the mixture resembles coarse crumbs.
It’s important to handle the butter gently to keep it cold. This helps create the flaky texture in your scones.
Step 4: Pour in the Non-Dairy Milk and Vanilla Extract
Make a well in the center of the dry ingredients and add the non-dairy milk and vanilla extract.
Mix the ingredients gently with a spoon or your hands until the dough just begins to come together.
Avoid overmixing, as this can result in dense scones.
Step 5: Shape the Dough
Turn the dough out onto a lightly floured surface. Gently knead the dough a few times to bring it together. Be careful not to overwork it.
Shape the dough into a round disc about 1 inch thick.
Using a sharp knife or a dough cutter, slice the dough into 8 wedges, just like a pie.
Step 6: Cut and Bake the Scones
Place the scones onto the prepared baking sheet, leaving space between each one.
Brush the tops of the scones with a bit of non-dairy milk for a golden finish.
Bake the scones for 12–15 minutes or until they’re lightly golden on top and have risen.
Step 7: Cool and Serve
Once baked, transfer the scones to a cooling rack. Let them cool for about 5 minutes before serving.
Serve them warm with your favorite vegan butter, jam, or any other toppings you enjoy.
Tips for the Perfect Vegan Scones
To achieve light, flaky vegan scones, there are a few helpful tips to keep in mind.
First, always use cold plant-based butter. This is key to getting the scones to rise and become tender.
The cold butter creates pockets of air, giving the scones their signature flaky texture.
Be sure not to overwork the dough. Mix the ingredients just until they come together. Overworking the dough can make the scones dense instead of light and airy.
If you’re adding mix-ins like raisins or chocolate chips, gently fold them in at the end of mixing.
Too much stirring can affect the texture of the dough.
Another tip is to chill the dough briefly before baking.
If you have time, pop the shaped scones into the fridge for about 10–15 minutes before baking.
This helps maintain their shape and promotes a more even rise.
If you want to experiment with flavors, try adding lemon zest, dried herbs like rosemary, or spices like cinnamon.
These can elevate the taste of your vegan scones.
Finally, make sure to bake your scones at the right temperature, usually around 400°F (200°C).
This high heat will help them rise quickly and form that beautiful golden crust.
How to Store Vegan Scones
Vegan scones are best enjoyed fresh, but they can be stored for later enjoyment.
To store them at room temperature, place your scones in an airtight container.
They should keep well for up to 2–3 days. Make sure they’re completely cooled before storing to prevent moisture buildup, which can make them soggy.
If you want to extend their shelf life, you can freeze the scones.
Wrap each one individually in plastic wrap or parchment paper, and then place them in a freezer-safe bag.
They’ll keep in the freezer for up to 3 months. To reheat, simply warm them in the oven at 350°F (175°C) for about 5–7 minutes.
For a quicker option, you can store the unbaked scone dough in the fridge for up to 24 hours.
When you’re ready, just bake them as directed. This is a great way to prepare in advance for a busy day or unexpected guests.
Why Vegan Scones Are a Healthier Option
Vegan scones are a healthier option compared to traditional scones because they’re made without dairy or eggs.
This means they can be lower in saturated fats and cholesterol, which is beneficial for heart health.
By using plant-based butter and non-dairy milk, you can also avoid some of the artificial ingredients often found in store-bought scones.
Moreover, vegan scones can be customized to be even healthier by swapping out refined sugar for natural sweeteners like maple syrup or coconut sugar.
The use of whole grain or gluten-free flours can further boost the nutritional value of your scones, offering more fiber and vitamins.
These scones are also naturally free from animal-based products, which means they support a plant-based diet.
This can lead to improved digestion, increased energy levels, and a more environmentally friendly lifestyle.
Vegan scones allow you to indulge in a delicious treat without compromising on your health goals.
Conclusion
Making vegan scones is an easy and rewarding experience.
With just a few simple ingredients, you can create a delicious, flaky pastry that’s perfect for any occasion.
Whether you enjoy them plain or with a touch of your favorite vegan jam, these scones are versatile, light, and full of flavor.
So, why not try this vegan version of a classic favorite?
With the tips and techniques shared in this post, you’ll be able to bake perfect scones every time.
Don’t hesitate to experiment with different flavors and enjoy the endless possibilities!
Remember, vegan scones are not only better for you but also better for the planet.
Treat yourself to a healthier, more compassionate version of a beloved treat.
Frequently Asked Questions
1. Can I make these scones gluten-free?
Yes, you can easily make these vegan scones gluten-free by using a gluten-free flour blend.
Make sure to check the blend’s instructions, as some may require adjustments to the liquid ratio or additional ingredients like xanthan gum.
2. Can I substitute the plant-based butter with coconut oil?
Yes, you can substitute the plant-based butter with coconut oil.
However, keep in mind that coconut oil has a slightly different texture and flavor, which may result in a slightly different scone texture.
For best results, use refined coconut oil to avoid a strong coconut flavor.
3. How can I make these scones sweeter?
If you prefer sweeter scones, you can increase the amount of sugar in the recipe or use alternative sweeteners like maple syrup, agave nectar, or coconut sugar.
You can also add a drizzle of icing or powdered sugar on top after baking.
4. Can I add fruit or nuts to the scones?
Absolutely! Adding fruits like berries, raisins, or dried apricots, as well as nuts like almonds or walnuts, is a great way to add flavor and texture to your scones.
Simply fold them into the dough before shaping and baking.
5. How can I keep my scones from becoming too dry?
To avoid dry scones, make sure not to overwork the dough and to add just enough non-dairy milk to bring it together.
If you’re using a flour substitute, be sure to follow any adjustments to liquid measurements.
Additionally, you can brush the scones with a bit of non-dairy milk before baking for extra moisture.
Vegan Scones
Equipment
- 1 large mixing bowl
- 1 pastry cutter (or fork)
- 1 Baking sheet
- 1 Parchment Paper (for lining the baking sheet)
- 1 cooling rack
- 1 knife or dough cutter (for slicing the dough)
Ingredients
- 2 cups all-purpose flour 250g
- 1/4 cup granulated sugar 50g
- 1 tbsp baking powder 15g
- 1/2 tsp salt 2g
- 1/2 cup plant-based butter 113g
- 1/2 cup non-dairy milk 120ml
- 1 tsp vanilla extract 5ml
- Optional: 1/2 cup raisins currants, or chocolate chips (75g)
Instructions
Step 1: Preheat the Oven and Prepare Your Baking Sheet
- Preheat your oven to 400°F (200°C). Line a baking sheet with parchment paper to prevent the scones from sticking.
Step 2: Mix the Dry Ingredients
- In a large bowl, whisk together the flour, sugar, baking powder, and salt until well combined.
Step 3: Add the Plant-Based Butter
- Cut the cold plant-based butter into small cubes. Add the butter to the dry ingredients and use a pastry cutter or fork to blend it into the flour mixture until it resembles coarse crumbs.
Step 4: Pour in the Non-Dairy Milk and Vanilla Extract
- Make a well in the center of the flour mixture and pour in the non-dairy milk and vanilla extract.Stir gently until the dough just begins to come together.
Step 5: Shape the Dough
- Turn the dough out onto a lightly floured surface. Gently knead the dough until it forms a rough ball. Flatten it into a round disc about 1 inch thick.
Step 6: Cut and Bake the Scones
- Using a sharp knife or dough cutter, slice the dough into 8 wedges. Place the scones on the prepared baking sheet, leaving space between each one.
- Brush the tops with a little non-dairy milk for a golden finish. Bake for 12–15 minutes, or until the scones are golden brown on top and risen.
Step 7: Cool and Serve
- Allow the scones to cool on a wire rack for 5–10 minutes before serving. Enjoy them warm with your favorite vegan spread, jam, or fruit.
Notes
- Non-dairy milk options: You can use any unsweetened plant-based milk, such as almond, oat, or soy milk. Choose one that complements the flavor profile you want.
- Plant-based butter: Ensure that the butter is cold and cut into small pieces. This helps to create the desired flaky texture.
- Add-ins: Feel free to mix in raisins, currants, nuts, or even a handful of chocolate chips for extra flavor. If adding, fold them in gently at the end of mixing.
- Sweetness: Adjust the sugar level based on your personal preference. You can use coconut sugar, maple syrup, or any other sweetener you prefer.
- Storage: These scones are best enjoyed fresh, but they can be stored in an airtight container for up to 2–3 days at room temperature. They can also be frozen for longer storage.
