All products are selected by our editorial team for quality. If you buy through our links, we may earn a small commission at no extra cost to you.
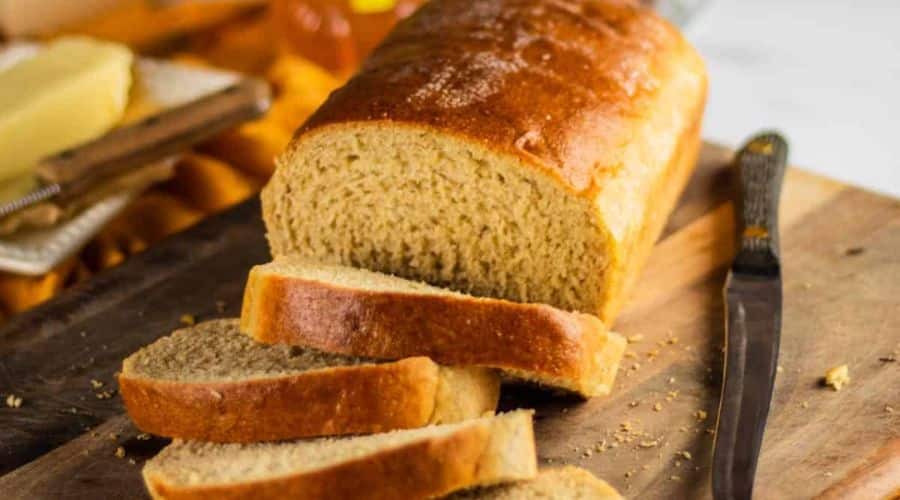
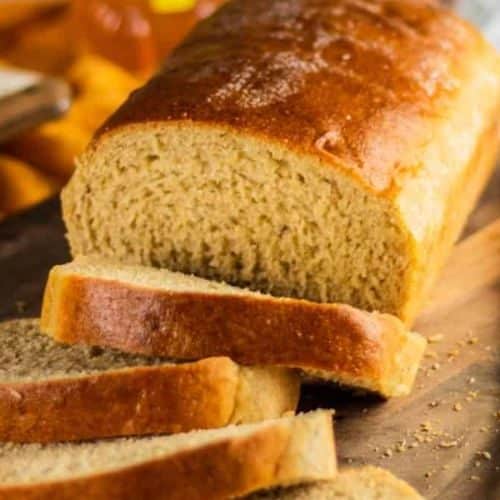
Honey wheat bread is a delicious, homemade staple that strikes the perfect balance between hearty whole wheat and the natural sweetness of honey.
With a soft yet slightly chewy texture, this bread is ideal for everything from morning toast to sandwich-making.
Unlike store-bought options, homemade honey wheat bread contains no unnecessary preservatives, allowing you to enjoy a fresher and healthier loaf.
Whether you are an experienced baker or new to bread-making, this recipe is straightforward and rewarding.
The combination of wholesome ingredients and a simple process makes it a great choice for anyone looking to elevate their baking skills.

Why You’ll Love This Honey Wheat Bread
Naturally Sweetened with Honey
Honey adds a gentle sweetness without the need for refined sugar, enhancing the flavor while keeping the bread moist.
It also helps extend the bread’s shelf life by naturally preserving freshness.
Healthier Than White Bread
Using whole wheat flour increases the fiber content, making this bread a more nutritious option compared to traditional white loaves.
Whole wheat flour is rich in vitamins, minerals, and antioxidants, promoting better digestion and sustained energy.
Soft Yet Hearty Texture
The perfect blend of whole wheat and all-purpose flour ensures the bread remains soft while still providing the hearty bite of wheat.
If you prefer a denser loaf, you can adjust the ratio to include more whole wheat flour.
Simple and Beginner-Friendly
This recipe requires minimal ingredients and follows a straightforward process.
Even if you’ve never baked bread before, the step-by-step instructions will guide you to a perfectly risen, golden-brown loaf.
Versatile and Customizable
Honey wheat bread pairs well with sweet and savory spreads alike.
Whether you top it with butter and jam, use it for sandwiches, or enjoy it with soup, it’s a versatile option that complements a variety of meals.
Ingredients Overview
Flour Choices
A combination of whole wheat flour and all-purpose flour provides the best texture.
Whole wheat flour gives the bread a slightly nutty flavor and added fiber, while all-purpose flour ensures softness.
You can adjust the ratio based on your preference, but using 100% whole wheat flour may result in a denser loaf.
Sweetener: The Role of Honey
Honey not only sweetens the bread naturally but also helps retain moisture, keeping the loaf soft for days.
It also contributes to a beautiful golden crust when baked.
Yeast & Leavening
Active dry yeast or instant yeast can be used in this recipe. Yeast helps the bread rise, creating a light and airy texture.
Proper activation of yeast is crucial for a successful loaf.
Liquid Ingredients
Warm water is essential to activate the yeast properly.
Some recipes also incorporate milk for a richer flavor and softer crumb, but it is optional.
The liquid temperature should be warm but not hot (about 110°F or 43°C) to prevent killing the yeast.
Fats for Tenderness
A small amount of butter or oil enhances the texture, making the bread softer and extending its freshness.
Butter adds a richer flavor, while oil provides a slightly lighter crumb.
Salt for Flavor and Dough Structure
Salt is a critical ingredient in bread-making, as it enhances flavor and controls yeast activity.
Without it, the bread may taste bland and rise too quickly, affecting the overall structure.
Would you like me to adjust anything before moving on to the next sections?
Essential Tools & Equipment
Mixing Bowls
You’ll need at least two bowls—one for mixing the dough and another for proofing.
A large bowl allows room for the dough to rise properly.
Measuring Cups and Spoons
Accurate measurements are crucial in baking. Use dry measuring cups for flour and liquid measuring cups for water or milk to ensure precision.
Stand Mixer (Optional)
While kneading can be done by hand, a stand mixer with a dough hook attachment can make the process easier and more consistent.
Loaf Pan
A standard 9×5-inch loaf pan helps shape the dough into a uniform loaf. If you prefer a more rustic look, you can also bake it freeform on a baking sheet.
Kitchen Thermometer
A thermometer helps ensure the water is at the right temperature (around 110°F or 43°C) for activating the yeast.
It also lets you check if the bread is fully baked—the internal temperature should reach about 190°F (88°C).
Wooden Spoon or Dough Scraper
A sturdy spoon is useful for mixing ingredients, while a dough scraper helps with shaping and handling sticky dough.
Plastic Wrap or Clean Kitchen Towel
Covering the dough during rising prevents it from drying out and helps maintain the right humidity for proper fermentation.
Oven and Cooling Rack
A well-preheated oven ensures even baking, while a cooling rack allows air to circulate around the loaf, preventing a soggy bottom.
Step-by-Step Guide to Making Honey Wheat Bread
Step 1: Activate the Yeast
- Warm the water to around 110°F (43°C). If it’s too hot, it can kill the yeast; too cold, and the yeast won’t activate.
- In a mixing bowl, combine warm water, honey, and yeast. Stir gently and let it sit for about 5–10 minutes until it becomes foamy. If the mixture doesn’t foam, your yeast may be expired or the water temperature may be incorrect.
Step 2: Mixing the Dough
- In a large bowl, combine whole wheat flour, all-purpose flour, and salt.
- Pour in the activated yeast mixture and add melted butter or oil.
- Stir everything together until a shaggy dough forms. If using a stand mixer, mix on low speed until combined.
Step 3: Kneading the Dough
- Transfer the dough to a floured surface and knead for about 8–10 minutes until it becomes smooth and elastic. If using a stand mixer, knead with the dough hook on medium speed for about 5–6 minutes.
- To test if the dough is ready, perform the “windowpane test” by stretching a small piece between your fingers. If it stretches thin without tearing, it’s properly kneaded.
Step 4: First Rise (Proofing the Dough)
- Lightly grease a bowl and place the dough inside, turning it to coat with oil.
- Cover the bowl with plastic wrap or a clean towel and let it rise in a warm place for 1 to 1.5 hours, or until doubled in size.
- If your kitchen is cold, you can place the dough inside a slightly warm oven (turned off) to speed up the rising process.
Step 5: Shaping the Loaf
- Once risen, punch down the dough to release excess air.
- Transfer it to a lightly floured surface and shape it into a rectangle.
- Roll the dough tightly into a log and tuck in the edges to fit into a greased loaf pan.
Step 6: Second Rise & Preparing for Baking
- Cover the loaf with a towel and let it rise for another 30–45 minutes until it puffs up slightly above the pan’s rim.
- Preheat the oven to 350°F (175°C) while the dough finishes proofing.
Step 7: Baking the Bread
- Bake the loaf for 30–35 minutes until the top is golden brown.
- To check doneness, tap the bottom of the loaf—if it sounds hollow, it’s ready. You can also use a thermometer to ensure it has reached 190°F (88°C) internally.
Step 8: Cooling & Storing
- Remove the bread from the pan and let it cool completely on a wire rack before slicing. This prevents the bread from becoming gummy.
- Store in an airtight container at room temperature for up to 4 days, or freeze for longer storage.
Would you like any additional details or modifications before moving on to the next sections?
Tips for the Best Honey Wheat Bread
Use the Right Flour Ratio
For a softer loaf, use a mix of whole wheat and all-purpose flour. A 50/50 ratio gives the best balance of nutrition and texture.
If using 100% whole wheat flour, consider adding a tablespoon of vital wheat gluten to improve elasticity.
Don’t Skip the Kneading Process
Kneading develops gluten, which gives the bread structure and helps it rise properly.
If your dough feels too sticky, add small amounts of flour while kneading, but avoid over-flouring as it can make the bread dense.
Let the Dough Rise in a Warm Environment
Yeast thrives in warm, humid conditions. If your kitchen is cold, place the dough in an oven with the light on or near a warm spot like the top of the refrigerator.
Check for Proper Proofing
Under-proofed dough won’t rise well, while over-proofed dough can collapse.
A good way to check is the poke test—gently press a finger into the dough. If it slowly springs back, it’s ready to bake.
Enhance Flavor with Extra Ingredients
For added texture and taste, mix in seeds (sunflower, flax, sesame) or dried fruits like raisins.
Brushing the top with honey or butter after baking gives a beautiful sheen and extra flavor.
Frequently Asked Questions
1. Why didn’t my bread rise properly?
This could be due to expired yeast, water that was too hot or too cold, or a cold proofing environment.
Always check the yeast’s freshness and ensure the water is around 110°F (43°C).
2. How do I make the bread softer?
For a softer crumb, replace some water with milk, add an extra tablespoon of honey, or use a little more fat (butter or oil).
Letting the bread cool completely before slicing also helps retain moisture.
3. Can I make this bread without a stand mixer?
Yes! Hand-kneading takes about 8–10 minutes, and though it requires effort, it’s a great way to develop gluten and create a well-textured loaf.
4. Can I freeze the dough or baked bread?
Yes. You can freeze the dough after the first rise—just shape it, wrap it tightly, and freeze.
When ready to bake, thaw overnight in the fridge, let it rise again, and then bake.
Baked bread can also be frozen for up to 3 months when wrapped in plastic and stored in an airtight bag.
5. How do I store honey wheat bread to keep it fresh?
Store it in an airtight container at room temperature for up to 4 days. For longer freshness, refrigerate for up to a week or freeze for later use.
Avoid storing in the fridge unless necessary, as it can dry out the bread faster.
Conclusion
Homemade honey wheat bread is a simple yet rewarding recipe that brings warmth and flavor to any meal.
With its naturally sweet taste, hearty texture, and wholesome ingredients, this bread is a perfect addition to your baking routine.
Whether you’re enjoying it fresh with butter, making sandwiches, or toasting it for breakfast, this versatile loaf is sure to become a household favorite.
If you try this recipe, share your experience in the comments! Have any questions or tips of your own? Let’s discuss them below. Happy baking!
Would you like any refinements or additions?
Honey Wheat Bread
Equipment
- 1 Large Mixing Bowl
- 1 Small bowl (for yeast proofing)
- 1 Measuring cup (liquids)
- 1 Measuring spoons
- 1 Kitchen thermometer (optional)
- 1 Wooden spoon or spatula
- 1 Stand mixer with dough hook (optional)
- 1 Loaf pan (9×5-inch)
- 1 Plastic wrap or clean towel
- 1 Wire cooling rack
Ingredients
- 1 cup 240ml Warm water (about 110°F/43°C)
- 2 ¼ tsp Active dry yeast or 1 packet
- 3 tbsp Honey
- 1 ½ cups Whole wheat flour
- 1 ½ cups All-purpose flour
- 1 tsp Salt
- 2 tbsp Unsalted butter melted or olive oil
Instructions
Step 1: Activate the Yeast
- In a small bowl, mix warm water (110°F/43°C) and honey. Stir until dissolved.
- Sprinkle yeast over the mixture and let it sit for 5–10 minutes until foamy.
Step 2: Mix the Dough
- In a large mixing bowl, combine whole wheat flour, all-purpose flour, and salt.
- Pour in the activated yeast mixture and add melted butter or oil.
- Stir until a rough dough forms.
Step 3: Knead the Dough
- Transfer the dough to a lightly floured surface and knead for 8–10 minutes until smooth and elastic. (If using a stand mixer, knead with a dough hook on medium speed for 5–6 minutes.)
Step 4: First Rise
- Place the dough in a greased bowl, cover with a towel, and let it rise in a warm place for 1–1.5 hours, or until doubled in size.
Step 5: Shape the Loaf
- Punch down the dough, then shape it into a rectangle and roll it into a log.
- Place the dough into a greased 9×5-inch loaf pan, tucking in the edges.
Step 6: Second Rise
- Cover the loaf and let it rise again for 30–45 minutes, until slightly above the pan’s rim.
- Preheat the oven to 350°F (175°C).
Step 7: Bake
- Bake for 30–35 minutes, or until golden brown. The internal temperature should be 190°F (88°C).
Step 8: Cool & Serve
- Remove from the oven and transfer to a wire rack. Let it cool completely before slicing.
Notes
- For a Softer Crust: Brush the top with melted butter immediately after baking.
- For Extra Flavor: Add 1 tbsp of ground flaxseed or 1 tbsp of sunflower seeds to the dough.
- Substitutions: Swap honey for maple syrup or molasses for a deeper flavor.
- Storage Tips: Store in an airtight container for up to 4 days at room temperature, or freeze for up to 3 months.
