Every product is independently reviewed and selected by our editors. If you buy something through our links, we may earn an affiliate commission at no extra cost to you.
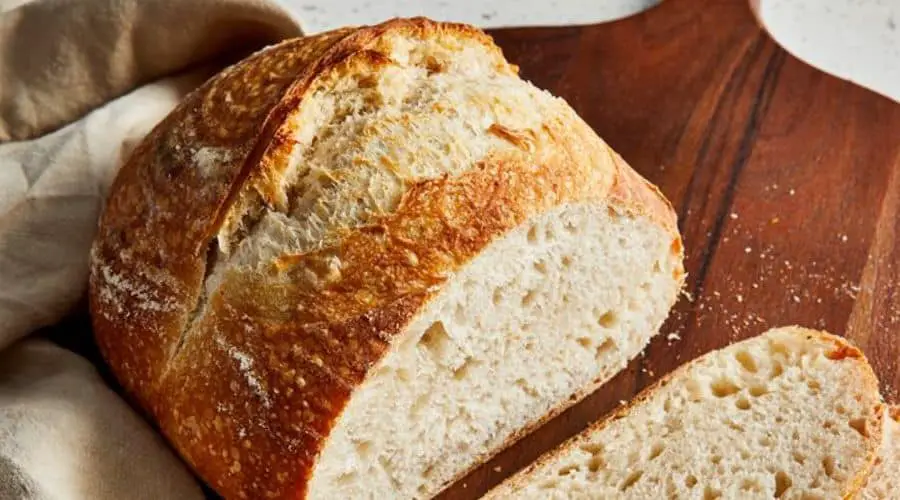
Gluten-free sourdough bread is a delicious and tangy alternative to traditional sourdough, perfect for those who need to avoid gluten due to dietary restrictions or preferences.
For many gluten-free eaters, finding a bread that mimics the flavor and texture of wheat-based sourdough can be a challenge.
However, with the right ingredients, techniques, and a bit of patience, you can bake a loaf that’s just as satisfying and flavorful.
The process of creating a gluten-free sourdough loaf is a rewarding journey that not only lets you enjoy fresh, homemade bread but also offers the joy of experimenting with fermentation, baking techniques, and different flours.
In this guide, we’ll walk you through the process step-by-step, from creating a gluten-free sourdough starter to baking the perfect loaf.

What is Sourdough Bread?
Sourdough bread is a type of bread that uses a natural fermentation process to rise, rather than commercial yeast.
The leavening comes from a starter culture, which is a mixture of flour and water that has been fermented with wild yeast and lactic acid bacteria.
The result is a bread with a characteristic tangy flavor and chewy texture, which many people find irresistible.
The beauty of sourdough lies in its simplicity and its ability to be made with just a few ingredients.
However, it’s the long fermentation process that gives sourdough its depth of flavor and unique texture.
The natural fermentation not only allows for better digestibility but also helps develop that signature sour taste.
When it comes to gluten-free sourdough, the same principles apply.
However, gluten-free flours behave differently, so adjustments need to be made to the recipe to ensure the dough rises and bakes correctly.
Essential Ingredients for Gluten-Free Sourdough Bread
Making gluten-free sourdough requires a few key ingredients, each playing an important role in the final texture, flavor, and rise of your bread. Here are the essentials:
Gluten-Free Flours
The foundation of any gluten-free sourdough bread starts with choosing the right flours.
Gluten-free flours such as rice flour, sorghum flour, or a gluten-free all-purpose flour blend are commonly used.
Each type of flour will contribute to the flavor, structure, and texture of your bread.
For example, rice flour helps with lightness, while sorghum flour adds a slight sweetness and a bit of density to the dough.
Gluten-Free Sourdough Starter
A gluten-free sourdough starter is essential for fermenting your dough naturally.
It’s made with a blend of gluten-free flour and water, fermented over time to cultivate wild yeast and bacteria.
The starter is the heart of sourdough and gives the bread its signature tang and leavening power.
You’ll need to start the starter a few days before you begin making your bread.
Yeast and Salt
While the sourdough starter provides most of the leavening, adding a small amount of commercial yeast can help give your bread the boost it needs, especially if you’re new to gluten-free sourdough.
Salt, on the other hand, is crucial for flavor, helping to balance the natural sourness of the dough and enhancing the overall taste.
Xanthan Gum or Psyllium Husk
Gluten-free dough lacks the elasticity provided by gluten.
To mimic this structure, xanthan gum or psyllium husk is often used.
Both ingredients help provide the bread with a better texture, allowing it to hold together and rise properly during baking.
How to Make a Gluten-Free Sourdough Starter

Creating a gluten-free sourdough starter from scratch is the first step to making your gluten-free sourdough bread.
While it takes time, it’s relatively simple, and it’s an important part of achieving that authentic tangy flavor in your loaf. Here’s how to get started:
Ingredients for Gluten-Free Starter:
- Gluten-free flour (such as rice flour or sorghum flour)
- Water (preferably filtered or non-chlorinated)
Day 1: Starting the Starter
Begin by mixing 1 cup of gluten-free flour with 1 cup of warm water in a clean jar or container. Stir well to combine, and cover the jar loosely with a cloth or lid.
Leave the mixture at room temperature for 24 hours.
During this time, wild yeast from the air will start to settle into the mixture and begin the fermentation process.
Day 2-7: Feeding the Starter
After the first 24 hours, you should start seeing some bubbles forming, indicating that the fermentation process has begun.
On day two, discard half of the mixture and add 1/2 cup of flour and 1/2 cup of water.
Stir it well, and cover again. Repeat this feeding process every 24 hours for about 5-7 days.
The starter will start to smell slightly sour as the fermentation continues. The more you feed it, the stronger and more active it will become. Once it’s bubbly, tangy, and doubling in size within 4-6 hours of feeding, your starter is ready to use.
Preparing the Dough: Techniques for Gluten-Free Sourdough
Working with gluten-free dough is different from traditional wheat-based dough, and it requires some unique techniques to ensure the best results.
Here are some tips for handling gluten-free sourdough dough:
Hydration is Key
Gluten-free dough tends to be wetter than traditional sourdough dough.
This is because gluten-free flours absorb moisture differently, and more hydration helps the dough rise.
Be prepared for a sticky, wet dough—this is normal and helps with the texture of the bread.
No Kneading Required
Unlike gluten-based doughs, gluten-free dough doesn’t require kneading
Instead, focus on gently folding and mixing the dough to combine the ingredients without overworking it.
Kneading can cause the dough to become too dense and affect the rise.
Use a Stand Mixer or Your Hands
To combine the dough, a stand mixer with a dough hook attachment works well, but you can also mix it by hand. If you mix by hand, be sure to use a wet spatula or your hands to prevent the dough from sticking.
Rest and Rise
Once mixed, cover your dough and allow it to rest and rise. Gluten-free dough may not rise as much as wheat-based dough, but it will expand during this period. Give it plenty of time to ferment and develop flavor, which is key for achieving a good sourdough loaf.
Baking Gluten-Free Sourdough Bread
Baking gluten-free sourdough bread requires attention to detail, as the dough behaves differently from traditional sourdough.
Here’s how to achieve a perfect loaf:
Preheat the Oven
Start by preheating your oven to 450°F (230°C).
It’s important to get the oven nice and hot before placing the dough inside.
A hot oven helps form a crispy crust and ensures that the bread rises properly during baking.
If you’re using a Dutch oven or baking cloche, preheat it as well, as this helps maintain moisture during the baking process.
Prepare Your Dough for the Oven
Before baking, gently shape your dough into a round or oval loaf.
You may choose to use a proofing basket for extra structure, but if you don’t have one, simply place the dough on parchment paper.
If you want to achieve that signature sourdough look, score the top of the loaf with a sharp knife or razor blade.
This helps control the expansion during baking and adds an aesthetic touch to the finished bread.
Baking Process
Place the dough into the preheated oven. If using a Dutch oven, cover it with the lid.
If you’re baking on a sheet pan, place a small pan of water at the bottom of the oven to create steam.
The steam is crucial for developing a crispy crust and for the dough to rise properly.
Bake the bread for about 40-45 minutes, or until the crust is golden brown and the bread sounds hollow when tapped on the bottom.
You can also use a thermometer to check the internal temperature—it should reach about 205°F (96°C) when fully baked.
Finishing Touches
For a crispier crust, remove the bread from the Dutch oven for the final 10-15 minutes of baking.
This allows the crust to firm up and develop that beautiful, golden-brown color. Once done, let the bread cool slightly in the oven with the door ajar to avoid moisture buildup.
Cooling and Storing Your Bread
Once you’ve baked your gluten-free sourdough, it’s important to cool and store it properly to maintain its freshness and texture.
Cooling Your Bread
After removing the bread from the oven, allow it to cool on a wire rack for at least 1-2 hours before slicing.
This is crucial, as the bread continues to set as it cools.
Cutting into the loaf too early can result in a gummy texture.
Letting it rest ensures that the crumb (interior of the bread) has time to firm up and the flavors fully develop.
Storing Your Bread
To store your gluten-free sourdough, keep it in a paper bag or a cloth bag at room temperature for up to 2-3 days.
Avoid using plastic, as this can make the crust soft.
If you need to keep it for longer, it’s best to freeze the bread.
Freezing Gluten-Free Sourdough
If you don’t plan to eat your bread within a few days, slice it up and freeze individual slices.
This way, you can toast them straight from the freezer whenever you want fresh bread.
To freeze, wrap the cooled bread in plastic wrap or aluminum foil, then place it in an airtight freezer bag.
Gluten-free bread freezes very well and can stay fresh for up to 3 months.
Gluten-Free Sourdough Variations and Add-Ins
While classic gluten-free sourdough bread is delicious on its own, there are plenty of ways to customize the recipe to suit your taste preferences. Here are some creative variations and add-ins to try:
Herbs and Spices
Incorporating herbs and spices into your gluten-free sourdough is an easy way to infuse it with additional flavor.
Fresh rosemary, thyme, or oregano pairs wonderfully with the tangy taste of sourdough. You can add them to the dough during the mixing phase or sprinkle them on top before baking.
Spices like garlic powder, onion powder, or even a touch of cinnamon can bring a unique twist to your bread.
Seeds and Nuts
For added texture and crunch, you can fold in seeds or nuts into the dough.
Popular options include sunflower seeds, pumpkin seeds, chia seeds, or even crushed walnuts.
These not only enhance the flavor but also contribute to the nutritional value of the bread.
Dried Fruits
If you enjoy a slightly sweeter bread, adding dried fruits like cranberries, raisins, or chopped dried apricots will add both sweetness and chewiness.
These are especially lovely in breakfast breads or as a snack.
Cheese
Cheese lovers can experiment by adding grated hard cheeses like Parmesan or a tangy goat cheese to the dough.
This creates a savory bread with pockets of melty cheese, perfect for sandwiches or served alongside a salad.
Sweet Variations
For a more dessert-like experience, try adding honey, cinnamon, or even chocolate chips.
You can also experiment with fruit purees, such as apple or pear, for a slightly sweet and aromatic flavor.
These variations pair wonderfully with butter or a spread of your choice.
Conclusion
Making gluten-free sourdough bread is an enjoyable and rewarding experience that allows you to create a delicious, homemade alternative to traditional bread.
By using the right ingredients, techniques, and a bit of patience, you can bake a loaf with that perfect balance of tangy flavor, chewy texture, and crispy crust.
Don’t be discouraged if it takes a few tries to perfect your loaf.
Gluten-free sourdough bread is an art that improves with practice, and each attempt brings you closer to mastering the craft.
So, roll up your sleeves, get your ingredients ready, and enjoy the process of making bread from scratch. Whether you keep it classic or explore creative variations, homemade gluten-free sourdough will soon become your go-to recipe.
Frequently Asked Questions (FAQ)
1. Can I use a store-bought gluten-free sourdough starter?
Yes, you can!
If you don’t want to wait several days to cultivate your own starter, many stores sell gluten-free sourdough starters.
Just make sure to feed it regularly with the appropriate gluten-free flour and water before using it in your bread recipe.
2. How do I know if my gluten-free sourdough starter is ready to use?
A healthy, ready-to-use starter will be bubbly, have a tangy smell, and double in size within 4-6 hours of feeding.
If your starter is active and shows these signs, it’s ready to incorporate into your dough.
3. Can I make gluten-free sourdough bread without a stand mixer?
Yes, it’s possible to make gluten-free sourdough bread without a stand mixer.
You can mix the dough by hand with a spoon or spatula, and use your hands to fold it. Just be prepared for a wetter dough, which is typical in gluten-free recipes.
4. Why is my gluten-free sourdough bread dense?
A dense loaf can be caused by several factors, such as not giving the dough enough time to rise, using too little yeast, or adding too much flour.
Be sure to allow for proper fermentation, use the right flour ratios, and make sure your dough is adequately hydrated.
5. Can I freeze gluten-free sourdough bread?
Absolutely!
Gluten-free sourdough bread freezes well.
Once it has fully cooled, slice it and wrap it in plastic wrap or aluminum foil, then place it in an airtight freezer bag.
This will keep your bread fresh for up to 3 months. You can toast slices directly from the freezer whenever you need them!

Gluten-Free Sourdough Bread
Equipment
- Stand Mixer or Hand Mixer (optional): 1
- Mixing bowls (2-3)
- Dutch oven or Baking cloche (1, optional)
- Proofing Basket (optional): 1
- Baking Sheet (1)
- Sharp knife or razor blade (for scoring)
- Wire cooling rack (1)
Ingredients
For the Sourdough Starter:
- 1 cup 120g gluten-free flour (rice flour, sorghum, or a gluten-free blend)
- 1 cup 240ml warm water (non-chlorinated)
For the Bread:
- 1 ½ cups 180g gluten-free flour (sorghum, rice flour, or a gluten-free blend)
- 1 ½ cups 180g gluten-free all-purpose flour (for structure)
- 1 tsp 5g salt
- 2 tbsp 30ml olive oil (or another oil of choice)
- 1 ½ cups 360ml water (room temperature)
- 1 tbsp 15g sugar (helps with fermentation)
- 2 tsp 6g active dry yeast (optional for extra rise)
- ½ tsp 1g xanthan gum (for texture)
- Gluten-free sourdough starter 1 cup, active and bubbly
Instructions
Make the Sourdough Starter:
- Mix 1 cup gluten-free flour with 1 cup warm water in a clean jar. Cover loosely and leave at room temperature for 24 hours. Feed it daily for 5-7 days, discarding half and adding ½ cup flour and ½ cup water daily until bubbly and sour-smelling.
Prepare the Dough:
- In a large bowl, mix the gluten-free flours, salt, xanthan gum, and sugar.
- Add the sourdough starter, olive oil, yeast (if using), and water to the dry ingredients. Mix well with a stand mixer or by hand using a wet spatula until a sticky dough forms.
- Let the dough rest for 30 minutes.
Proof the Dough:
- Cover the dough with a damp cloth or plastic wrap and let it rise in a warm place for 4-6 hours or until slightly puffed, though it may not double in size.
Shape the Loaf:
- Gently shape the dough into a round or oval loaf. Place it into a proofing basket or onto a baking sheet lined with parchment paper.
Bake the Bread:
- Preheat the oven to 450°F (230°C). If using a Dutch oven, preheat it as well.
- Score the top of the dough with a sharp knife and place it into the oven. Bake for 40-45 minutes or until the crust is golden and the bread sounds hollow when tapped on the bottom.
Cool:
- Remove the bread from the oven and cool on a wire rack for at least 1-2 hours before slicing.
Notes
- Starter Care: Ensure your sourdough starter is active and bubbly before using it in the recipe. If it’s not rising properly, it might need more time or a slightly warmer environment.
- Hydration Levels: Gluten-free dough tends to be wetter than traditional bread dough. Don’t worry if it’s sticky—this is normal!
- Freezing: To preserve the bread for longer, slice it and freeze individual slices. You can toast them straight from the freezer.
- Flour Choices: Experiment with different gluten-free flour blends. Rice flour and sorghum flour give the best texture, but you can mix them with oat flour or millet flour for added flavor.


So there is no fermintation in the fridge or overnight? The 4-6 hours is all there is?