All products are selected by our editorial team for quality. If you buy through our links, we may earn a small commission at no extra cost to you.
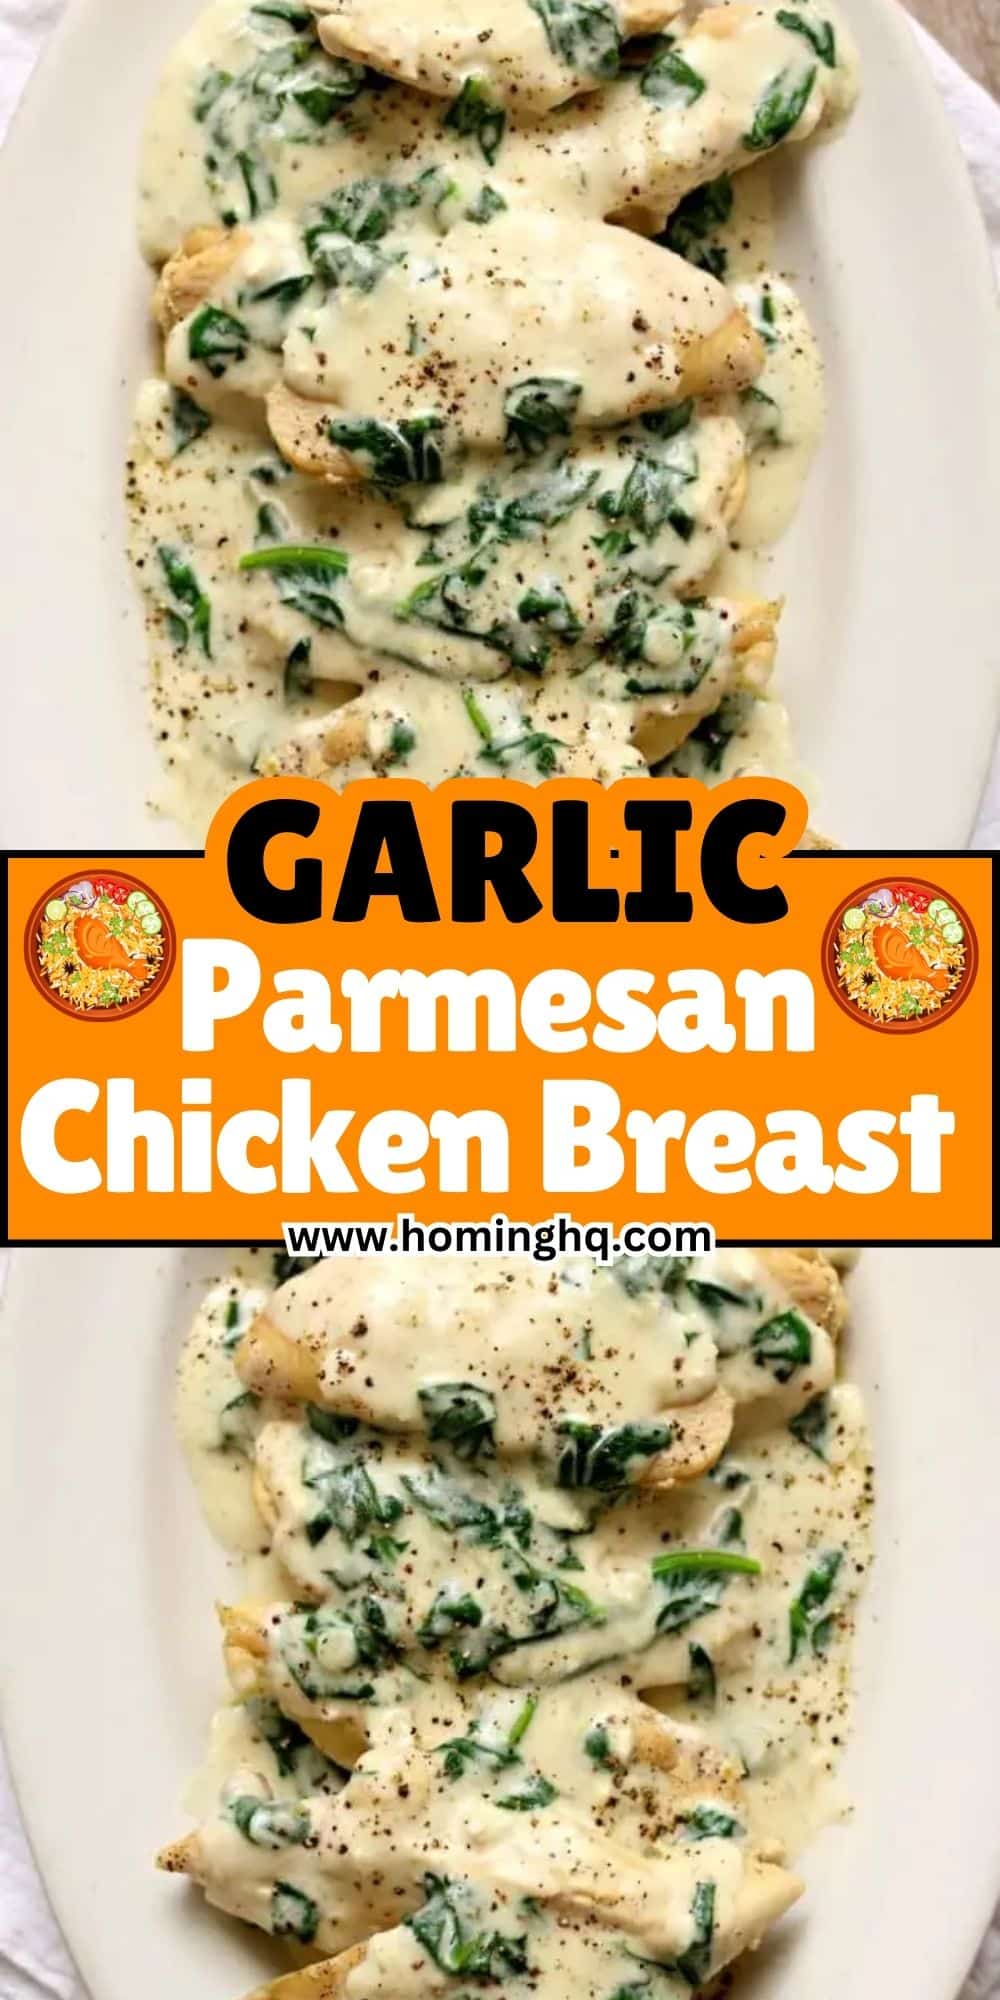
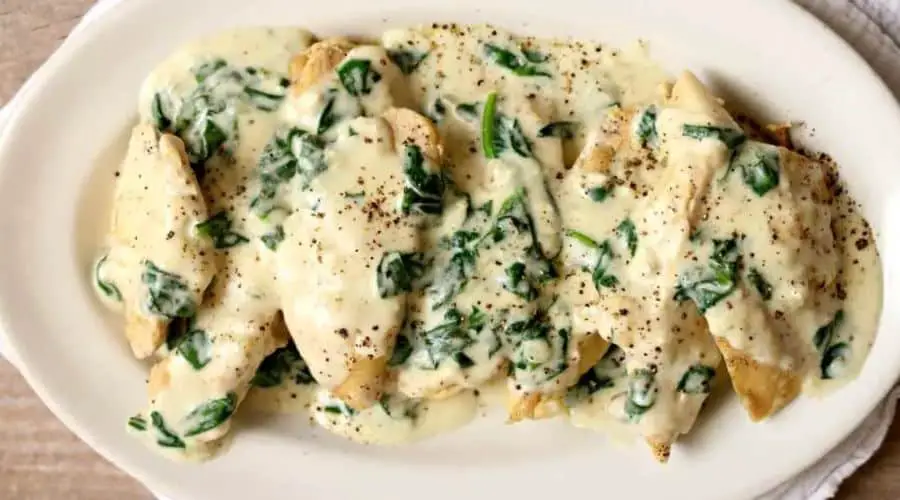
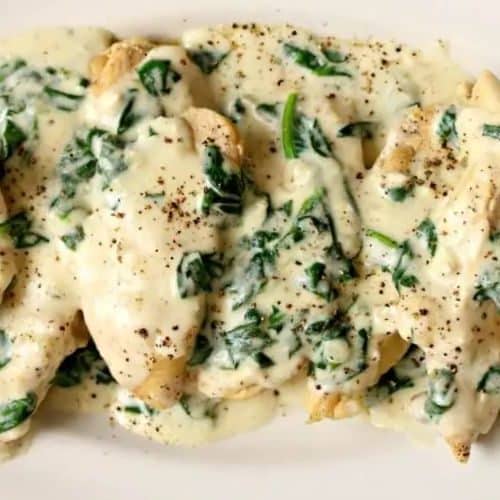
Garlic Parmesan Chicken Breast is a flavorful and easy-to-make dish that combines juicy, tender chicken with a crispy, cheesy coating.
The rich, garlicky aroma and the golden crust make it a comforting yet elegant meal, perfect for weeknight dinners or special occasions.
This recipe is a great choice for those who love bold flavors but don’t want to spend hours in the kitchen.
With a handful of pantry staples and minimal prep, you can create a restaurant-quality dish right at home.
Whether you bake, air fry, or pan-fry, the result is always a crispy, savory bite with a juicy interior.
Why You’ll Love This Recipe
This Garlic Parmesan Chicken Breast is not only delicious but also incredibly versatile.
Here’s why it deserves a spot in your recipe collection:
- Simple ingredients, big flavor – A combination of garlic, Parmesan, and breadcrumbs creates a rich, savory coating.
- Quick and easy – Ready in under 30 minutes, making it ideal for busy weeknights.
- Perfect texture – A crisp, golden crust on the outside with juicy, tender chicken inside.
- Kid-friendly and crowd-pleasing – A dish the whole family will enjoy.
- Customizable cooking methods – Bake, air fry, or pan-fry to suit your preference.
Ingredients You’ll Need
To make this delicious Garlic Parmesan Chicken Breast, you’ll need a few simple yet essential ingredients:
Main Ingredients:
- Chicken breasts – Boneless, skinless for easy prep. Pound them to an even thickness for uniform cooking.
- Garlic – Freshly minced for the best flavor. Garlic powder can be used as an alternative.
- Parmesan cheese – Freshly grated for a rich, nutty taste. Avoid pre-packaged grated cheese for better texture.
- Breadcrumbs – Panko for extra crunch or regular for a finer coating.
Binding and Flavor Enhancers:
- Butter or olive oil – Helps the coating stick and adds a rich taste.
- Eggs (optional) – Can be used for an extra crispy crust.
- Seasonings – Salt, black pepper, Italian seasoning, and optional red pepper flakes for a slight kick.
Step-by-Step Instructions
1. Prepare the Chicken
Start by pounding the chicken breasts to an even thickness using a meat mallet or rolling pin.
This step ensures even cooking and prevents dryness. Season both sides with salt, pepper, and Italian seasoning.
2. Make the Garlic Parmesan Coating
In a bowl, combine grated Parmesan cheese, breadcrumbs, and minced garlic.
Mix well to evenly distribute the flavors. If you want an extra crispy coating, you can add a bit of paprika or extra seasoning.
3. Coat the Chicken
- If using butter, melt it in a shallow dish. Alternatively, use olive oil for a lighter option.
- Dip each chicken breast into the butter or oil, ensuring it’s well coated.
- Press the chicken into the Parmesan breadcrumb mixture, coating both sides evenly. Gently press the mixture onto the surface so it adheres well.
4. Cook the Chicken
Oven Method:
Preheat the oven to 400°F (200°C). Place the coated chicken on a baking sheet lined with parchment paper or a greased wire rack.
Bake for 20-25 minutes, flipping halfway, until golden brown and the internal temperature reaches 165°F (75°C).
Air Fryer Method:
Preheat the air fryer to 375°F (190°C). Arrange the chicken in a single layer in the air fryer basket.
Cook for 12-15 minutes, flipping halfway through, until crispy and fully cooked.
Pan-Fry Method:
Heat a skillet over medium heat with a small amount of olive oil or butter.
Cook the chicken for about 5-7 minutes per side until golden brown and cooked through.
Avoid flipping too often to allow a nice crust to form.
5. Rest and Serve
Once cooked, let the chicken rest for a few minutes before slicing.
This allows the juices to redistribute, keeping the meat tender.
Garnish with fresh parsley and an extra sprinkle of Parmesan for a finishing touch.
Would you like to continue with the next sections, or make any modifications?
Tips for the Best Garlic Parmesan Chicken Breast
Achieving the perfect Garlic Parmesan Chicken Breast is all about technique and ingredient choices.
Follow these tips to ensure the best results every time.
Use Freshly Grated Parmesan
Pre-packaged grated Parmesan can be too dry and powdery, preventing a proper crust from forming.
Freshly grated cheese melts better and creates a richer flavor.
Pound the Chicken for Even Cooking
Flattening the chicken breasts to an even thickness ensures they cook uniformly.
This prevents thinner parts from drying out before the thicker sections are done.
Don’t Skip the Garlic
Fresh garlic adds depth to the dish, but if you prefer a milder taste, use garlic powder instead.
Just be sure to mix it evenly into the breadcrumb mixture.
Choose the Right Breadcrumbs
Panko breadcrumbs create a crispier crust, while regular breadcrumbs give a finer texture.
For a gluten-free option, use crushed pork rinds or almond flour.
Let the Chicken Rest Before Serving
After cooking, let the chicken sit for a few minutes before slicing.
This helps retain its juices, making each bite more flavorful and tender.
Adjust Cooking Time Based on Thickness
Thicker chicken breasts may need extra minutes in the oven or air fryer.
Always check for doneness with a meat thermometer—165°F (75°C) is the safe internal temperature.
Serving Suggestions
Garlic Parmesan Chicken Breast pairs well with a variety of sides, making it a versatile dish for any occasion.
Here are some delicious ways to serve it.
Classic Pairings
- Roasted Vegetables: Serve with asparagus, Brussels sprouts, or zucchini for a healthy, well-balanced meal.
- Mashed Potatoes: The creamy texture of mashed potatoes complements the crispy chicken coating.
- Rice or Quinoa: A light, fluffy grain adds a nice contrast to the crispy Parmesan crust.
Pasta Lovers’ Choice
- Garlic Butter Pasta: Toss some spaghetti or fettuccine in a simple garlic butter sauce for an effortless pairing.
- Creamy Alfredo: Serve the chicken over fettuccine Alfredo for a rich and indulgent meal.
- Tomato Basil Pasta: A fresh tomato-based pasta balances the richness of the chicken.
Lighter Options
- Fresh Green Salad: A crisp garden salad with a lemon vinaigrette adds freshness to the meal.
- Cauliflower Mash: A low-carb alternative to mashed potatoes that still provides creaminess.
Sandwich or Wrap Style
- Garlic Parmesan Chicken Sandwich: Serve in a toasted brioche bun with lettuce, tomato, and a garlic aioli.
- Lettuce Wraps: For a lighter option, wrap the chicken in large lettuce leaves with a drizzle of ranch or Caesar dressing.
Would you like any variations or additional suggestions?
Storage and Reheating Instructions
Refrigerate
Store any leftover Garlic Parmesan Chicken Breast in an airtight container. It will stay fresh in the fridge for up to 3 days.
To maintain the crispiness, it’s best to avoid covering the chicken until it has cooled completely.
Freeze
For longer storage, wrap the chicken tightly in plastic wrap and aluminum foil, then place it in a freezer-safe container or bag.
It can be frozen for up to 2 months.
Reheat
To reheat, follow these methods for the best results:
- Oven: Preheat your oven to 350°F (175°C) and place the chicken on a baking sheet. Heat for 10 minutes or until it’s warmed through.
- Air Fryer: Set the air fryer to 375°F (190°C) and cook for 5 minutes to restore crispiness.
- Skillet: Heat a little oil in a skillet over medium heat and cook the chicken for a few minutes on each side, just until heated through.
Note: Reheating in the microwave is not ideal as it can make the coating soggy, but if needed, do so in short bursts to avoid overcooking the chicken.
Final Thoughts
Garlic Parmesan Chicken Breast is a simple yet delicious dish that brings out bold flavors with minimal effort.
Whether baked, air-fried, or pan-fried, this recipe promises a satisfying meal every time.
Its versatility makes it perfect for a variety of sides, making it a go-to for weeknight dinners, family gatherings, or even meal prep.
By following the tips for best results, you’ll ensure that each bite is crispy, juicy, and full of savory goodness.
This dish will undoubtedly become a new favorite in your cooking rotation—one that’s easy to make and hard to forget.
So, give it a try, and don’t forget to share your thoughts and variations!
Frequently Asked Questions
1. Can I use chicken thighs instead of chicken breasts?
Yes! While the cooking time may vary, chicken thighs are a great substitute.
They’re naturally juicier and have a richer flavor, so they’re perfect for this recipe if you prefer dark meat.
2. Can I make this recipe gluten-free?
Absolutely! Simply substitute regular breadcrumbs with gluten-free panko or crushed gluten-free crackers.
Be sure to double-check your seasoning and Parmesan for any hidden gluten ingredients.
3. Can I prepare the chicken ahead of time?
Yes! You can prep the chicken by coating it in the breadcrumbs and garlic Parmesan mixture up to a day in advance.
Store it in the refrigerator, covered, and bake, air fry, or pan-fry it when ready to cook.
4. Can I use store-bought garlic butter for extra flavor?
You can definitely use garlic butter if you want to save time, but fresh minced garlic will provide a more pronounced flavor.
Store-bought versions may lack the intensity of fresh garlic.
5. How do I prevent the chicken from becoming dry?
To avoid dry chicken, make sure to pound it to an even thickness so it cooks evenly.
Also, using a meat thermometer will help you avoid overcooking. The chicken is done when it reaches an internal temperature of 165°F (75°C).
Letting the chicken rest for a few minutes before slicing also helps retain its juiciness.
Let me know if you’d like to dive deeper into any of these sections or need further adjustments!
Garlic Parmesan Chicken Breast
Equipment
- Meat Mallet – 1 unit (for flattening the chicken breasts)
- Shallow Dish – 2 units (for the butter and breadcrumb mixture)
- Baking Sheet – 1 unit (for baking the chicken)
- Oven or Air Fryer – 1 unit
- Meat Thermometer – 1 unit (optional but recommended for checking doneness)
- Shallow Bowl – 1 unit (for mixing Parmesan and breadcrumbs)
Ingredients
- 4 boneless skinless chicken breasts (about 1 ½ pounds or 680g)
- 2 cloves garlic minced
- 1 cup freshly grated Parmesan cheese about 100g
- 1 cup panko breadcrumbs about 60g
- 2 tablespoons butter melted (or olive oil)
- 1 teaspoon Italian seasoning
- ½ teaspoon salt
- ½ teaspoon black pepper
- Optional: 1 tablespoon chopped fresh parsley for garnish
Instructions
Prep the Chicken:
- Pound the chicken breasts to an even thickness using a meat mallet or rolling pin. Season both sides with salt, pepper, and Italian seasoning.
Prepare the Coating:
- In a shallow dish, mix grated Parmesan cheese, panko breadcrumbs, and minced garlic until well combined.
Coat the Chicken:
- In another shallow dish, melt the butter (or use olive oil). Dip each chicken breast into the butter, ensuring it’s fully coated, then press it into the Parmesan breadcrumb mixture. Make sure each side is well coated with the mixture.
Cook the Chicken:
- Oven Method: Preheat the oven to 400°F (200°C). Place the coated chicken on a baking sheet lined with parchment paper or a greased wire rack. Bake for 20-25 minutes, flipping halfway, until golden brown and the internal temperature reaches 165°F (75°C).
- Air Fryer Method: Preheat the air fryer to 375°F (190°C). Place the chicken breasts in a single layer in the basket. Air fry for 12-15 minutes, flipping halfway through.
- Pan-Fry Method: Heat a skillet over medium heat with a small amount of olive oil or butter. Cook the chicken for 5-7 minutes per side until golden and cooked through.
Rest and Serve:
- Allow the chicken to rest for a few minutes before slicing. Garnish with fresh parsley and an additional sprinkle of Parmesan. Serve immediately.
Notes
- Chicken Thickness: Be sure to pound the chicken breasts evenly for consistent cooking.
- Garlic Options: Fresh garlic gives the best flavor, but garlic powder can be used as a substitute if necessary.
- Make-Ahead: You can prepare the chicken breasts by coating them ahead of time and refrigerating them for up to a day before cooking.
- Gluten-Free Option: Use gluten-free breadcrumbs or crushed pork rinds for a gluten-free alternative.
- Storage: Store leftovers in an airtight container in the fridge for up to 3 days, or freeze for up to 2 months.
