All products are selected by our editorial team for quality. If you buy through our links, we may earn a small commission at no extra cost to you.
Baking bread from scratch is one of life’s simple pleasures, and there’s something truly special about the aroma of freshly baked bread filling your kitchen.
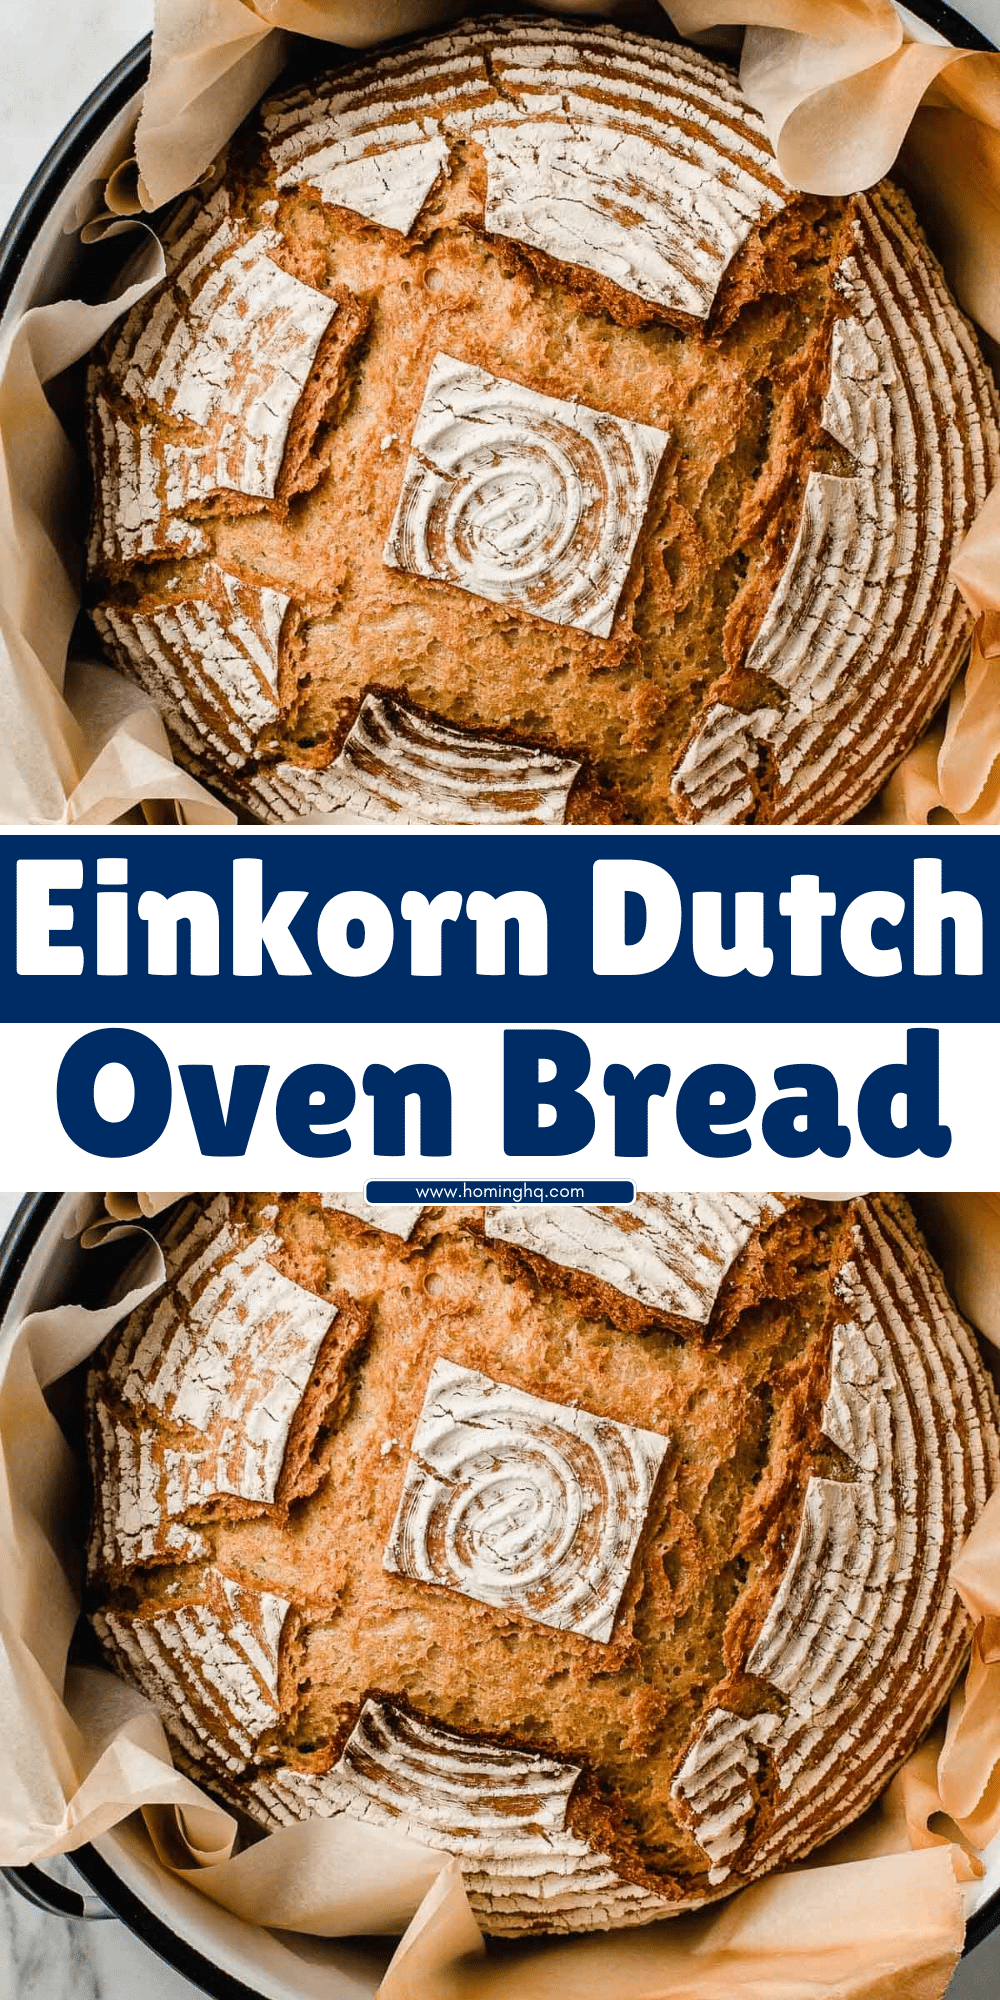
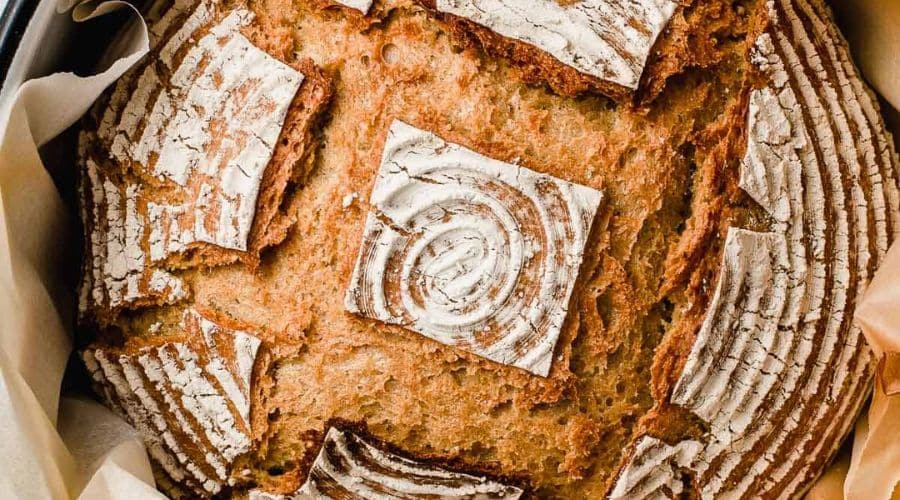
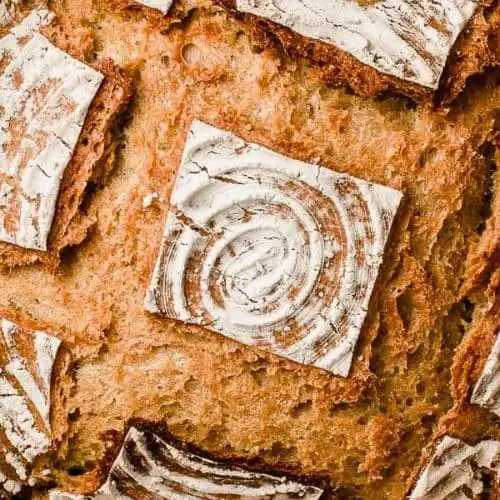
If you’re looking for a bread that’s as nutritious as it is delicious, then Einkorn Dutch Oven Bread is a perfect choice.
This ancient grain is making a comeback, and it’s a fantastic alternative to modern wheat, bringing unique flavor and texture to your baking.
This recipe will guide you through every step, from mixing the dough to baking it in a Dutch oven for that perfectly crusty, golden-brown exterior.
Whether you’re a seasoned baker or a newbie, you’ll love how simple and rewarding this bread is to make.
Why choose Einkorn for your bread?
Read on to discover the fascinating qualities of this ancient grain and why it’s worth trying out in your next loaf.
What is Einkorn Wheat?
Einkorn wheat is one of the world’s oldest cultivated grains, dating back over 10,000 years.
Known as the “original wheat,” Einkorn has remained largely unchanged throughout history.
Unlike modern wheat, which has been bred and modified over centuries, Einkorn retains a simpler, more robust genetic structure.
This gives it a distinct flavor profile and unique baking properties.
The History Behind Einkorn Wheat
Einkorn was a staple crop for ancient civilizations such as the Mesopotamians, Egyptians, and Romans.
For thousands of years, it was harvested, ground into flour, and used for baking bread and other traditional foods.
However, as agriculture evolved and newer varieties of wheat were introduced, Einkorn gradually faded from mainstream farming practices.
Thankfully, due to a resurgence in interest for ancient grains, Einkorn has found its way back into modern kitchens, prized for its health benefits and exceptional taste.
Why is Einkorn Different from Modern Wheat?
The main difference between Einkorn and modern wheat lies in their genetic makeup.
Einkorn has 14 chromosomes, while most modern wheat varieties have 42.
This simpler genetic structure means that Einkorn retains a higher concentration of nutrients and antioxidants, including essential fatty acids, B vitamins, and a variety of minerals like iron and zinc.
It’s also known for being easier to digest for some individuals, making it a great alternative for those with sensitivities to modern wheat.
Einkorn flour has a slightly sweet, nutty flavor that makes it stand out in baking.
Its unique texture and rich taste can take your bread recipes to a whole new level—perfectly suited for this Einkorn Dutch Oven Bread recipe!
Ingredients for Einkorn Dutch Oven Bread
To bake a perfect loaf of Einkorn Dutch Oven Bread, you don’t need many ingredients, but each one plays a crucial role in achieving the right texture and flavor.
Here’s what you’ll need:
Einkorn Flour
Einkorn flour is the star of this recipe, giving the bread its nutty, slightly sweet flavor and unique texture.
Unlike regular wheat flour, Einkorn flour is made from an ancient variety of wheat and is lower in gluten, which makes it slightly more delicate to work with but results in a tender, flavorful loaf.
Water
Water activates the yeast and hydrates the flour, allowing the dough to come together and rise.
Use lukewarm water (around 100°F / 37°C) to help the yeast bloom without killing it.
Active Dry Yeast
Yeast is essential for helping the dough rise and develop air pockets that give the bread its soft interior.
Make sure your yeast is fresh for the best rise.
Salt
Salt isn’t just for seasoning; it helps to control the yeast’s activity, adds flavor, and strengthens the dough’s structure.
Don’t skip this ingredient!
Optional: Olive Oil or Honey
For added richness and flavor, you can incorporate a tablespoon of olive oil or honey.
These ingredients are optional but can enhance the bread’s moisture and subtly sweet taste.
Tools You’ll Need
The right tools can make your bread-baking experience easier and more enjoyable.
Here are the key items you’ll need to get started:
Dutch Oven
A Dutch oven is a game-changer for baking bread.
Its heavy, thick walls create a mini oven inside, trapping steam and allowing the bread to bake evenly with a beautiful, golden crust.
The size of your Dutch oven matters—aim for a 4 to 5-quart size for this recipe.
Mixing Bowls
You’ll need at least one large mixing bowl to combine the ingredients and one smaller bowl for proofing the yeast.
Glass or stainless steel work best since they won’t retain smells or stains from the dough.
Kitchen Scale (Optional)
While not strictly necessary, a kitchen scale is highly recommended for accuracy, especially with Einkorn flour, which can vary in weight.
Weighing your flour helps achieve the right dough consistency.
Dough Scraper
A dough scraper is perfect for handling sticky dough, scraping the sides of your mixing bowl, and transferring the dough onto the countertop.
Proofing Basket or Bowl Lined with a Towel
For the second rise, you’ll need a proofing basket (banneton) or a bowl lined with a floured towel to hold the shaped dough.
This helps maintain the loaf’s shape and allows for a better rise.
Step-by-Step Instructions for Einkorn Dutch Oven Bread
Now that you have your ingredients and tools ready, let’s dive into the steps for making this delicious loaf of Einkorn Dutch Oven Bread.
Step 1: Mixing the Dough
Start by combining the dry ingredients. In a large mixing bowl, combine 3 ½ cups Einkorn flour, 1 ½ teaspoons salt, and 1 teaspoon active dry yeast. Stir them together until evenly distributed.
Next, add 1 ¼ cups lukewarm water to the bowl.
Mix everything until it forms a sticky dough.
Einkorn flour absorbs water differently than regular flour, so you may need to adjust the water slightly.
You’re aiming for a dough that’s hydrated but not too runny.
Step 2: Kneading the Dough
Once your dough is formed, it’s time to knead.
Although Einkorn dough is slightly stickier than regular dough, use a dough scraper to gently fold and turn the dough.
Knead it for about 8-10 minutes, or until it becomes smooth and elastic.
If the dough sticks too much, sprinkle your work surface with a little Einkorn flour.
Step 3: First Rise
Transfer the kneaded dough to a lightly oiled bowl and cover it with a damp cloth or plastic wrap. Place the bowl in a warm spot to rise for about 1 ½ to 2 hours, or until the dough has doubled in size. If you’re working in a cooler environment, allow for extra time.
Step 4: Shaping the Dough
Once the dough has risen, gently punch it down to release any air bubbles.
Turn the dough out onto a floured surface and shape it into a round loaf or boule.
Use your hands to gently fold the edges under to create a smooth, tight surface.
If you’re using a proofing basket, place the dough seam-side up in the basket.
Alternatively, you can place it in a bowl lined with a floured kitchen towel.
Step 5: Second Rise
Cover the dough again and allow it to rise for another 1 to 1 ½ hours. This second rise helps develop the bread’s structure.
You’ll know it’s ready when the dough has puffed up and holds its shape when gently touched.
Step 6: Baking the Bread in a Dutch Oven
While the dough is rising, preheat your oven to 475°F (245°C). Place your Dutch oven, with its lid, inside to heat up.
Once the dough has finished its second rise, carefully remove the preheated Dutch oven from the oven (be cautious—it’s hot!).
Gently flip your dough into the Dutch oven, placing it seam-side down.
If desired, you can score the top of the dough with a sharp knife or bread lame to help control the bread’s expansion during baking.
Cover the Dutch oven with its lid and bake for 30 minutes.
After 30 minutes, remove the lid and bake for an additional 15 to 20 minutes, or until the bread is golden brown and has a hollow sound when tapped on the bottom.
Step 7: Cooling and Slicing
Once your Einkorn Dutch Oven Bread is baked to perfection, remove it from the Dutch oven and transfer it to a wire rack to cool completely.
It’s tempting to slice into the bread right away, but let it cool for at least 30 minutes to allow the interior to set.
This will give you the best texture and flavor.
How to Store Einkorn Dutch Oven Bread
Once you’ve baked your Einkorn Dutch Oven Bread, the next step is to keep it fresh.
Proper storage ensures that you can enjoy your loaf for days without losing its delicious texture or flavor.
Room Temperature Storage
For short-term storage (about 2 to 3 days), store the bread in a cool, dry place.
The best way to keep it fresh is by placing it in a paper bag or a bread box. Avoid using plastic bags, as they can trap moisture, making the crust soft.
If you’re storing the bread in a cloth or towel, wrap it loosely so it can breathe, preserving the crispy crust. Make sure to place it on a flat surface, as upright storage can cause the bread to lose its shape.
Freezing for Long-Term Storage
If you want to keep your bread for longer than a few days, freezing is the best option.
Slice the bread before freezing so that you can pull out just what you need.
Wrap the loaf (or slices) tightly in plastic wrap, followed by aluminum foil, or place it in an airtight freezer bag.
To thaw, remove the bread from the freezer and let it come to room temperature.
You can also warm it in the oven for a few minutes to crisp the crust back up.
Final Thoughts and Tips
Baking Einkorn Dutch Oven Bread is a truly satisfying experience.
The combination of ancient Einkorn wheat and the slow baking process in a Dutch oven creates a bread with a rustic charm and unbeatable flavor.
Whether you’re new to baking or an experienced home baker, this recipe will allow you to make a loaf that’s both nutritious and delicious.
Pro Tips for Perfect Einkorn Bread
- Don’t rush the rise: Einkorn dough takes a bit longer to rise than dough made with modern wheat, so be patient and allow it to fully double in size.
- Hydration is key: Einkorn flour absorbs water differently than other flours, so don’t be afraid to adjust the liquid in the recipe to get the right dough consistency.
- Add-ins: Feel free to experiment with additional ingredients like seeds, nuts, or herbs to create your own unique twist on this loaf.
Happy baking, and enjoy the wonderful flavor and texture of your homemade Einkorn bread!
Frequently Asked Questions
1. Can I use all-purpose flour instead of Einkorn flour?
While you can substitute all-purpose flour for Einkorn flour, the bread’s flavor and texture will be different.
Einkorn has a unique, nutty flavor and a more delicate structure.
If you do choose to use all-purpose flour, you may need to adjust the hydration levels.
2. Why is my Einkorn bread dense?
Einkorn dough can sometimes be denser than other wheat breads due to its lower gluten content.
To avoid this, make sure to knead the dough thoroughly and give it plenty of time to rise.
You can also add a small amount of vital wheat gluten if you want a slightly lighter loaf.
3. Can I use a cast iron pot instead of a Dutch oven?
Yes! A cast iron pot with a lid works similarly to a Dutch oven, providing the heat and steam necessary for a good rise and crispy crust.
Just make sure it has a lid to trap moisture during the baking process.
4. Can I make this bread without yeast?
You could try making a sourdough version of Einkorn bread if you prefer to avoid commercial yeast.
You’ll need to create or use an active sourdough starter, and the rising times will vary, so be prepared for a longer process.
5. How do I know when my Einkorn bread is fully baked?
The best way to check if your bread is done is by tapping the bottom of the loaf. If it sounds hollow, it’s fully baked. You can also use a kitchen thermometer; the internal temperature of the bread should reach around 200°F (93°C) when it’s done.
Einkorn Dutch Oven Bread
Equipment
- Dutch Oven (4-5 quarts) – 1 unit
- Mixing Bowls – 2 (1 large, 1 small for yeast proofing)
- Kitchen Scale (optional) – 1 unit
- Dough Scraper – 1 unit
- Wire Rack (for cooling) – 1 unit
- Sharp Knife or Bread Lame (for scoring) – 1 unit
Ingredients
- 3 ½ cups 440g Einkorn flour
- 1 ½ teaspoons 7g Salt
- 1 teaspoon 3g Active dry yeast
- 1 ¼ cups 300ml Lukewarm water
- 1 tablespoon 15ml Olive oil (optional, for richness)
- 1 tablespoon 15g Honey (optional, for sweetness)
Instructions
Mix the Dough
- In a large mixing bowl, combine 3 ½ cups Einkorn flour, 1 ½ teaspoons salt, and 1 teaspoon active dry yeast. Stir to evenly distribute. Add 1 ¼ cups lukewarm water and mix until a sticky dough forms.If using, incorporate 1 tablespoon olive oil and 1 tablespoon honey.
Knead the Dough
- Transfer the dough to a floured surface and knead for 8-10 minutes. The dough will be slightly sticky, but try not to add too much extra flour.Use a dough scraper to assist if needed. The dough should become smooth and elastic.
First Rise
- Place the dough in a lightly oiled bowl and cover with a damp cloth. nLet it rise in a warm area for 1 ½ to 2 hours or until doubled in size.
Shape the Dough
- Once the dough has risen, punch it down gently to deflate. Turn it out onto a floured surface and shape it into a round boule or loaf. Place the shaped dough seam-side down into a floured proofing basket or bowl.
Second Rise
- Cover the dough and let it rise for 1 to 1 ½ hours until it has puffed up and holds its shape when touched.
Preheat the Oven
- Preheat your oven to 475°F (245°C). Place the Dutch oven with its lid inside to heat up while the dough rises.
Bake the Bread
- Once the dough has risen, carefully remove the hot Dutch oven from the oven. Gently flip the dough into the Dutch oven, seam-side up, and score the top with a sharp knife. Cover and bake for 30 minutes. After 30 minutes, remove the lid and bake for another 15-20 minutes, until the crust is golden brown and the loaf sounds hollow when tapped on the bottom.
Cool and Slice
- Let the bread cool on a wire rack for at least 30 minutes before slicing to ensure the interior has set.
Notes
- Hydration: Einkorn flour absorbs water differently than regular flour. If your dough feels too dry, add a little more water, one tablespoon at a time.
- Optional Add-ins: Feel free to add seeds (like sunflower or sesame), herbs, or nuts to the dough for extra flavor and texture.
- Storage: Store the bread in a paper bag or bread box at room temperature for up to 3 days. For longer storage, freeze the bread after slicing it, then reheat as needed.
- Sourdough Variation: If you prefer sourdough, you can use a sourdough starter in place of yeast. Just remember to adjust the rising times and proportions.

Comments are closed.