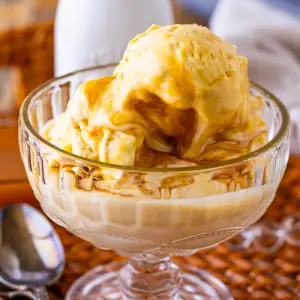
Indulge in creamy, dreamy butterscotch ice cream without the hassle of an ice cream maker!
This no-churn version blends rich butterscotch syrup with luscious whipped cream and sweetened condensed milk, creating a satisfyingly smooth texture.
Packed with protein from cream and milk, it’s a decadent yet simple treat perfect for quick desserts, weekend gatherings, or anytime you crave a homemade sweet fix.
Creamy Butterscotch Ice Cream
Equipment
- 1 large mixing bowl
- 1 stand mixer or electric hand mixer
- 9×5-inch loaf pan
- 1 butter knife or skewer
- Aluminum foil
Ingredients
- 2 cups heavy whipping cream
- 14 ounces sweetened condensed milk
- 12 ounces butterscotch syrup
- ½ teaspoon vanilla extract
- Pinch of salt
Instructions
- Chill Your Tools for Perfect Whipping: Before starting, place your large mixing bowl and the beaters of your electric hand mixer or stand mixer in the fridge for at least 10 minutes. Chilling the equipment helps the cream whip faster and creates a lighter, fluffier texture that’s essential for smooth ice cream.
- Whip the Cream to Soft Peaks: Pour the heavy whipping cream into your chilled bowl. Using a stand mixer or hand mixer, whip the cream on high speed until it forms soft peaks. You’ll know it’s ready when the cream has almost doubled in size and, when you lift the beaters, the cream holds a gentle peak that folds over. Be careful not to overwhip, or it will turn into butter!
- Incorporate Sweetened Condensed Milk: Add the sweetened condensed milk to the whipped cream. Using a spatula or mixer on low speed, fold the milk gently into the whipped cream until fully combined. This mixture is the foundation of your creamy ice cream and gives it sweetness and body without the need for an ice cream maker.
- Mix in Butterscotch Syrup, Vanilla, and Salt: Measure half of your butterscotch syrup and pour it into the whipped cream mixture. Add the vanilla extract and a pinch of salt to enhance flavor. Mix gently but thoroughly until the syrup is fully incorporated, ensuring a consistent, rich butterscotch flavor throughout the ice cream.
- Layer the Ice Cream Base: Take a 9×5 inch loaf pan and pour half of your ice cream mixture into it. Smooth the surface with a spatula to create an even base layer. This initial layer will provide a solid foundation for your decorative syrup swirl.
- Add the First Swirl of Butterscotch: Drizzle half of the remaining butterscotch syrup evenly over the top of the ice cream base. This will create pockets of extra flavor and visual appeal once frozen. Using the back of a spoon, gently swirl the syrup into the ice cream in figure-eight motions to achieve a marbled effect.
- Add the Second Layer of Ice Cream: Pour the remaining half of your ice cream mixture over the swirled syrup layer. Smooth it gently with a spatula so the surface is even and ready for the final decorative swirl.
- Finish with the Top Swirl: Drizzle the remaining butterscotch syrup over the top layer. Take a butter knife, skewer, or the back of a spoon to create figure-eight or zigzag patterns across the surface. This step not only adds visual appeal but ensures every scoop has a burst of rich butterscotch flavor.
- Cover and Freeze: Cover the loaf pan tightly with aluminum foil to prevent freezer burn. Place the pan on a flat surface in the freezer and freeze for at least 6 hours, preferably overnight, until the ice cream is completely firm. Keeping the pan level ensures an even freeze for smooth slicing and scooping.
- Serve and Enjoy: When ready to serve, remove the ice cream from the freezer. For easy scooping, dip your ice cream scoop or spoon in hot water, then scoop into bowls or cones. The ice cream should be creamy, smooth, and full of rich butterscotch flavor, perfect for a decadent homemade dessert.
- Optional Taste Test Before Freezing: If you’d like, you can taste a small spoonful before freezing. Adjust sweetness by adding a little extra syrup if desired. This ensures the flavor is just right before the ice cream sets.
Notes
- Chill Everything First: Always chill your mixing bowl and beaters before whipping the cream to ensure a light, fluffy texture.
- Soft Peaks Only: Whip the cream until soft peaks form; overwhipping can turn it into butter.
- Swirl Strategically: Use a skewer or the back of a spoon to create figure-eight or zigzag patterns with the syrup for a visually appealing marbled effect.
- Flat Freezing Matters: Keep your loaf pan on a level surface in the freezer to ensure even setting.
- Warm Scoop Tip: Dip your scoop or spoon in hot water before serving for smooth, perfect scoops.
Chef’s Secrets for Ultimate Creaminess
For a luxurious texture, focus on gentle folding when combining the whipped cream and sweetened condensed milk.
Overmixing can deflate the whipped cream, resulting in a denser ice cream.
Use high-quality butterscotch syrup for the best flavor, and consider lightly warming the syrup before swirling if it’s thick.
For a gourmet twist, add a few toasted nuts or a sprinkle of sea salt to enhance the buttery richness.
The key is patience—allowing the ice cream to freeze fully without rushing ensures each bite is creamy, smooth, and decadent.
Serving Suggestions for Maximum Enjoyment
This butterscotch ice cream shines on its own, but you can elevate it with a few creative pairings.
Serve in a waffle cone for a classic treat, or alongside warm apple pie or brownie squares for a comforting dessert plate.
A drizzle of extra butterscotch syrup, chocolate shavings, or crushed caramelized nuts on top adds flair and texture.
For portion-controlled indulgence, serve in small glass cups with a dollop of whipped cream and a sprinkle of sea salt to balance sweetness.
Storage Tips for Long-Lasting Quality
Store your ice cream in an airtight container to prevent freezer burn and maintain creaminess.
For best results, press a layer of parchment paper or plastic wrap directly onto the surface before sealing the lid.
Keep it flat in the freezer and avoid frequent temperature changes, which can create ice crystals.
Properly stored, the ice cream maintains peak flavor and texture for up to 2 weeks.
Always allow it to sit for a few minutes at room temperature before scooping to make serving easier.
Frequently Asked Questions
1. Can I make this recipe dairy-free?
Yes! Substitute coconut cream for heavy whipping cream and a plant-based condensed milk for a dairy-free version.
Note that texture and sweetness may vary slightly, but it will still be rich and creamy.
2. How can I prevent the ice cream from getting icy?
Ensure you whip the cream to soft peaks and fold gently with the condensed milk.
Keep the ice cream covered tightly and freeze on a flat surface to minimize ice crystal formation.
3. Can I add mix-ins like chocolate or nuts?
Absolutely! Fold in small chunks of chocolate, caramel pieces, or toasted nuts after combining the ice cream base but before layering and swirling the syrup. Be careful not to overmix.
4. How long can I store this ice cream?
For optimal taste and texture, enjoy within 2 weeks. Beyond that, the ice cream may develop ice crystals and slightly lose its creamy texture.
5. Can I prepare this ahead for a party?
Definitely! This no-churn ice cream is perfect for make-ahead desserts.
Prepare it a day or two in advance, freeze completely, and serve straight from the freezer. Just remember to dip your scoop in hot water for smooth servings.
