All products are selected by our editorial team for quality. If you buy through our links, we may earn a small commission at no extra cost to you.
Baking bread at home is a rewarding experience, especially when you achieve that perfect crust and soft, flavorful interior.
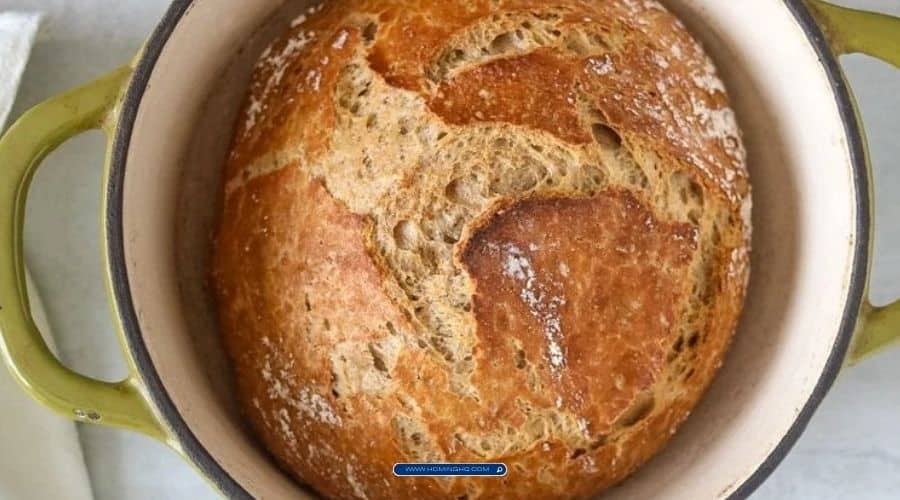
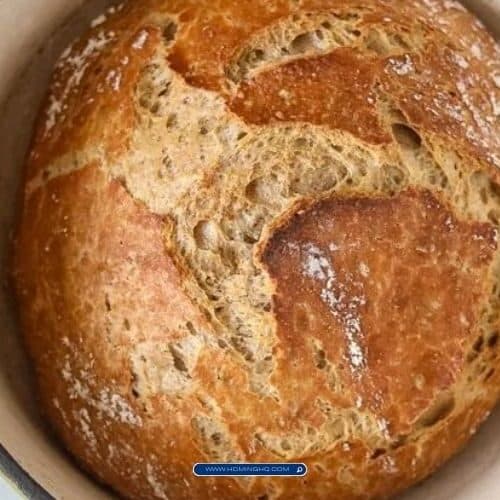
Whole Wheat Dutch Oven Bread takes it a step further by offering a healthier alternative to traditional white bread, with the added benefit of using whole wheat flour.
This type of bread boasts a rich, nutty flavor and a dense, satisfying texture, making it ideal for everything from sandwiches to toast.
What makes Dutch oven bread so special is the technique of baking it in a heavy pot with a lid, creating a steamy environment that helps the dough rise beautifully and develop a crisp, golden-brown crust.
The simplicity of the ingredients and the forgiving nature of the process make it perfect for both beginner and seasoned bakers alike.
Whether you’re a first-time bread maker or an experienced artisan, this recipe will guide you through the process of creating a loaf that’s both hearty and wholesome.

Ingredients: What You Need to Make Whole Wheat Dutch Oven Bread
To make your own Whole Wheat Dutch Oven Bread, you’ll need just a few simple ingredients.
Here’s a breakdown of what you’ll need to gather:
Whole Wheat Flour
The key ingredient in this recipe, whole wheat flour gives the bread its earthy flavor and denser texture.
Unlike refined white flour, whole wheat flour retains the bran and germ of the wheat kernel, making it a healthier option full of fiber, vitamins, and minerals.
It’s important to use a good-quality, fresh whole wheat flour for the best results.
Water
Water is essential for activating the yeast and hydrating the flour to form a dough.
The right water-to-flour ratio is crucial in achieving the perfect dough texture.
Too much water can make the dough too sticky, while too little will result in a dry loaf.
Yeast
Yeast is the magical ingredient that causes the dough to rise, creating the soft, airy structure of your bread.
You can use either active dry yeast or instant yeast, depending on what you have available.
Instant yeast is often more convenient, as it doesn’t need to be activated in water first, but both types will work just fine in this recipe.
Salt
Salt is not only a flavor enhancer but also plays a vital role in controlling the fermentation process.
It strengthens the dough, regulates yeast activity, and balances the natural sweetness of the wheat.
Don’t skip this ingredient—just a teaspoon of salt makes a significant difference in the final flavor.
Honey or Sugar (Optional)
While not essential, adding a small amount of honey or sugar can enhance the bread’s flavor by balancing the earthiness of the whole wheat.
It can also provide a slight sweetness that complements the bread’s hearty texture.
Honey adds a natural sweetness and a touch of moisture, but if you prefer, you can substitute it with regular sugar.
These basic ingredients come together to create a wholesome and delicious loaf of bread, perfect for any meal or snack.
Equipment: Tools for the Perfect Whole Wheat Dutch Oven Bread
The right equipment can make a world of difference when baking bread, ensuring that your Whole Wheat Dutch Oven Bread comes out perfectly every time.
Here’s a list of essential tools to help you along the way:
Dutch Oven
A Dutch oven is the most important tool for this bread.
Its heavy cast-iron construction ensures that the dough is exposed to even heat, helping it rise and bake evenly.
The pot’s lid traps steam, creating a moist environment that results in a crispy, golden crust. If you don’t already have one, a 4 to 6-quart Dutch oven is ideal for this recipe.
It’s also important to preheat your Dutch oven before placing the dough inside, which mimics the effects of a professional steam-injected oven.
Mixing Bowl
A large mixing bowl is essential for combining all your dry ingredients and incorporating the water.
You’ll use it to mix the dough before letting it rise.
A sturdy, wide bowl makes it easier to handle the dough, especially when you start kneading.
Bench Scraper or Dough Hook
A bench scraper is useful for handling sticky dough, especially when you’re working with whole wheat flour, which can be a little more challenging to work with than refined flour.
It allows you to easily lift and fold the dough without overworking it. If you have a stand mixer with a dough hook, this can also be used to knead the dough, making the process easier if you’re looking for a more hands-off approach.
Linen Cloth or Proofing Basket
Once your dough is mixed, it needs to rest and rise before baking.
You can use a linen cloth to cover the dough as it rises, or place it in a proofing basket, which helps to shape the dough and provides a nice textured finish.
A linen cloth works well to prevent the dough from drying out during the rise, while a proofing basket (also called a banneton) helps maintain the shape of the dough.
Instant Read Thermometer (Optional)
An instant-read thermometer is optional but incredibly helpful for ensuring that your bread is fully cooked.
Checking the internal temperature of the loaf can take the guesswork out of the process.
The ideal temperature for fully baked bread is around 200°F (93°C), ensuring that the crumb is set and the bread is thoroughly cooked through.
These tools are all you need to create a perfect loaf of Whole Wheat Dutch Oven Bread, making the process smoother and more enjoyable.
With just a few basic items, you can transform simple ingredients into a delicious homemade masterpiece.
You have not enough Humanizer words left. Upgrade your Surfer plan.
Step-by-Step Instructions: How to Make Whole Wheat Dutch Oven Bread
Making Whole Wheat Dutch Oven Bread may seem like a daunting task, but with these clear and easy-to-follow instructions, you’ll be able to create a beautiful loaf that rivals any bakery.
Here’s a step-by-step guide to help you through the process.
1. Mix the Dough: Combine Dry Ingredients and Add Liquids
Start by measuring out your dry ingredients: whole wheat flour, salt, and yeast. In a large mixing bowl, combine these ingredients. If you’re using honey or sugar, add it to the flour mixture as well.
Next, gradually add warm water to the dry ingredients.
The water should be about 100°F (37°C)—not too hot, as that can kill the yeast, but warm enough to activate it. Mix the ingredients together with a spoon or your hands until a rough dough forms.
2. Knead the Dough: Develop Gluten and Form a Smooth Dough
Once you have a shaggy dough, transfer it to a floured surface to begin kneading.
Knead the dough for about 8-10 minutes, using the heels of your hands to push the dough forward, fold it over, and turn it.
The dough will be a bit sticky at first, but resist the temptation to add too much flour—your goal is to develop the gluten structure, which will give the bread its texture.
Once the dough feels smooth and elastic, it’s ready for its first rise.
3. First Rise: Let the Dough Rest and Expand
Form the dough into a ball and place it in a lightly oiled bowl, turning it once so the entire surface is coated.
Cover the bowl with a damp linen cloth or plastic wrap and let it rise in a warm place for 1-2 hours, or until it has doubled in size.
If you’re not in a hurry, you can also let the dough rise slowly in the refrigerator overnight.
This slower rise can develop a deeper flavor, but make sure to bring it back to room temperature before shaping it.
4. Shape the Dough: Prepare for the Second Rise
Once the dough has risen, punch it down gently to release the air bubbles.
Transfer it onto a lightly floured surface and shape it into a round boule (ball) or any shape that fits your Dutch oven.
Carefully place the shaped dough into a proofing basket or onto a piece of parchment paper. Let it rest for about 30 minutes to an hour for the second rise. Cover it with a cloth to prevent it from drying out.
5. Preheat the Dutch Oven: Creating the Perfect Baking Environment
While the dough undergoes its second rise, preheat your Dutch oven. Place the Dutch oven, with the lid on, into the oven and heat it to 450°F (230°C).
Preheating the Dutch oven is crucial for creating a crisp, golden crust. It ensures that the bread will immediately start to rise when placed inside.
6. Bake the Bread: The Final Step
Once the dough has finished proofing, carefully remove the preheated Dutch oven from the oven (it will be very hot, so use oven mitts).
If you’re using parchment paper, gently lift the dough and place it into the hot Dutch oven.
If you’re not using parchment paper, simply lower the dough into the pot.
Cover the Dutch oven with the lid and bake for 25-30 minutes. This will trap steam, helping the bread rise and form that perfect crust.
After the initial baking time, remove the lid and bake for an additional 15-20 minutes, or until the crust is golden brown and the internal temperature reaches 200°F (93°C). If you don’t have a thermometer, you can tap the bottom of the loaf; it should sound hollow when done.
7. Cool and Serve
Once your bread is baked to perfection, remove it from the Dutch oven and let it cool on a wire rack for at least 30 minutes.
This allows the crumb to set, making it easier to slice.
Enjoy your fresh, homemade Whole Wheat Dutch Oven Bread as a sandwich base, alongside a bowl of soup, or simply with a pat of butter.
Tips for Perfecting Your Whole Wheat Dutch Oven Bread
- Hydration: Whole wheat flour absorbs more water than white flour, so don’t be afraid to add a little extra water to get the dough to the right consistency. It should be soft and slightly sticky but still manageable.
- Resting Time: If you have the time, let the dough rise longer. A slow rise will help develop more flavor. You can even refrigerate the dough overnight for a deeper taste.
- Steam: If you don’t have a Dutch oven, you can mimic the steam effect by placing a pan of hot water at the bottom of your oven or spraying the dough with water before baking. The steam helps create a crispy, golden crust.
- Flour Substitutions: If you don’t have enough whole wheat flour, you can substitute part of it with bread flour for a lighter texture while still maintaining the health benefits of whole wheat.
- Shaping: Be gentle when shaping the dough to preserve the air pockets formed during the rise. Overworking the dough can result in a dense loaf.
Frequently Asked Questions
1. Can I use all-purpose flour instead of whole wheat flour?
Yes, you can substitute all-purpose flour for whole wheat flour if you prefer a lighter loaf. However, the bread will have a softer texture and different flavor profile.
2. How can I make this bread vegan?
This recipe is almost vegan as is, but to ensure it’s completely vegan, use a non-honey sweetener like maple syrup or agave instead of honey.
3. What if my dough doesn’t rise?
If your dough doesn’t rise, it may be due to expired yeast or water that’s too hot or too cold.
Make sure your yeast is fresh and your water is warm (but not hot). You can try moving the dough to a warmer spot or give it more time to rise.
4. Can I freeze this bread?
Yes, you can freeze the dough after the first rise.
Shape the dough, place it in a greased pan, and cover it well before freezing.
When you’re ready to bake, thaw it in the refrigerator overnight and allow it to complete the second rise before baking.
5. How can I store my bread to keep it fresh?
Store the bread in an airtight container or bread box at room temperature for up to 3 days.
For longer storage, slice the bread and freeze individual slices.
Simply toast them as needed.
Conclusion
Making Whole Wheat Dutch Oven Bread at home is not only incredibly satisfying, but it’s also a healthier, more flavorful option than store-bought bread.
The process, while simple, results in a hearty, aromatic loaf with a crisp, golden crust and a soft, chewy interior.
Whether you’re new to baking or a seasoned pro, this recipe allows you to experience the joy of homemade bread with minimal effort and maximum flavor.
With a few basic ingredients and tools, you can enjoy the satisfaction of baking a delicious loaf of bread from scratch.
Try out different variations, and don’t be afraid to experiment with flavors and textures.
Before you know it, this will become your go-to recipe for fresh, wholesome bread at home. Happy baking!
Whole Wheat Dutch Oven Bread
Equipment
- 1 Dutch Oven (4-6 quart)
- 1 Mixing Bowl (Large)
- 1 Bench Scraper or Dough Hook (optional)
- 1 Proofing Basket or Linen Cloth
- 1 Instant-Read Thermometer (optional)
- 1 measuring cup
- 1 Measuring Spoon
Ingredients
- 3 1/2 cups 420g Whole Wheat Flour
- 1 1/2 teaspoons Salt
- 1 teaspoon Active Dry Yeast
- 1 1/2 cups 360ml Warm Water (around 100°F / 37°C)
- 1 tablespoon Honey optional
- 1 tablespoon Olive Oil optional, for greasing
Instructions
- Mix the Dough: In a large mixing bowl, combine the whole wheat flour, salt, and yeast. If you’re using honey, add it to the warm water and stir until dissolved. Gradually pour the water into the dry ingredients and stir until a rough dough forms.
- Knead the Dough: Transfer the dough to a lightly floured surface and knead for about 8-10 minutes, or until it becomes smooth and elastic. You can use a bench scraper to help fold and shape the dough if it’s too sticky.
- First Rise: Lightly grease the bowl with olive oil, and place the dough inside, turning it to coat with the oil. ]Cover with a damp cloth or plastic wrap. Let the dough rise for 1-2 hours or until it has doubled in size.
- Shape the Dough: Punch the dough down to release the air. Shape it into a round loaf (boule) and place it on parchment paper or into a proofing basket. Cover it again and let it rest for 30-60 minutes for the second rise.
- Preheat the Dutch Oven: While the dough is rising, preheat your oven to 450°F (230°C) with the Dutch oven inside to get it hot. Preheating the Dutch oven helps achieve the desired crisp crust.
- Bake the Bread: Carefully remove the preheated Dutch oven from the oven. Using parchment paper, lift the dough and place it into the hot Dutch oven. Cover with the lid and bake for 25-30 minutes. Remove the lid and continue baking for another 15-20 minutes, or until the bread is golden brown and the internal temperature reaches 200°F (93°C).
- Cool: Remove the bread from the Dutch oven and let it cool on a wire rack for at least 30 minutes before slicing.
Notes
Recipe Notes
- Storage: Store leftover bread in an airtight container or bread box at room temperature for up to 3 days. For longer storage, freeze the loaf and toast slices as needed.
- Yeast: If you prefer using instant yeast, simply mix it directly with the dry ingredients without proofing in water.
- Flour Substitutions: You can substitute up to half of the whole wheat flour with bread flour for a lighter texture, though it will no longer be 100% whole wheat.
- Optional Add-ins: Add seeds, nuts, or herbs like sunflower seeds, flaxseeds, or rosemary to give the bread extra flavor and texture.
