All products are selected by our editorial team for quality. If you buy through our links, we may earn a small commission at no extra cost to you.
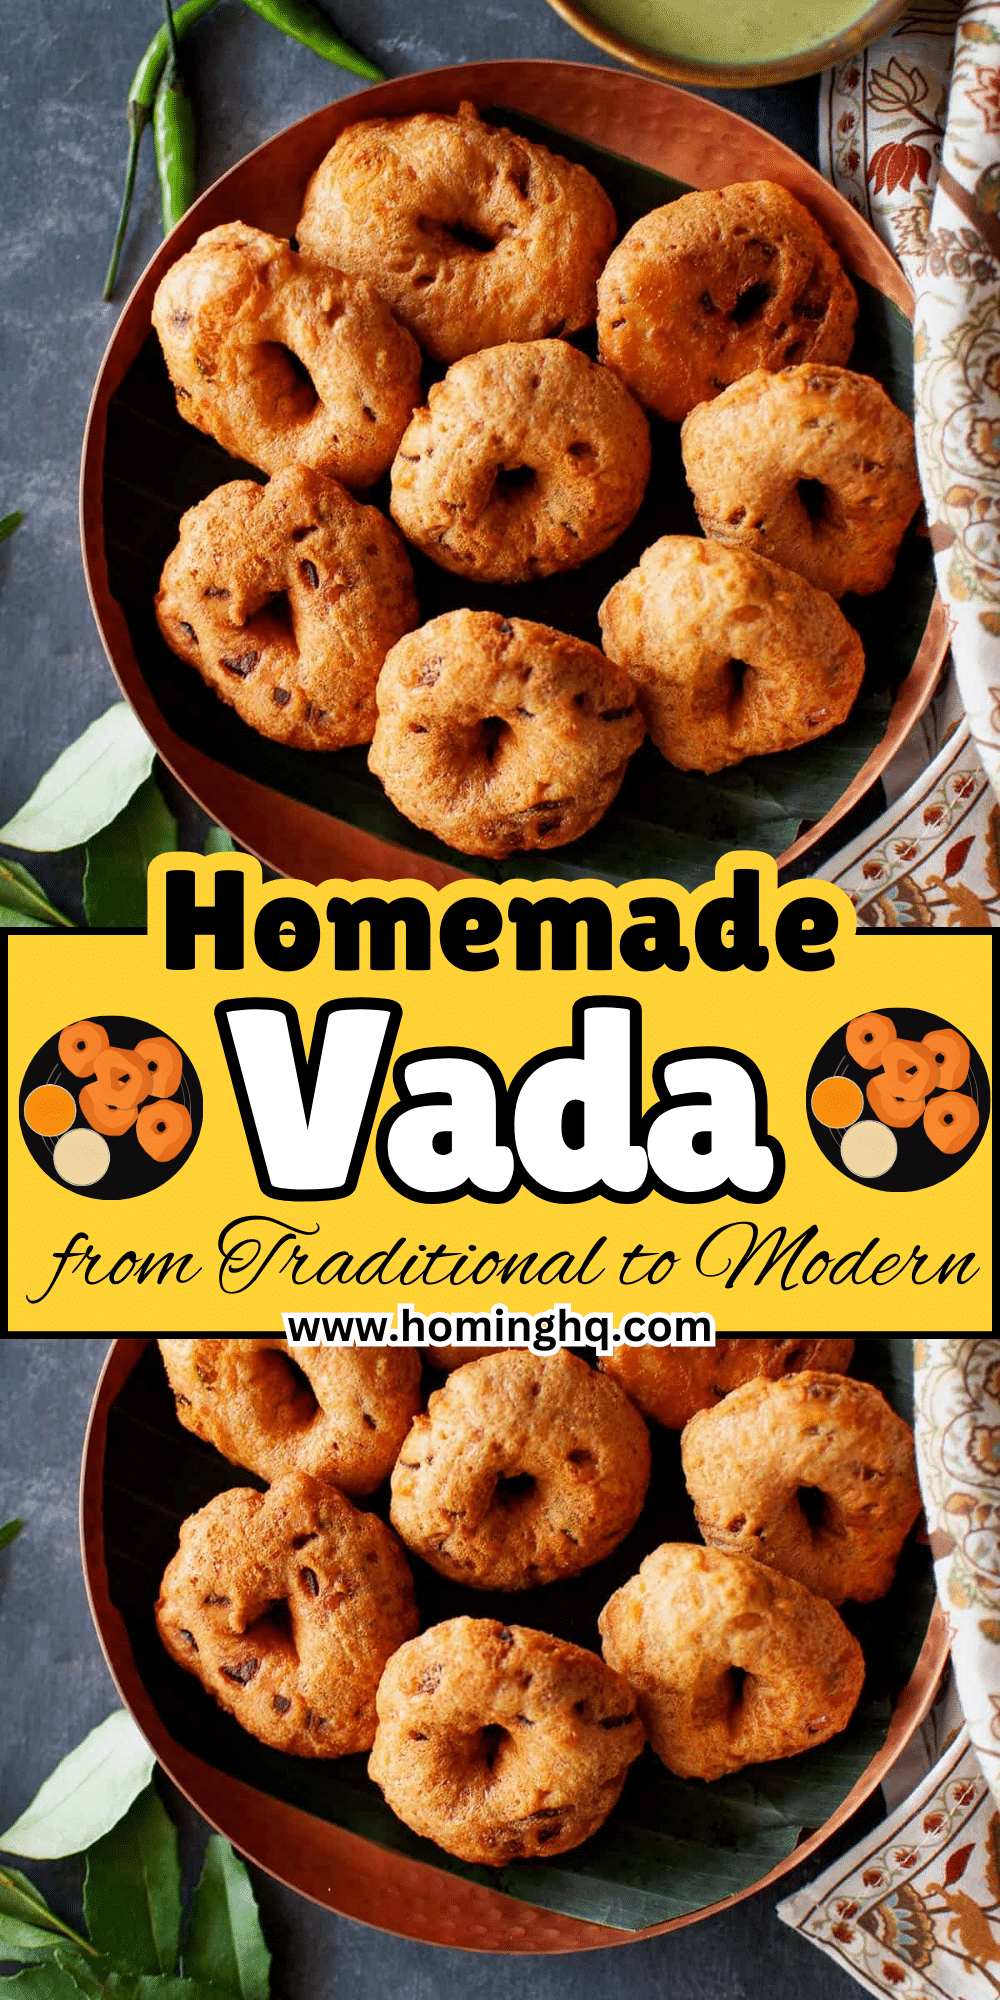
Vada is a popular deep-fried snack that holds a special place in South Indian cuisine.
These crispy, golden fritters are made using lentils, spices, and herbs, offering a delightful crunch on the outside with a soft, fluffy interior.
Vada is often served with coconut chutney and sambar, making it a staple breakfast or tea-time snack.
Beyond South India, different regions of India have their unique variations of Vada, each with distinct flavors and ingredients.
Whether it’s the classic Medu Vada, the spicy Masala Vada, or the beloved Batata Vada from Maharashtra, this dish has captivated food lovers across the country.
In this blog, we will explore the different types of Vada, focus on the authentic Medu Vada recipe, and provide useful tips to achieve restaurant-style perfection at home.
Types of Vada
Vada comes in many varieties, each differing in texture, ingredients, and preparation methods.
Here are some of the most popular types:
1. Medu Vada – The Classic South Indian Lentil Doughnut
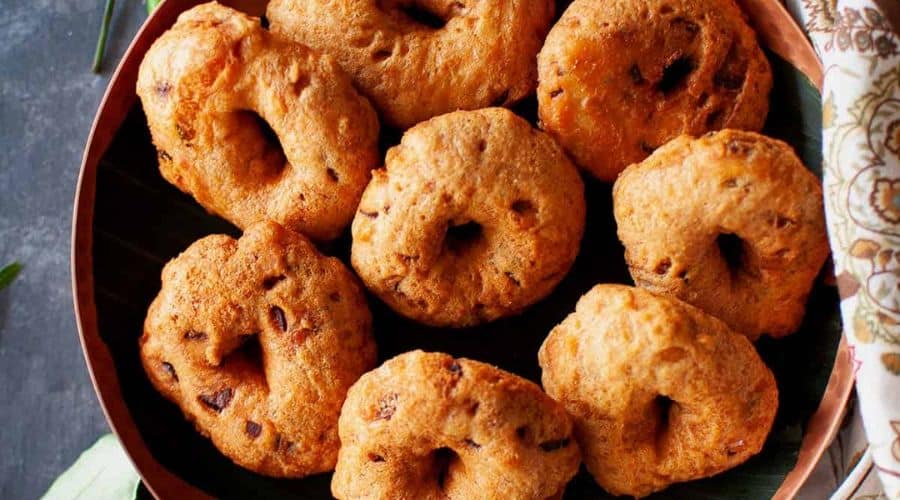
Medu Vada is the most iconic version of Vada, made using urad dal (black gram). It is known for its light, fluffy texture and distinctive doughnut shape.
Medu Vada is often served with coconut chutney and sambar, making it a beloved dish for breakfast or festive occasions.
2. Masala Vada – The Crispy and Spicy Chana Dal Fritter
Unlike Medu Vada, Masala Vada is made using chana dal (Bengal gram), which gives it a coarser and crunchier texture.
It is flavored with onions, green chilies, curry leaves, and spices, making it a perfect snack for tea time.
3. Batata Vada – The Iconic Maharashtrian Potato Snack
Batata Vada consists of a spicy mashed potato filling, coated in a chickpea flour batter, and deep-fried to golden perfection.
It is the key component of Mumbai’s famous street food, Vada Pav.
4. Sabudana Vada – The Fasting-Friendly Tapioca Pearl Fritter
Sabudana Vada is a popular snack during Hindu fasting periods.
Made from tapioca pearls, mashed potatoes, and roasted peanuts, this crispy and light Vada is typically enjoyed with yogurt or a tangy green chutney.
5. Dahi Vada – Soft Lentil Fritters Soaked in Yogurt
Dahi Vada is a flavorful variation where deep-fried urad dal Vadas are soaked in spiced yogurt and garnished with tamarind chutney, roasted cumin, and fresh coriander.
This dish is often served as a chilled appetizer during festivals and special occasions.
Each of these Vada varieties brings a unique taste and texture, making them an irresistible part of Indian cuisine.
Ingredients Required for Medu Vada
To make authentic Medu Vada at home, you need a few essential ingredients that ensure the right texture and taste.
Main Ingredients:
- Urad Dal (Black Gram Lentils) – 1 cup (Soaked for at least 4 hours)
- Rice Flour – 1 tbsp (For extra crispiness)
- Green Chilies – 2 (Finely chopped) (Adds heat and flavor)
- Ginger – 1 inch (Grated or finely chopped) (Enhances aroma and taste)
- Curry Leaves – 8-10 (Finely chopped) (A must for authentic flavor)
- Black Peppercorns – 1/2 tsp (Crushed slightly) (For a subtle spice kick)
- Cumin Seeds – 1/2 tsp (Adds earthy flavor)
- Salt – As per taste
- Water – As needed (For grinding, should be minimal to keep batter thick)
- Oil – For deep frying
Optional Ingredients:
- Chopped Onions – 1/4 cup (For a slightly different texture and taste)
- Grated Coconut – 1 tbsp (For a hint of sweetness)
- Asafoetida (Hing) – A pinch (Aids digestion and enhances flavor)
The secret to perfect Medu Vada lies in using the right amount of water while grinding, ensuring a fluffy yet firm batter.
Next, let’s move on to the step-by-step preparation process to make crispy, golden Medu Vadas at home.
Step-by-Step Instructions for Making Medu Vada
Making Medu Vada at home requires patience and technique to get the perfect crispiness on the outside and a soft, airy texture inside.
Follow these steps carefully for a foolproof recipe.
Step 1: Soaking and Grinding the Dal
- Wash 1 cup of urad dal (black gram) thoroughly and soak it in water for at least 4 to 6 hours or overnight. This helps in softening the dal for smooth grinding.
- Drain the water completely and transfer the soaked dal to a grinder or blender.
- Add very little water (1-2 tablespoons at a time) and grind to a smooth, thick batter. The consistency should be similar to whipped cream, light and fluffy but not runny.
- Once ground, transfer the batter to a mixing bowl.
Step 2: Preparing the Batter
- Add finely chopped green chilies, ginger, curry leaves, crushed black peppercorns, cumin seeds, and salt to the batter. Mix well.
- To make the batter extra fluffy, use your hand or a whisk to aerate it by stirring in circular motions for 2 to 3 minutes.
- If using, mix in chopped onions or grated coconut for additional texture and taste.
- To check if the batter is ready, drop a small portion in a bowl of water. If it floats, it has the right consistency.
Step 3: Shaping the Vada
- Keep a bowl of water nearby to wet your hands before shaping the Vadas.
- Take a small portion of batter in your wet palm, shape it into a ball, and gently press it to flatten slightly.
- Using your thumb, create a hole in the center to get the classic doughnut shape.
- Alternatively, you can shape the Vadas on a banana leaf or greased plastic sheet for better control.
Step 4: Deep Frying to Golden Perfection
- Heat oil in a deep pan or kadai over medium heat. The oil should be hot but not smoking.
- Drop a small portion of batter into the oil. If it sizzles and rises to the top immediately, the oil is ready.
- Carefully slide the shaped Vadas into the hot oil. Do not overcrowd the pan.
- Fry on medium heat until golden brown and crisp, flipping occasionally for even cooking.
- Once done, remove the Vadas and place them on paper towels to absorb excess oil.
Step 5: Draining Excess Oil and Serving
- Allow the fried Medu Vadas to rest for 1-2 minutes before serving.
- Serve hot with coconut chutney, mint chutney, and steaming hot sambar for an authentic South Indian experience.
Tips and Tricks for Perfect Medu Vada
Achieving restaurant-style Medu Vada at home can be tricky, but these expert tips will help you master the recipe.
1. Achieve the Right Batter Consistency
- Use minimal water while grinding the dal. A thick batter ensures the Vadas hold their shape and remain crispy.
- Always check the batter by dropping a small portion in water—if it floats, it’s well-aerated and ready.
2. Use Your Hands for Mixing
- Mixing the batter using your hands instead of a spoon incorporates natural warmth, which helps in fermentation and fluffiness.
3. Maintain the Perfect Oil Temperature
- If the oil is too hot, the Vadas will brown too quickly but remain raw inside.
- If the oil is too cold, the Vadas will absorb excess oil and turn greasy. Maintain a medium-high heat for best results.
4. Shape the Vadas Easily
- Wet your hands with water before shaping the Vadas to prevent sticking.
- Beginners can shape the Vadas on a banana leaf or greased plastic sheet before transferring them to the oil.
5. Add a Crispy Touch
- Mixing 1 tablespoon of rice flour into the batter gives the Vadas an extra crunchy texture.
6. Avoid Dense or Hard Vadas
- If the Vadas turn out hard, the batter may be too thick or not aerated properly. Whisk the batter well before frying.
- If they turn out too dense, add a pinch of baking soda for extra fluffiness.
Serving Suggestions and Accompaniments
Medu Vada is a versatile dish that pairs beautifully with traditional South Indian accompaniments.
Here’s how to serve it the authentic way.
1. Coconut Chutney – The Classic Pairing
A fresh and mildly spiced coconut chutney is the best companion for Medu Vada. It is made using grated coconut, green chilies, roasted chana dal, and tempered with mustard seeds and curry leaves.
2. Sambar – A Hearty Side Dish
Medu Vada is often served dunked in piping hot sambar, a lentil-based vegetable stew flavored with tamarind and spices. This makes for a wholesome and satisfying meal.
3. Mint or Coriander Chutney – A Refreshing Twist
For a vibrant and tangy flavor, serve Medu Vada with mint-coriander chutney, which adds a refreshing contrast to the crispy Vadas.
4. Dahi Vada – A Flavorful Alternative
If you want a North Indian twist, soak the Medu Vadas in spiced yogurt and drizzle with tamarind chutney, roasted cumin powder, and coriander leaves for a delicious Dahi Vada.
5. Enjoying Medu Vada as a Snack
- Pair it with masala chai or filter coffee for a comforting evening snack.
- Serve it alongside idli and dosa for a complete South Indian breakfast platter.
With these serving ideas, Medu Vada transforms into a flavorful and fulfilling dish, whether enjoyed as a standalone snack or part of a larger meal.
Storing and Reheating Vada
Medu Vada tastes best when served fresh, but if you have leftovers, proper storage and reheating techniques will help maintain their texture and flavor.
1. Storing Medu Vada
- At Room Temperature: If consuming within a few hours, store the Vadas in an airtight container to prevent them from becoming soggy.
- Refrigeration: Place the cooled Vadas in a zip-lock bag or airtight container and store them in the refrigerator for up to 2 days.
- Freezing: For long-term storage, freeze Vadas in a single layer on a tray. Once frozen, transfer them to an airtight freezer bag. They can be stored for up to a month.
2. Reheating Medu Vada
- Oven/Toaster Oven: Preheat to 350°F (175°C) and bake for 8-10 minutes. This helps restore crispiness.
- Air Fryer: Reheat at 180°C (356°F) for 5-6 minutes for a crispy texture without excess oil.
- Stovetop: Reheat in a pan over low heat for a few minutes, flipping occasionally.
- Microwave (Not Recommended for Crispiness): If using a microwave, place a damp paper towel over the Vadas and heat for 30-40 seconds to retain moisture.
Variations and Fusion Recipes
If you love experimenting with flavors, here are some creative takes on traditional Medu Vada.
1. Stuffed Medu Vada
- Add a spiced paneer or potato filling inside the Vada before frying for a surprise burst of flavor.
2. Baked or Air-Fried Medu Vada
- For a healthier version, bake at 375°F (190°C) for 20-25 minutes or air-fry at 180°C (356°F) for 10-12 minutes until crispy.
3. Cheese Medu Vada
- Add grated cheese to the batter or stuff the center with mozzarella for a gooey twist.
4. Vada Pav – Mumbai Street Food Style
- Instead of Batata Vada, use Medu Vada in a pav (bread roll) with spicy chutneys and fried green chilies.
5. Indo-Mexican Vada Tacos
- Serve mini Medu Vadas in soft tortillas with salsa, guacamole, and sour cream for a fusion delight.
Final Thoughts
Medu Vada is more than just a snack—it’s a beloved dish that brings comfort and nostalgia to many.
Whether enjoyed with coconut chutney, dunked in sambar, or transformed into a fusion recipe, its crispy exterior and soft interior make it a true crowd-pleaser.
With the right technique and a few expert tips, you can now recreate authentic, restaurant-style Medu Vada in your own kitchen.
Try it out, experiment with variations, and share your experiences in the comments below!
Frequently Asked Questions (FAQ)
1. Why is my Medu Vada batter too runny?
- If the batter is too runny, it means too much water was added while grinding. To fix this, mix in a tablespoon of rice flour or semolina to thicken it.
2. How do I get the perfect doughnut shape for Medu Vada?
- Wet your hands before shaping, or use a greased plastic sheet or banana leaf for easier handling. You can also use a piping bag to shape them directly over the oil.
3. Can I make Medu Vada without soaking overnight?
- Soaking for at least 4-6 hours is essential for a soft and fluffy texture. If short on time, soak in warm water for 2-3 hours, but the results may vary.
4. Why does my Medu Vada absorb too much oil?
- If the batter is too thin, it absorbs more oil. Also, ensure the oil is at the right temperature—not too low—before frying.
5. Can I make Medu Vada without deep frying?
- Yes! You can bake or air-fry Medu Vada at 180-190°C (356-375°F) for a healthier alternative, though the texture may be slightly different.
Now that you’re equipped with all the knowledge, it’s time to try making Medu Vada at home. Happy cooking!
Vada
Equipment
- Mixing Bowl – 1 large (for soaking dal and mixing batter)
- Grinder or Blender – 1 (for grinding urad dal)
- Kadai (Deep Frying Pan) – 1 (for frying)
- Slotted Spoon – 1 (for removing Vadas from oil)
- Paper Towels – 2-3 (for draining excess oil)
- Measuring cups and spoons – 1 set (for accurate ingredient measurements)
Ingredients
- Urad Dal Black Gram – 1 cup
- Rice Flour – 1 tablespoon
- Green Chilies – 2 finely chopped
- Ginger – 1-inch piece grated or finely chopped
- Curry Leaves – 8-10 finely chopped
- Black Peppercorns – 1/2 teaspoon crushed
- Cumin Seeds – 1/2 teaspoon
- Salt – To taste
- Water – As needed for grinding the dal
- Oil – For deep frying about 3 cups
Optional Ingredients
- Chopped Onions – 1/4 cup
- Grated Coconut – 1 tablespoon
- Asafoetida Hing – A pinch
Instructions
- Soak the Urad Dal: Wash and soak 1 cup urad dal in water for 4-6 hours or overnight. Drain the water before grinding.
- Grind the Dal: Transfer the soaked dal to a grinder, adding a little water at a time, and grind to a smooth, thick batter. The consistency should resemble whipped cream.
- Prepare the Batter: Add green chilies, ginger, curry leaves, black peppercorns, cumin seeds, and salt to the batter. Mix well and aerate the batter by stirring for 2-3 minutes.
- Shape the Vadas: Wet your hands and take small portions of batter. Shape them into round discs with a hole in the center to form doughnut-like shapes.
- Fry the Vadas: Heat oil in a deep frying pan (kadai) on medium-high heat.Drop the shaped Vadas into the hot oil, making sure not to overcrowd the pan. Fry until golden brown, turning occasionally for even cooking.
- Drain and Serve: Once the Vadas are crisp and golden, remove them using a slotted spoon and place them on paper towels to drain excess oil. Serve hot with coconut chutney and sambar.
Notes
- Batter Consistency: Ensure the batter is thick but light and fluffy. If it’s too runny, add a little rice flour to thicken.
- Oil Temperature: The oil should be hot enough to fry the Vadas but not smoking. Test the temperature by dropping a small portion of batter into the oil—if it rises immediately, the oil is ready.
- Add-ons: You can experiment by adding onions, coconut, or asafoetida to the batter for added flavor.
- Reheating Tips: Reheat Vadas in an oven or air fryer for a crisp texture if stored in the fridge. Avoid microwaving for best results.
