All products are selected by our editorial team for quality. If you buy through our links, we may earn a small commission at no extra cost to you.
Gluten-free baking can seem intimidating, especially when it comes to bread. Many people with gluten sensitivities or allergies miss the warm, comforting loaf of bread that’s so often associated with traditional baking.
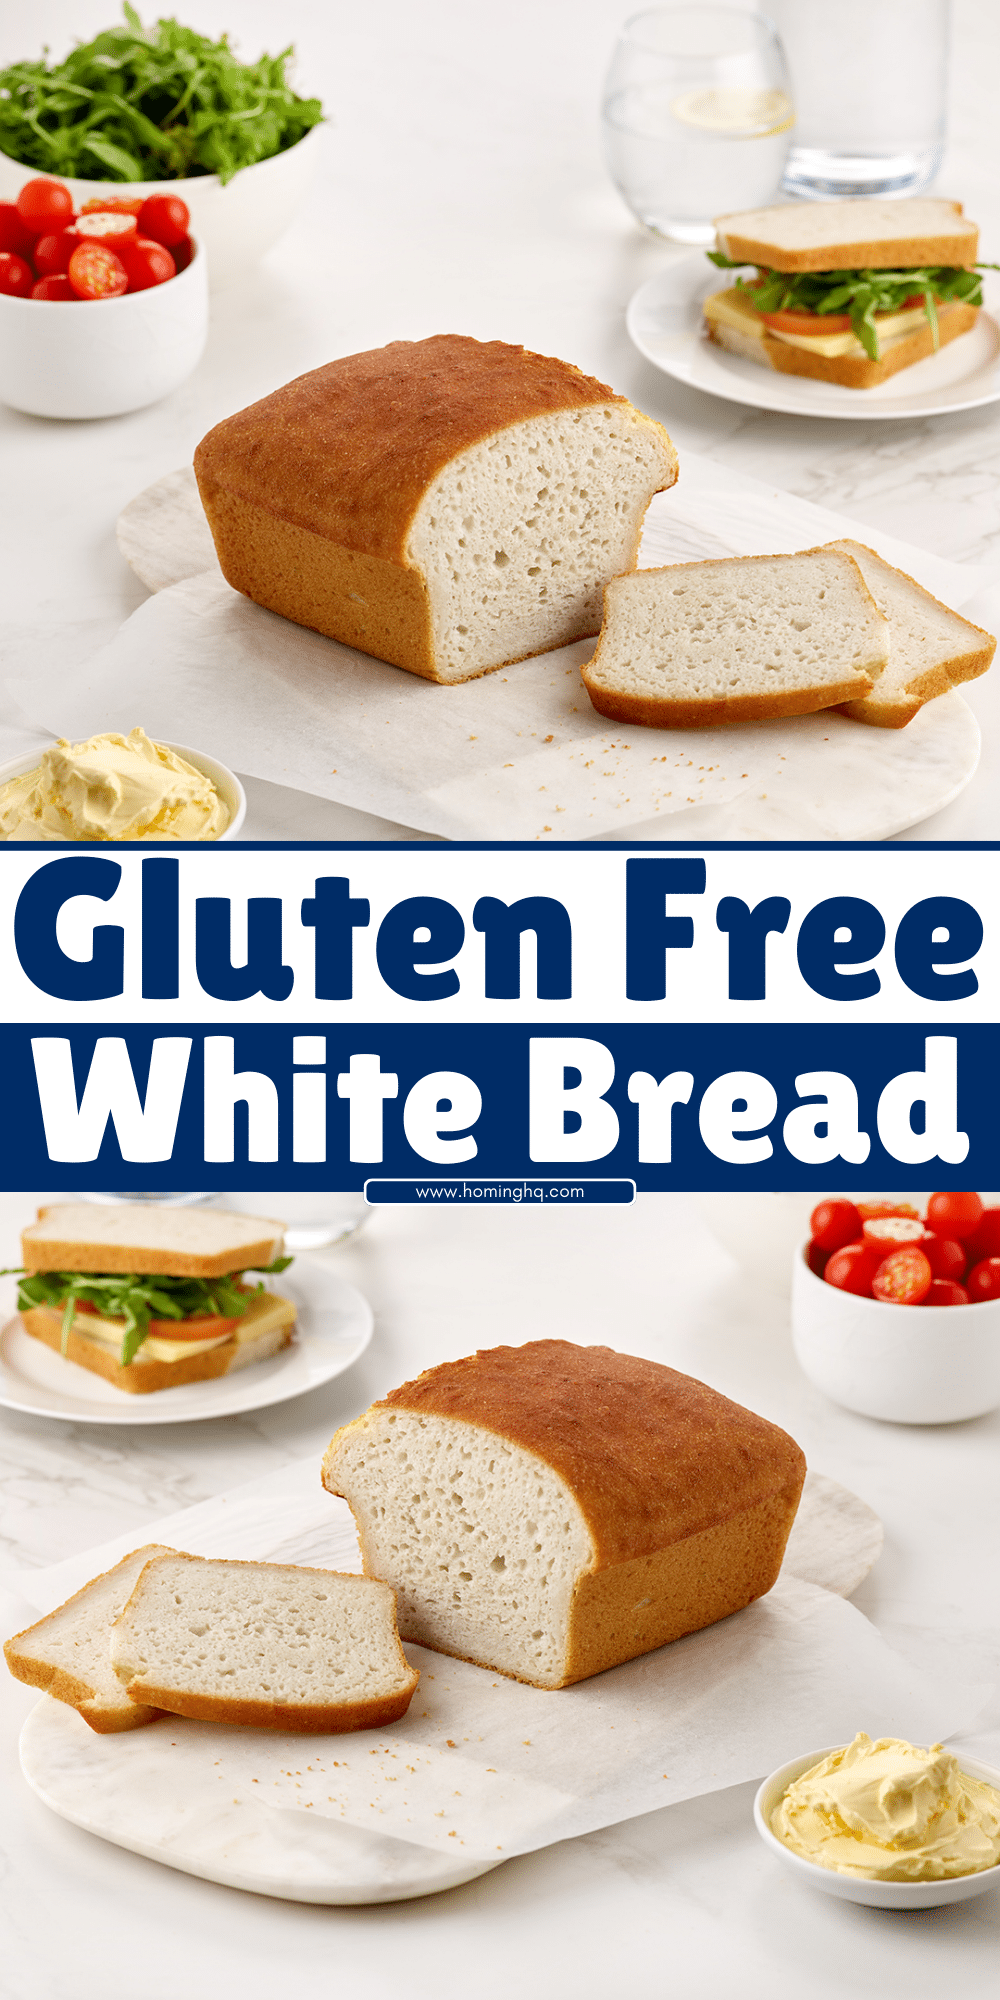
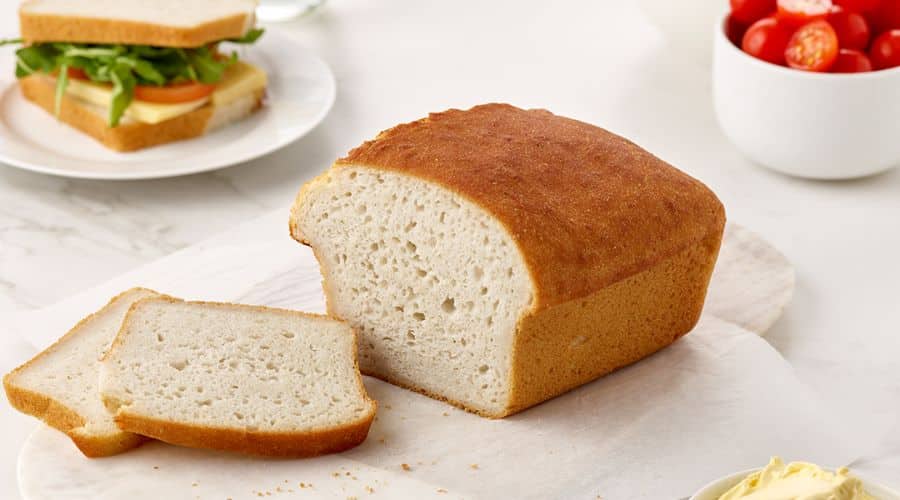
Fortunately, this Simple Gluten-Free White Bread recipe makes it easy to enjoy a soft, fluffy loaf without the gluten.
It’s perfect for anyone looking to avoid gluten but still craving the taste and texture of a homemade white bread.
What makes this recipe stand out is its simplicity.
With only a few key ingredients, you don’t need to be an experienced baker to get it right.
Whether you’re new to gluten-free baking or an experienced pro, this recipe delivers a perfect result every time.
So, roll up your sleeves, gather your ingredients, and let’s get started!

Ingredients Needed for Simple Gluten-Free White Bread
To make this Simple Gluten-Free White Bread, you’ll need a few essential ingredients that will bring the bread to life.
Let’s break them down:
Gluten-Free Flour Blend
The base of your bread is the gluten-free flour blend.
There are many blends available in stores, often made with a combination of rice flour, potato starch, and tapioca flour.
Choose a good-quality, all-purpose gluten-free flour blend for the best texture.
Xanthan Gum or Guar Gum
These ingredients act as binders and help mimic the texture that gluten would normally provide.
Xanthan gum is the more common choice, but guar gum can also be used.
A small amount will go a long way in giving your bread structure and preventing it from falling apart.
Yeast
Yeast is essential for helping the bread rise. Active dry yeast is the most common type used in gluten-free baking. Make sure your yeast is fresh to ensure it activates properly and gives your bread that fluffy texture.
Water
Warm water is used to activate the yeast and hydrate the dry ingredients.
It’s important that the water isn’t too hot, as it can kill the yeast, but also not too cold, as it may prevent the yeast from activating.
Sugar
A small amount of sugar helps feed the yeast and promotes rising. It also adds a hint of sweetness to the bread.
Salt
Salt enhances the flavor of the bread, balancing out the sweetness from the sugar.
It’s an essential ingredient to elevate the overall taste.
Eggs
Eggs provide moisture and richness to the dough. They also contribute to the structure, helping the bread hold together.
Oil
Vegetable oil (or another neutral oil) adds moisture and keeps the bread soft. You can also substitute with olive oil for a slightly different flavor.
Equipment You’ll Need
To make this Simple Gluten-Free White Bread, there are a few pieces of equipment that will make the process easier and more efficient:
Mixing Bowls
Start by using large mixing bowls to combine the ingredients.
A bigger bowl ensures you have enough room to stir without making a mess.
Hand Mixer or Stand Mixer
While you can mix the dough by hand, using a hand mixer or stand mixer with a paddle attachment will make the process smoother.
Gluten-free dough tends to be stickier than traditional dough, so a mixer helps ensure everything is well-combined and the batter has the right consistency.
Loaf Pan
A standard 9×5-inch loaf pan is perfect for this recipe.
Make sure the pan is greased or lined with parchment paper to prevent the bread from sticking. You can also use a silicone loaf pan if you prefer.
Thermometer (Optional)
Using a kitchen thermometer is optional, but it can help you determine if the bread is fully baked.
When the internal temperature reaches about 200°F (93°C), it’s ready to come out of the oven.
Step-by-Step Instructions

Now that you have your ingredients and equipment ready, let’s get started with the Step-by-Step Instructions for making your Simple Gluten-Free White Bread.
Step 1: Prepare the Yeast Mixture
In a small bowl, combine the warm water and sugar.
Stir until the sugar dissolves, then sprinkle the active dry yeast over the top.
Let it sit for 5–10 minutes until it becomes frothy.
This is known as “proofing” the yeast, and it ensures that the yeast is active and ready to help your bread rise.
Step 2: Mix Dry Ingredients
In a large mixing bowl, whisk together your gluten-free flour blend, xanthan gum, and salt.
Make sure the dry ingredients are evenly mixed before you combine them with the wet ingredients.
Step 3: Combine Wet and Dry Ingredients
Once the yeast has proofed, pour it into the bowl with your dry ingredients.
Add the eggs and oil, and use a hand mixer or stand mixer to combine the ingredients.
The dough will be thicker than regular bread dough but should be smooth and slightly sticky.
Scrape the sides of the bowl to ensure everything is incorporated.
Step 4: Knead the Dough
Unlike traditional bread, gluten-free dough doesn’t need extensive kneading.
Use the mixer to mix the dough for about 3–4 minutes, or until it’s well-combined.
If the dough seems too thick, add a small amount of water, one tablespoon at a time, until it reaches a thick, sticky batter consistency.
Step 5: Let the Dough Rise
Transfer the dough into a greased loaf pan. Use a spatula to spread the dough evenly.
Cover the pan with a clean towel and place it in a warm, draft-free area to rise.
Let the dough rise for about 1–1.5 hours, or until it has doubled in size.
If your kitchen is cold, you can also place the dough in a turned-off oven with the light on to create a warm environment.
Step 6: Bake the Bread
Preheat the oven to 375°F (190°C). Once the dough has risen, place the loaf pan in the oven and bake for 30–40 minutes, or until the bread has a golden brown crust and sounds hollow when tapped on the bottom.
For the best result, use a kitchen thermometer to check that the internal temperature of the bread has reached 200°F (93°C).
Step 7: Cool the Bread
Once baked, remove the bread from the oven and let it cool in the pan for 5–10 minutes.
Afterward, transfer it to a wire rack to cool completely before slicing.
Gluten-free bread is best when fully cooled, as this helps maintain its texture and prevents it from being too crumbly.
Tips for Perfect Gluten-Free White Bread
Baking gluten-free bread can come with its unique challenges, but with these helpful tips, you’ll be able to achieve the perfect loaf every time.
1. Use a Good Quality Gluten-Free Flour Blend
Not all gluten-free flour blends are created equal.
Choose a blend designed specifically for baking, preferably one that contains a mixture of rice flour, potato starch, and tapioca flour.
This combination offers the right balance of structure and lightness needed for bread.
Avoid using single flours like almond flour or coconut flour on their own unless the recipe specifically calls for it.
2. Don’t Skip the Xanthan Gum or Guar Gum
Xanthan gum or guar gum is essential in gluten-free bread recipes to provide the necessary structure and elasticity.
These ingredients mimic the binding properties of gluten, which is missing from gluten-free flour.
Be sure to measure them carefully, as too much can make the bread dense or overly chewy.
3. Allow the Dough to Rise Properly
Rising is critical for gluten-free bread, but it can be slower than regular bread dough due to the absence of gluten.
Make sure your dough has plenty of time to rise in a warm, draft-free place.
If your kitchen is chilly, you can place the dough in an oven with just the light on to create a warm environment.
The dough should double in size before baking.
4. Use Room Temperature Ingredients
Using ingredients at room temperature (especially eggs and oil) helps the dough come together more easily.
Cold ingredients can result in uneven mixing or inhibit proper yeast activation, leading to a denser loaf.
5. Don’t Overmix the Dough
Unlike traditional bread, gluten-free dough doesn’t need to be kneaded.
Overmixing can cause the dough to become too sticky and difficult to work with.
Use a hand mixer or stand mixer to mix the dough until it’s smooth and slightly sticky, but avoid overworking it.
6. Cool Completely Before Slicing
Gluten-free bread has a different texture than regular bread and may be more crumbly if sliced too early.
Allow your bread to cool completely on a wire rack to set its structure and avoid it falling apart when cut.
Variations of Simple Gluten-Free White Bread
While this Simple Gluten-Free White Bread is delicious as is, you can easily customize it to suit your preferences.
Here are some creative variations to try:
1. Add Herbs and Spices
For a flavorful twist, try adding herbs and spices to the dough.
Rosemary, thyme, oregano, or garlic powder can be folded into the dough before baking for a savory, aromatic bread.
Fresh or dried herbs will enhance the bread’s flavor and make it perfect for sandwiches or as a side to soups and stews.
2. Seeded Gluten-Free White Bread
Incorporating seeds like sunflower, pumpkin, or chia seeds adds texture and nutrition to your bread.
Simply stir the seeds into the dough or sprinkle them on top before baking.
This variation gives the bread a slightly nutty flavor and extra crunch.
3. Dairy-Free Option
For those avoiding dairy, it’s easy to make this bread dairy-free by substituting the eggs with a flax or chia egg (1 tablespoon of ground flax or chia seeds mixed with 3 tablespoons of water, allowed to sit until it forms a gel-like consistency).
You can also use non-dairy oils like coconut oil in place of vegetable oil.
4. Sweet Gluten-Free Bread
If you prefer a sweeter bread, add a little extra sugar or a touch of honey or maple syrup to the dough.
You can also incorporate cinnamon or vanilla extract for a warm, comforting flavor.
This variation makes a great base for sweet sandwiches or French toast.
5. Gluten-Free White Bread with a Crunchy Crust
For a crunchy, bakery-style crust, try brushing the top of the bread with a little olive oil or melted butter before baking.
This creates a golden, crispy exterior that contrasts beautifully with the soft inside.
6. Gluten-Free Whole Grain Bread
For a heartier bread with more fiber, consider mixing in some whole grains like oat flour or sorghum flour to the gluten-free flour blend.
You can replace about a quarter of the gluten-free flour with one of these grains for a more rustic texture and flavor.
Conclusion
This Simple Gluten-Free White Bread recipe is a fantastic way to enjoy fresh, homemade bread without gluten.
Whether you’re avoiding gluten due to allergies, sensitivities, or personal preference, this bread offers a soft, fluffy texture and delicious flavor that will satisfy your bread cravings.
By using a few basic ingredients and following simple steps, you can create a loaf that rivals traditional bread.
The best part?
It’s customizable to fit your taste and dietary needs, with endless variations to experiment with.
Remember, gluten-free baking can take a little practice, but with the tips and guidelines provided, you’ll be able to bake a perfect loaf every time.
So, gather your ingredients, follow the steps, and enjoy the comfort of homemade gluten-free white bread that everyone can love!
Frequently Asked Questions (FAQs)
1. Can I use a different gluten-free flour blend for this recipe?
Yes, you can use different gluten-free flour blends, but the results may vary depending on the composition of the blend.
Make sure the blend you choose is designed for bread baking to ensure the texture and rise are optimal.
Some blends may require slight adjustments in liquid amounts.
2. Why is my gluten-free bread too dense or crumbly?
If your gluten-free bread is dense or crumbly, it could be due to insufficient rising time, not enough xanthan gum or guar gum, or overmixing the dough.
Make sure the dough has time to rise fully and use the correct amount of binding agents. Also, allow the bread to cool completely before slicing to set the texture.
3. Can I make this recipe dairy-free?
Absolutely!
To make this recipe dairy-free, simply substitute the eggs with a flax or chia egg, and use a non-dairy oil such as coconut oil or olive oil instead of vegetable oil.
You can also use a dairy-free milk if you’d like to add moisture.
4. How should I store my gluten-free bread?
Store your cooled gluten-free bread in an airtight container at room temperature for up to 2–3 days.
For longer storage, you can freeze the bread by wrapping it tightly in plastic wrap or foil and placing it in a freezer bag.
When ready to eat, just thaw or toast the slices.
5. Can I make this gluten-free bread without using yeast?
While yeast helps the bread rise and gives it its signature texture, you can experiment with a yeast-free version, such as using baking soda or baking powder as leavening agents.
However, the texture and flavor will differ from the traditional yeast-based bread, so the results may not be exactly the same.
If you’re avoiding yeast, there are plenty of yeast-free gluten-free bread recipes available to try.

Simple Gluten-Free White Bread
Equipment
- Mixing bowl (1, large)
- Hand Mixer or Stand Mixer – 1
- Loaf Pan – 1 (9×5-inch)
- Thermometer (Optional) – 1
- Spatula (1)
Ingredients
- 2 cups Gluten-Free Flour Blend such as rice flour, potato starch, and tapioca flour
- 1 tsp Xanthan Gum or Guar Gum
- 1 tsp Salt
- 2 tsp Active Dry Yeast
- 1 tbsp Sugar
- 1 cup Warm Water
- 2 Large Eggs
- 2 tbsp Vegetable Oil or coconut oil
- 1/4 cup Warm Water additional for proofing yeast
Instructions
- Prepare the Yeast Mixture: In a small bowl, combine the 1 cup of warm water and sugar. Sprinkle the active dry yeast over the top and let it sit for 5–10 minutes, or until it becomes frothy.
- Mix Dry Ingredients: In a large mixing bowl, whisk together the gluten-free flour blend, xanthan gum, and salt. Ensure the dry ingredients are evenly mixed.
- Combine Wet and Dry Ingredients: Pour the yeast mixture into the dry ingredients. Add the eggs and vegetable oil, then mix using a hand mixer or stand mixer on medium speed. Continue mixing until the dough is smooth but still slightly sticky. Scrape the sides of the bowl as needed to ensure everything is incorporated.
- Knead the Dough: Gluten-free dough doesn't require extensive kneading. Mix on medium speed for about 3–4 minutes until the dough is smooth and thick. If the dough seems too thick, add water one tablespoon at a time until the desired consistency is achieved.
- Let the Dough Rise: Transfer the dough into a greased loaf pan. Use a spatula to smooth the top and evenly distribute the dough. Cover the pan with a clean towel and place it in a warm, draft-free area. Let it rise for 1 to 1.5 hours, or until the dough has doubled in size.
- Bake the Bread: Preheat the oven to 375°F (190°C). Once the dough has risen, bake the bread for 30–40 minutes, or until the top is golden brown and the internal temperature of the bread reaches 200°F (93°C) (optional: use a thermometer to check).
- Cool the Bread: Remove the bread from the oven and let it cool in the pan for 5–10 minutes. Then transfer it to a wire rack to cool completely before slicing.
Notes
- Storage: Store in an airtight container at room temperature for 2–3 days. For longer storage, wrap in plastic wrap and freeze.
- Customizations: Feel free to add herbs, seeds, or sweeteners like honey to enhance flavor. You can also try replacing the vegetable oil with olive oil for a unique taste.
- Dairy-Free: To make the bread dairy-free, substitute the eggs with flax or chia eggs and use a dairy-free oil like coconut oil.

