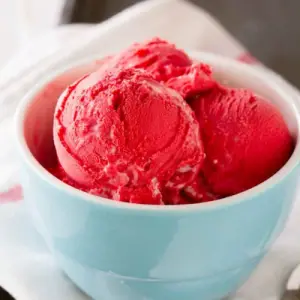
Indulge in a creamy, dreamy Red Velvet Ice Cream with a luscious marshmallow swirl that’s perfect for any occasion.
Rich in protein from cream cheese and milk, this recipe also provides healthy fats from cream while keeping sugar balanced.
Quick to prep and freezer-friendly, it’s a satisfying treat ideal for everyday enjoyment or easy make-ahead desserts.
Easy Red Velvet Ice Cream
Equipment
- 1 Blender or food processor
- 1 Ice Cream Maker
- 1 freezer-safe container (medium size)
- Measuring Cups and Spoons
- Spatula
Ingredients
- 8 oz cream cheese softened
- ¾ cup whole milk
- ¾ cup heavy cream
- ¾ cup granulated sugar
- ½ cup buttermilk
- 1 tbsp + 1 tsp red food coloring
- 2 tsp unsweetened cocoa powder
- 1/8 tsp salt
- ½ cup marshmallow ice cream topping
Instructions
- Prepare the Cream Cheese Base: Begin by taking the 8 ounces of softened cream cheese and placing it into a high-powered blender or food processor. Make sure the cream cheese is at room temperature to ensure a smooth, lump-free texture. Blend on medium speed for about 30 seconds until creamy. This step forms the rich, velvety foundation of your red velvet ice cream, ensuring every bite is perfectly smooth.
- Add the Dairy Components: Next, measure and pour ¾ cup of whole milk and ¾ cup of heavy cream into the blender with the cream cheese. These ingredients contribute both creaminess and body to the ice cream. Blend again for 30–45 seconds until the mixture is fully combined, light, and airy. The mixture should have a uniform, glossy consistency with no visible chunks of cream cheese.
- Sweeten the Mixture: Add ¾ cup of granulated sugar and ½ cup of tangy buttermilk to the dairy mixture. The sugar will provide sweetness, while the buttermilk adds a subtle tang that balances the richness of the cream and cream cheese. Blend everything together for an additional 30 seconds. Taste the mixture carefully and adjust sweetness slightly if desired.
- Add Color and Cocoa Flavor: To achieve the classic red velvet flavor and signature hue, add 1 tablespoon plus 1 teaspoon of red food coloring and 2 teaspoons of unsweetened cocoa powder to the blender. Add a pinch of 1/8 teaspoon of salt to enhance the flavors. Blend on high speed for 60 seconds until the color is vibrant and the cocoa is fully incorporated. The mixture should be a smooth, uniform pinkish-red with a light chocolate undertone.
- Chill the Ice Cream Base: Cover the blended mixture with a lid or plastic wrap and place it in the refrigerator for at least 2 hours. For best results, chill overnight. Chilling allows the flavors to meld and ensures the mixture is cold enough for the ice cream maker, which is essential for achieving a creamy, scoopable texture.
- Prepare the Ice Cream Maker: While the mixture chills, assemble your ice cream maker according to the manufacturer’s instructions. Ensure the bowl is fully frozen if required, and the motor and paddle are ready. This preparation ensures smooth churning and prevents the ice cream from freezing too quickly, which could create icy textures.
- Churn the Ice Cream: Once the ice cream base is thoroughly chilled, pour it into the ice cream maker. Turn on the machine and allow it to churn according to the manufacturer’s instructions, usually about 20–25 minutes. During this step, the ice cream will thicken and become creamy. Keep an eye on the texture: it should be soft-serve consistency before adding any toppings.
- Layer the Marshmallow Swirl: Prepare a medium-sized freezer-safe container. Spoon a layer of the churned ice cream into the container, spreading it evenly. Then, drizzle a portion of the ½ cup marshmallow ice cream topping over the ice cream layer. Continue layering ice cream and marshmallow topping until all of the ice cream and topping are used. This creates a beautiful marbled effect with sweet pockets of marshmallow throughout.
- Freeze Until Firm: Cover the container tightly with a lid or plastic wrap and place it in the freezer. Allow the ice cream to freeze for at least 8 hours or overnight. Freezing overnight ensures the ice cream is fully set, making it easy to scoop and serve while preserving the swirled layers of marshmallow throughout.
- Serve and Enjoy: When ready to serve, remove the ice cream from the freezer and let it sit at room temperature for 5–10 minutes to soften slightly for easier scooping. Scoop into bowls or cones, and if desired, drizzle extra marshmallow topping on top. Enjoy this creamy, rich red velvet ice cream with its sweet, fluffy marshmallow swirls — a dessert that’s as visually stunning as it is delicious.
Notes
- Ensure the cream cheese is fully softened before blending to prevent lumps and achieve a smooth, velvety ice cream.
- Chilling the ice cream base for at least 2 hours (or overnight) improves flavor melding and texture.
- Use high-quality red food coloring and cocoa powder for the best color and subtle chocolate flavor.
- If you prefer a less sweet version, reduce sugar by 1–2 tablespoons.
- Marshmallow topping can be adjusted or replaced with chocolate chips or caramel for creative variations.
Chef’s Secrets: Perfect Creamy Red Velvet
To achieve the smoothest, creamiest red velvet ice cream, always start with room-temperature cream cheese and chill the base thoroughly before churning.
The cold mixture churns evenly, preventing icy textures. Adding a pinch of salt balances the sweetness and enhances the cocoa’s subtle richness.
For an extra-special touch, gently fold the marshmallow topping at the end rather than mixing it completely—this creates beautiful, swirled pockets that melt in your mouth.
Serving Suggestions: Enjoy Every Scoop Deliciously
Serve this ice cream in individual bowls, tall dessert glasses, or waffle cones for a fun presentation.
Pair it with fresh berries, chocolate drizzle, or crumbled cookies for added texture and flavor contrast.
For an indulgent twist, serve alongside warm brownies or slices of red velvet cake.
Its vibrant color makes it perfect for parties, celebrations, or simply brightening up a quiet evening treat.
Storage Tips: Keep Ice Cream Perfectly Fresh
Store the ice cream in an airtight container to prevent freezer burn and maintain the soft, creamy texture.
Press a piece of parchment paper directly on the surface before sealing for extra protection.
Keep it in the back of the freezer where temperatures are more stable.
Ice cream is best enjoyed within 2 weeks for peak flavor, though it can safely last up to a month if properly sealed.
Frequently Asked Questions
1. Can I make this ice cream without an ice cream maker?
Yes! Pour the chilled mixture into a freezer-safe container, stirring every 30 minutes for 2–3 hours to break up ice crystals.
Fold in the marshmallow topping midway for swirls. This produces a slightly denser texture but remains deliciously creamy.
2. Can I use a sugar substitute or less sugar?
Absolutely. Granulated sugar can be reduced slightly, or you can use a natural sweetener like erythritol or monk fruit.
Keep in mind that sugar affects both sweetness and texture, so altering it may slightly change the ice cream’s softness.
3. How can I make the ice cream more vibrant red?
Use gel-based food coloring instead of liquid for a deeper, more vibrant hue without adding extra liquid.
Mixing thoroughly ensures even color throughout the ice cream.
4. Can I add mix-ins like chocolate chips or nuts?
Yes! Gently fold in chocolate chips, chopped nuts, or crushed cookies after churning but before layering with the marshmallow topping.
This adds texture and enhances flavor while keeping the ice cream smooth.
5. How long should I let the ice cream sit before serving?
Remove the ice cream from the freezer about 5–10 minutes before scooping.
This softens it slightly, making scooping easier while preserving the creamy texture and marshmallow swirls.
