All products are selected by our editorial team for quality. If you buy through our links, we may earn a small commission at no extra cost to you.
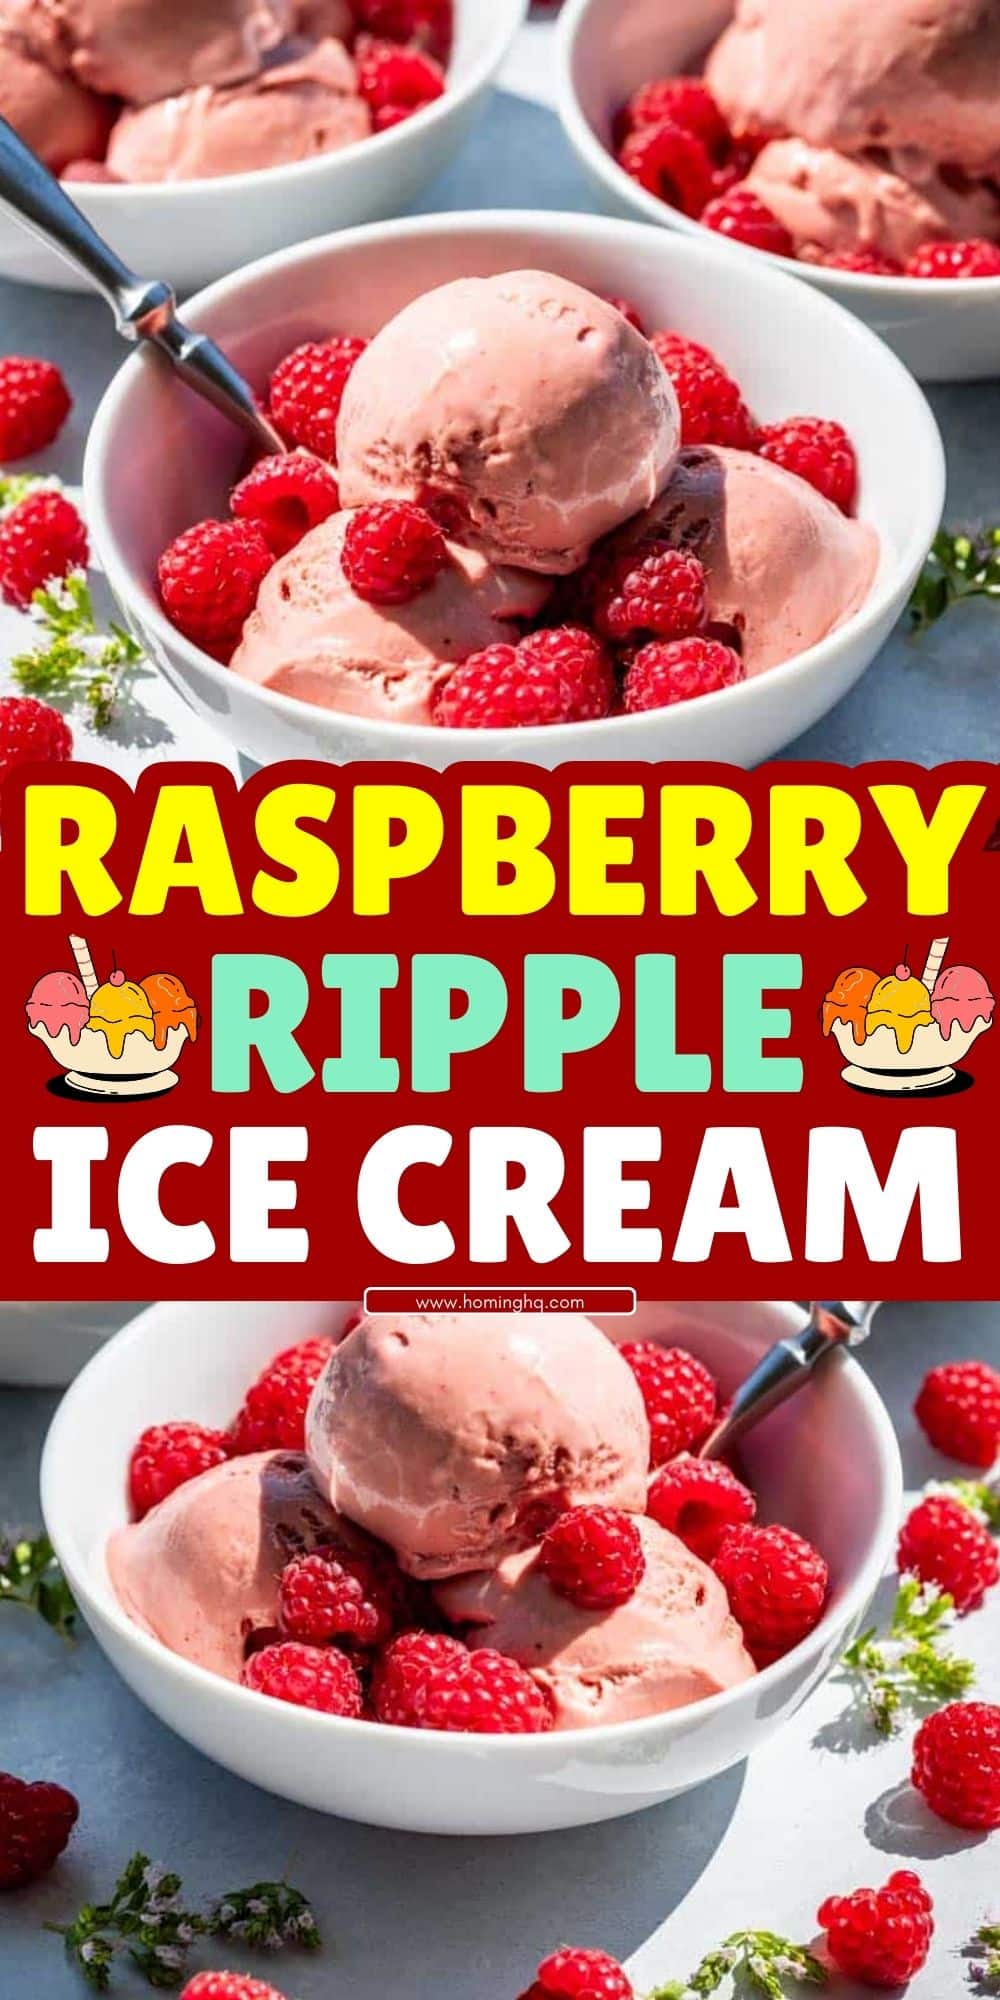
Raspberry Ripple Ice Cream is one of those classic desserts that feels like a special treat no matter when you enjoy it.
With its creamy, smooth texture and vibrant burst of raspberry flavor, this homemade version brings the best of summer into your kitchen.
Unlike store-bought options, this ice cream uses fresh ingredients and a luxurious swirl of raspberry sauce that makes each bite extra indulgent.
Whether you’re enjoying a quiet afternoon at home or serving it at a family gathering, Raspberry Ripple Ice Cream is bound to be a hit.
Plus, it’s surprisingly easy to make at home – even without an ice cream maker!
In this guide, we’ll walk you through the steps to create this mouthwatering treat from scratch.
Ingredients for Raspberry Ripple Ice Cream
For the Raspberry Ripple Ice Cream, you’ll need two main components: the ice cream base and the raspberry ripple swirl.
Each ingredient plays a crucial role in achieving the perfect balance of creamy and tangy flavors.
For the Ice Cream Base:
- Heavy cream – This provides the rich, smooth texture that is characteristic of good ice cream.
- Whole milk – The milk balances the richness of the cream, creating a creamy yet not overly heavy base.
- Granulated sugar – Sweetens the ice cream without overpowering the other flavors.
- Egg yolks – If you’re making a custard-style base, egg yolks help thicken the mixture and create a silky-smooth texture.
- Vanilla extract – Adds a subtle, aromatic flavor that complements the raspberries.
For the Raspberry Ripple:
- Fresh raspberries – The star of the ripple, offering vibrant color and a natural sweetness. You can also use frozen raspberries if fresh ones aren’t available.
- Granulated sugar – Helps to sweeten the raspberry sauce and helps it thicken as it simmers.
- Lemon juice (optional) – A small amount of lemon juice enhances the tangy notes of the raspberries and helps balance the sweetness.
Tools and Equipment You’ll Need
To make your Raspberry Ripple Ice Cream, you’ll need a few essential tools and equipment.
While some can be substituted, these items will make the process smoother and ensure the best results.
- Ice cream maker – An ice cream maker is ideal for churning the base and incorporating air, which gives the ice cream its light and creamy texture. If you don’t have one, there’s still hope—simply follow the freezing and stirring method explained in the instructions.
- Blender or food processor – This is used to puree the raspberries for the ripple. If you prefer a smoother texture, you may want to strain the puree to remove the seeds.
- Mixing bowls – You’ll need at least two bowls: one for preparing the ice cream base and another for the raspberry ripple sauce.
- Whisk – A good whisk helps with blending ingredients smoothly, especially if you’re making a custard-style base.
- Saucepan – A medium saucepan is necessary for cooking the raspberry mixture to create the ripple sauce.
- Spatula – A rubber spatula is useful for scraping down the sides of bowls and spreading the ripple through the ice cream evenly.
Having all of these tools on hand will make the process easier and more enjoyable, ensuring you end up with a deliciously smooth and flavorful Raspberry Ripple Ice Cream!
Step-by-Step Instructions for Making Raspberry Ripple Ice Cream
Making Raspberry Ripple Ice Cream is a simple yet rewarding process.
Follow these steps for a smooth, creamy ice cream that’s bursting with fresh raspberry flavor.
Prepare the Raspberry Ripple
Start by making the raspberry ripple, which will give your ice cream that signature swirl.
- In a small saucepan, combine the fresh raspberries, sugar, and lemon juice (if using).
- Cook over medium heat, stirring occasionally, until the raspberries break down and release their juice, about 5-7 minutes.
- Once the raspberries have softened and the mixture thickens slightly, remove the pan from the heat.
- Use a blender or food processor to puree the mixture until smooth. For a smoother ripple, strain the puree through a fine mesh sieve to remove the seeds.
- Set the raspberry sauce aside to cool while you prepare the ice cream base.
Make the Ice Cream Base
Now it’s time to create the rich, creamy base that will carry the raspberry ripple.
- In a medium saucepan, combine the heavy cream, whole milk, and half of the sugar. Heat over medium heat, stirring occasionally, until the mixture is hot but not boiling.
- In a separate bowl, whisk together the egg yolks and the remaining sugar until the mixture becomes pale and slightly thickened.
- Slowly pour a small amount of the hot cream mixture into the egg yolks, whisking constantly to temper the eggs. Gradually add the rest of the cream mixture while continuing to whisk.
- Pour the mixture back into the saucepan and cook over low heat, stirring constantly, until the custard thickens enough to coat the back of a spoon. Be careful not to overheat and scramble the eggs.
- Once thickened, remove from the heat and stir in the vanilla extract.
- Allow the custard to cool, then refrigerate for at least 4 hours, or overnight for the best results.
Churn the Ice Cream
Once the ice cream base is fully chilled, it’s time to churn!
- Pour the chilled ice cream base into an ice cream maker, following the manufacturer’s instructions.
- Churn the mixture for 20-25 minutes, or until it thickens and reaches a soft-serve consistency.
Swirl the Raspberry Ripple into the Ice Cream
This is where the magic happens—creating that beautiful ripple effect.
- Once the ice cream is churned, transfer half of the ice cream to a container.
- Drizzle a few spoonfuls of the cooled raspberry sauce over the ice cream, then gently swirl with a spoon or spatula.
- Repeat with the remaining ice cream and raspberry sauce, creating layers of raspberry ripple.
- Use a spoon to swirl the sauce throughout the ice cream, but don’t overmix—this is what creates the signature ripple!
Freeze the Ice Cream
- Cover the container with a lid or plastic wrap and freeze for at least 4 hours, or until firm.
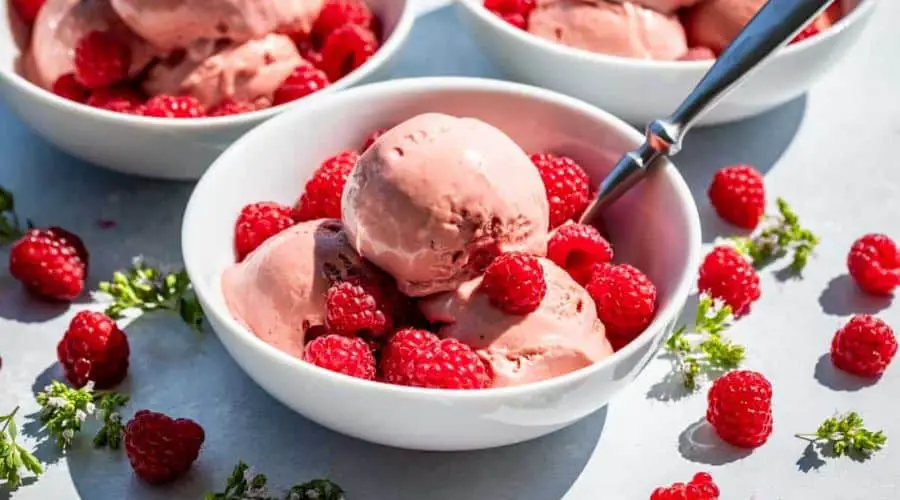
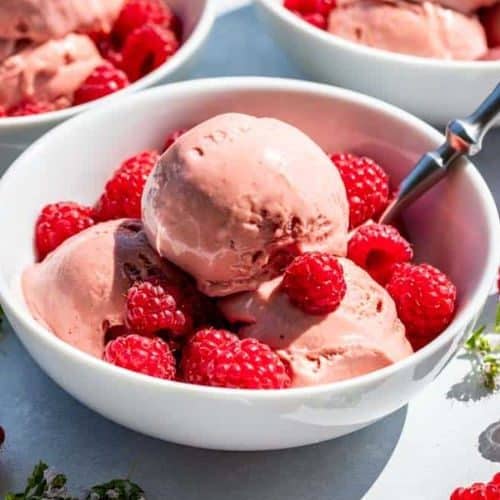
- Once frozen, your Raspberry Ripple Ice Cream is ready to enjoy! Scoop and serve with fresh raspberries or enjoy as is.
Tips for the Best Raspberry Ripple Ice Cream
To make sure your Raspberry Ripple Ice Cream turns out perfectly, here are a few tips to keep in mind:
- Use Fresh Raspberries for Best Flavor: While frozen raspberries can work in a pinch, fresh raspberries provide a more vibrant flavor and color for the ripple. If you can’t find fresh ones, be sure to thaw frozen raspberries thoroughly before using.
- Adjust Sweetness to Your Taste: If you prefer a sweeter ice cream, feel free to adjust the sugar in both the base and the raspberry ripple. Just keep in mind that the sweetness of the raspberry ripple will also impact the overall flavor.
- Strain the Raspberry Puree: For a smooth, seedless ripple, always strain the raspberry puree. This will ensure a clean, velvety texture and prevent any gritty bits from detracting from the ice cream’s creaminess.
- Chill the Base Properly: For the best texture, make sure your ice cream base is fully chilled before churning. The colder it is, the smoother and creamier the final product will be.
- Swirl Gently: When incorporating the raspberry ripple into the ice cream, be gentle with the swirling. The idea is to have distinct ribbons of raspberry sauce running through the ice cream, so avoid overmixing. You want to keep that beautiful ripple effect intact.
- Storage Tips: Homemade ice cream can freeze hard over time. To prevent it from becoming rock solid, let it sit at room temperature for 5 minutes before scooping. If storing for longer periods, cover the surface of the ice cream with plastic wrap to reduce ice crystals.
By following these tips, you’ll achieve a perfectly creamy, flavorful Raspberry Ripple Ice Cream that’s sure to impress anyone who tries it!
Common Troubleshooting Tips
Making ice cream can sometimes come with a few hiccups, but don’t worry! Here are some common troubleshooting tips to help you along the way:
- Ice Cream is Too Icy: If your ice cream turns out too icy instead of creamy, this could be due to not churning it long enough or not using enough fat in the base. Ensure that the cream-to-milk ratio is correct, and make sure the ice cream base is churned properly for a smooth texture. You can also try letting the ice cream soften at room temperature for a few minutes before serving.
- Ripple Didn’t Swirl Well: If the raspberry ripple mixes too much into the ice cream and loses its distinct swirl, it could be because the raspberry puree was too runny or the ice cream base was too soft when you swirled it. Make sure to let the raspberry sauce cool to room temperature before swirling, and be gentle when mixing it into the ice cream to preserve the beautiful ripple effect.
- Ice Cream is Too Hard: If your ice cream is too hard after freezing, it’s likely because there wasn’t enough air incorporated during the churning process. If you’re using an ice cream maker, make sure it’s fully chilled before churning. Let the ice cream sit at room temperature for a few minutes before scooping to make it easier to serve.
- Egg Custard Curdled: If your egg custard curdles while cooking, it’s usually because the mixture was heated too quickly or to too high of a temperature. When making the custard, always cook it on low heat and stir constantly to prevent the eggs from scrambling. If this happens, try straining the custard to remove the curdled bits.
- Ice Cream Too Soft: If your ice cream seems too soft after churning, it may not have been chilled long enough in the freezer. Make sure to freeze the ice cream for at least 4 hours or until it reaches the desired consistency. If you’re using a no-churn method, keep in mind that it may take longer to firm up.
With these tips, you’ll be able to troubleshoot any issues and ensure your Raspberry Ripple Ice Cream turns out perfectly every time!
Conclusion
Raspberry Ripple Ice Cream is an undeniably delicious homemade treat that combines the creamy richness of ice cream with the bright, tangy goodness of fresh raspberries.
With a few simple ingredients and some careful attention to detail, you can create an ice cream that rivals any store-bought version.
The ripple effect adds a playful touch that makes each scoop a delight, and the freshness of the ingredients elevates the flavors to a whole new level.
Whether enjoyed on a hot summer day or as a refreshing dessert after a family dinner, this ice cream is sure to become a favorite in your kitchen.
Enjoy the process of making it, and most importantly, enjoy every bite!
Frequently Asked Questions
- Can I make this ice cream without an ice cream maker? Yes! If you don’t have an ice cream maker, you can still make Raspberry Ripple Ice Cream. After preparing the ice cream base, pour it into a freezer-safe container. Freeze it for about 1-2 hours, then stir vigorously every 30 minutes for 3-4 hours to break up ice crystals and achieve a creamy texture.
- Can I use frozen raspberries instead of fresh? Absolutely! Frozen raspberries work just as well as fresh ones for the ripple. If you use frozen, allow them to thaw slightly before cooking them with the sugar to make the ripple sauce.
- Can I make this ice cream dairy-free? Yes, you can make a dairy-free version by using coconut milk or almond milk in place of the dairy, and coconut cream or a non-dairy cream alternative instead of the heavy cream. Be sure to check the ingredients on the non-dairy products to ensure they’re suitable for your dietary needs.
- How long can I store Raspberry Ripple Ice Cream? Homemade ice cream can be stored in an airtight container in the freezer for up to 2-3 weeks. For best results, cover the surface of the ice cream with plastic wrap to help prevent ice crystals from forming.
- Can I use a different fruit for the ripple? Yes! You can easily swap raspberries for other fruits like strawberries, blueberries, or blackberries. Just prepare the fruit in the same way by cooking it with sugar and optionally straining it before adding it to the ice cream base.
Raspberry Ripple Ice Cream
Equipment
- Ice Cream Maker: 1 (if you have one)
- Blender or Food Processor: 1 (for pureeing raspberries)
- Medium Saucepans: 2 (for making raspberry ripple and the custard base)
- Mixing Bowls: 2 (for separating ice cream base and raspberry sauce)
- Whisk: 1 (for blending egg yolks and sugar)
- Spatula: 1 (for swirling ripple through the ice cream)
Ingredients
For the Ice Cream Base:
- 2 cups 480 ml heavy cream
- 1 cup 240 ml whole milk
- ¾ cup 150 g granulated sugar
- 4 large egg yolks
- 1 teaspoon vanilla extract
For the Raspberry Ripple:
- 2 cups 250 g fresh raspberries (or frozen)
- ⅓ cup 67 g granulated sugar
- 1 tablespoon lemon juice optional
Instructions
- Prepare the Raspberry Ripple: In a saucepan, combine raspberries, sugar, and lemon juice. Cook over medium heat for 5-7 minutes, stirring occasionally, until the raspberries break down. Blend the mixture in a food processor until smooth. Strain to remove seeds, then set aside to cool.
- Make the Ice Cream Base: In another saucepan, combine the heavy cream, milk, and half of the sugar. Heat over medium heat until hot but not boiling. In a separate bowl, whisk the egg yolks and the remaining sugar until pale. Slowly add the hot cream mixture to the egg yolks, whisking constantly. Return the mixture to the pan and cook over low heat until thickened. Remove from heat and stir in vanilla. Chill in the fridge for 4 hours or overnight.
- Churn the Ice Cream: Pour the chilled base into an ice cream maker and churn according to the manufacturer's instructions, about 20-25 minutes, until it thickens to soft-serve consistency.
- Swirl the Raspberry Ripple: Transfer half of the ice cream to a container. Drizzle with a few spoonfuls of raspberry sauce and gently swirl. Repeat with the remaining ice cream and ripple. Freeze for 4 hours or until firm.
- Serve: Allow the ice cream to soften slightly at room temperature for a few minutes before scooping. Serve as is, or with additional fresh raspberries.
Notes
- For a dairy-free option, replace the heavy cream with coconut cream and the milk with almond or coconut milk.
- If you don’t have an ice cream maker, you can freeze the mixture in a shallow container and stir it every 30 minutes for 3-4 hours to prevent ice crystals.
- You can store this ice cream in the freezer for up to 2-3 weeks, but for the creamiest texture, consume it within the first week.
- Make sure to let the raspberry ripple cool to room temperature before swirling into the ice cream to maintain the texture of the base.
