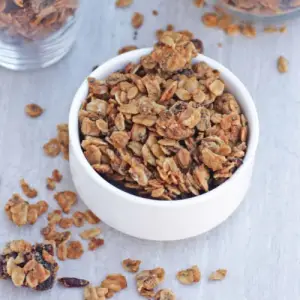
This homemade peanut butter granola is a quick, wholesome breakfast or snack packed with protein, fiber, and heart-healthy fats.
Made with rolled oats, chia seeds, and natural peanut butter, it delivers sustained energy and keeps you full longer.
Naturally sweetened with honey and maple syrup, it’s low in saturated fat and perfect for meal prep, on-the-go snacks, or adding a crunchy boost to yogurt, oatmeal, or smoothies.
Crunchy Peanut Butter Granola
Equipment
- 1 oven
- 1 Baking sheet
- 1 large mixing bowl
- 1 Small Mixing Bowl
- Parchment paper or silicone baking mat
Ingredients
- 2 cups old-fashioned rolled oats
- ⅓ cup smooth peanut butter
- ¼ cup dried cranberries
- 2 tablespoons chia seeds
- 3 tablespoons honey
- 3 tablespoons maple syrup
- 1½ teaspoons coconut oil
- ½ teaspoon cinnamon
- ⅛ teaspoon salt
Instructions
- Prepare the Baking Sheet: Start by lining a standard baking sheet with parchment paper or a silicone baking mat. This will prevent the granola from sticking and make cleanup much easier. Set the prepared baking sheet aside for later. Make sure the sheet is completely flat and the parchment or mat covers all corners to ensure even baking.
- Preheat the Oven: Preheat your oven to 325°F (165°C). Preheating is crucial because it ensures the granola cooks evenly and develops a light, golden crunch. While the oven is warming, you can move on to preparing the dry and wet ingredients.
- Combine the Dry Ingredients: In a large mixing bowl, add 2 cups of old-fashioned rolled oats. Then include ¼ cup dried cranberries, 2 tablespoons chia seeds, ½ teaspoon ground cinnamon, and ⅛ teaspoon salt. Stir everything together thoroughly with a large spoon or spatula. This ensures that the spices, seeds, and fruit are evenly distributed throughout the oats.
- Prepare the Wet Mixture: In a small mixing bowl, combine ⅓ cup smooth peanut butter, 3 tablespoons honey, 3 tablespoons maple syrup, and 1½ teaspoons coconut oil. Gently warm the mixture—either in the microwave for 20–30 seconds or on the stovetop in a small saucepan over low heat—until the peanut butter softens and the mixture is easy to stir. Mix until smooth and fully combined, creating a thick, glossy sauce.
- Incorporate Wet and Dry Ingredients: Pour the peanut butter mixture into the large bowl with the oats, cranberries, chia seeds, cinnamon, and salt. Use a spatula or large spoon to fold the mixture together. Make sure all oats and seeds are coated evenly with the peanut butter-honey blend. Every oat flake should be lightly covered to ensure the granola bakes into uniform clusters.
- Spread the Granola on the Baking Sheet: Carefully transfer the mixture onto the prepared baking sheet. Use the back of a spatula or a spoon to spread it evenly into a thin layer, about ½-inch thick. Ensure the layer is uniform—thicker areas may bake unevenly, while thinner areas may burn. Take your time to shape it into a neat rectangle or square to help with later cutting into chunks.
- First Bake for Golden Color: Place the baking sheet in the preheated oven and bake for 15–17 minutes. Keep an eye on the granola as it bakes—it should turn a light golden brown. At this stage, it will still feel slightly soft, but the aroma of toasted oats and peanut butter should start filling your kitchen.
- Flip the Granola: After the initial baking time, carefully remove the pan from the oven. Using a spatula, gently flip the granola over in sections. Try to keep the clusters intact to maintain chunkiness. Return the baking sheet to the oven and bake for an additional 5 minutes to ensure both sides are evenly toasted and slightly crisped.
- Cool Completely: Once baked, remove the granola from the oven and let it cool completely on the baking sheet. This step is essential—attempting to break or move the granola while warm will cause it to crumble. As it cools, the peanut butter mixture hardens, creating the perfect crunchy texture. Cooling may take 20–30 minutes, depending on your kitchen temperature.
- Break into Chunks: After the granola has fully cooled, use your hands or a knife to break it into small or medium-sized chunks, depending on your preference. Larger chunks are perfect for snacking, while smaller pieces work well as cereal or yogurt toppings.
- Store Properly: Transfer the granola into an airtight container or a glass jar. Store at room temperature for up to 2–3 weeks, or in the refrigerator for longer freshness. Avoid storing in a humid environment to maintain crispiness. This makes it a convenient grab-and-go breakfast or snack for the entire week.
- Serving Suggestions: Enjoy your homemade peanut butter granola with cold milk, sprinkled over yogurt, mixed into oatmeal, or eaten directly as a healthy snack. It’s versatile, protein-rich, and perfect for satisfying sweet cravings while keeping you full and energized.
Notes
- Use old-fashioned rolled oats for the best texture; instant oats can turn mushy when baked.
- Slightly warming the peanut butter mixture helps it coat the oats evenly.
- Ensure even layer thickness on the baking sheet for uniform baking and golden color.
- Flip the granola gently halfway through baking to preserve clusters.
- Allow granola to cool completely before breaking into chunks to achieve crispiness.
- This recipe is naturally sweetened with honey and maple syrup, but you can adjust sweetness to taste.
- Optional add-ins include chopped nuts, seeds, or cocoa nibs for extra flavor and nutrition.
- Store in an airtight container at room temperature to keep crunchy for weeks.
Chef’s Secrets for Perfect Granola
One key to perfect homemade granola is using low heat and patience.
Baking at 325°F ensures that the oats toast evenly without burning, and flipping the granola halfway preserves its chunkiness.
Another tip is to slightly warm the peanut butter, honey, and syrup mixture before mixing; this makes coating easier and improves cluster formation.
Using coconut oil or any neutral oil adds a golden crunch and prevents sticking.
Don’t rush the cooling process—granola must be completely cool before breaking it to retain its satisfying texture.
Serving Suggestions for Every Occasion
This granola is incredibly versatile. Enjoy it as a quick breakfast with cold or warm milk, or sprinkle over Greek yogurt with fresh berries for a protein-packed snack.
It works beautifully as a topping for oatmeal, smoothie bowls, or even desserts like ice cream.
For on-the-go energy, pack a few granola chunks in a small container to curb mid-morning or post-workout hunger.
You can also layer it with nut butter and banana slices for a wholesome snack parfait.
Storage Tips for Crunchy Granola
To keep granola crisp, always store it in an airtight container at room temperature, away from heat or humidity.
It will remain fresh for up to three weeks. For longer storage, you can refrigerate it, but allow it to come to room temperature before serving to restore crunch.
Avoid covering granola while it’s still warm, as trapped heat can cause moisture buildup, leading to soft or soggy clusters.
Freezing portions in zip-lock bags is also an option for long-term storage.
Frequently Asked Questions
1. Can I make this granola gluten-free?
Yes! Simply use certified gluten-free rolled oats to ensure the recipe is safe for a gluten-free diet. All other ingredients are naturally gluten-free.
2. How can I make larger granola chunks?
Press the oat mixture firmly into a thicker layer on the baking sheet and avoid over-stirring when flipping. Larger clusters form naturally as it cools.
3. Can I substitute peanut butter?
Absolutely. Almond butter, cashew butter, or sunflower seed butter work well and provide different flavors while maintaining the same texture and binding properties.
4. Is this granola suitable for meal prep?
Yes, it’s ideal for meal prep. Portion it into jars or snack bags and keep it on hand for ready-to-eat breakfasts, yogurt toppings, or post-workout snacks throughout the week.
5. Can I add other mix-ins like chocolate or nuts?
Yes, feel free to add chopped nuts, seeds, or unsweetened chocolate chips after baking.
Adding chocolate before baking can cause it to melt excessively, so it’s best to fold in extras once the granola has cooled.
