All products are selected by our editorial team for quality. If you buy through our links, we may earn a small commission at no extra cost to you.
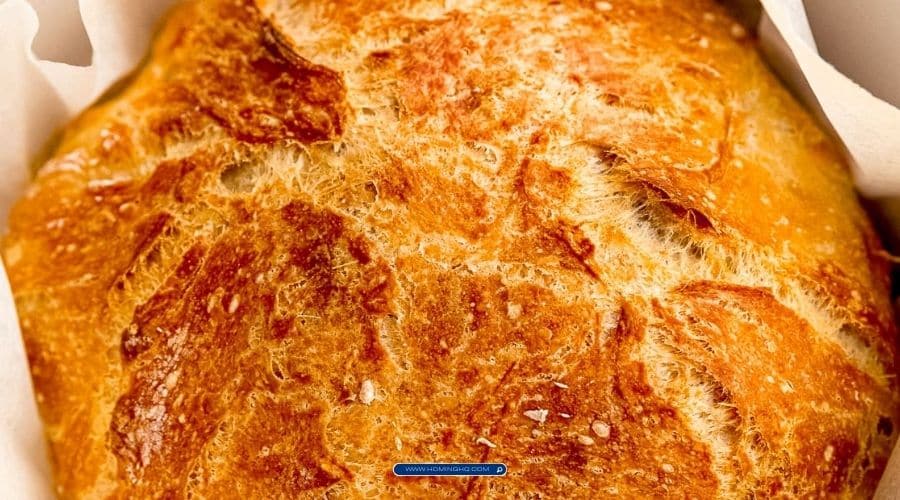
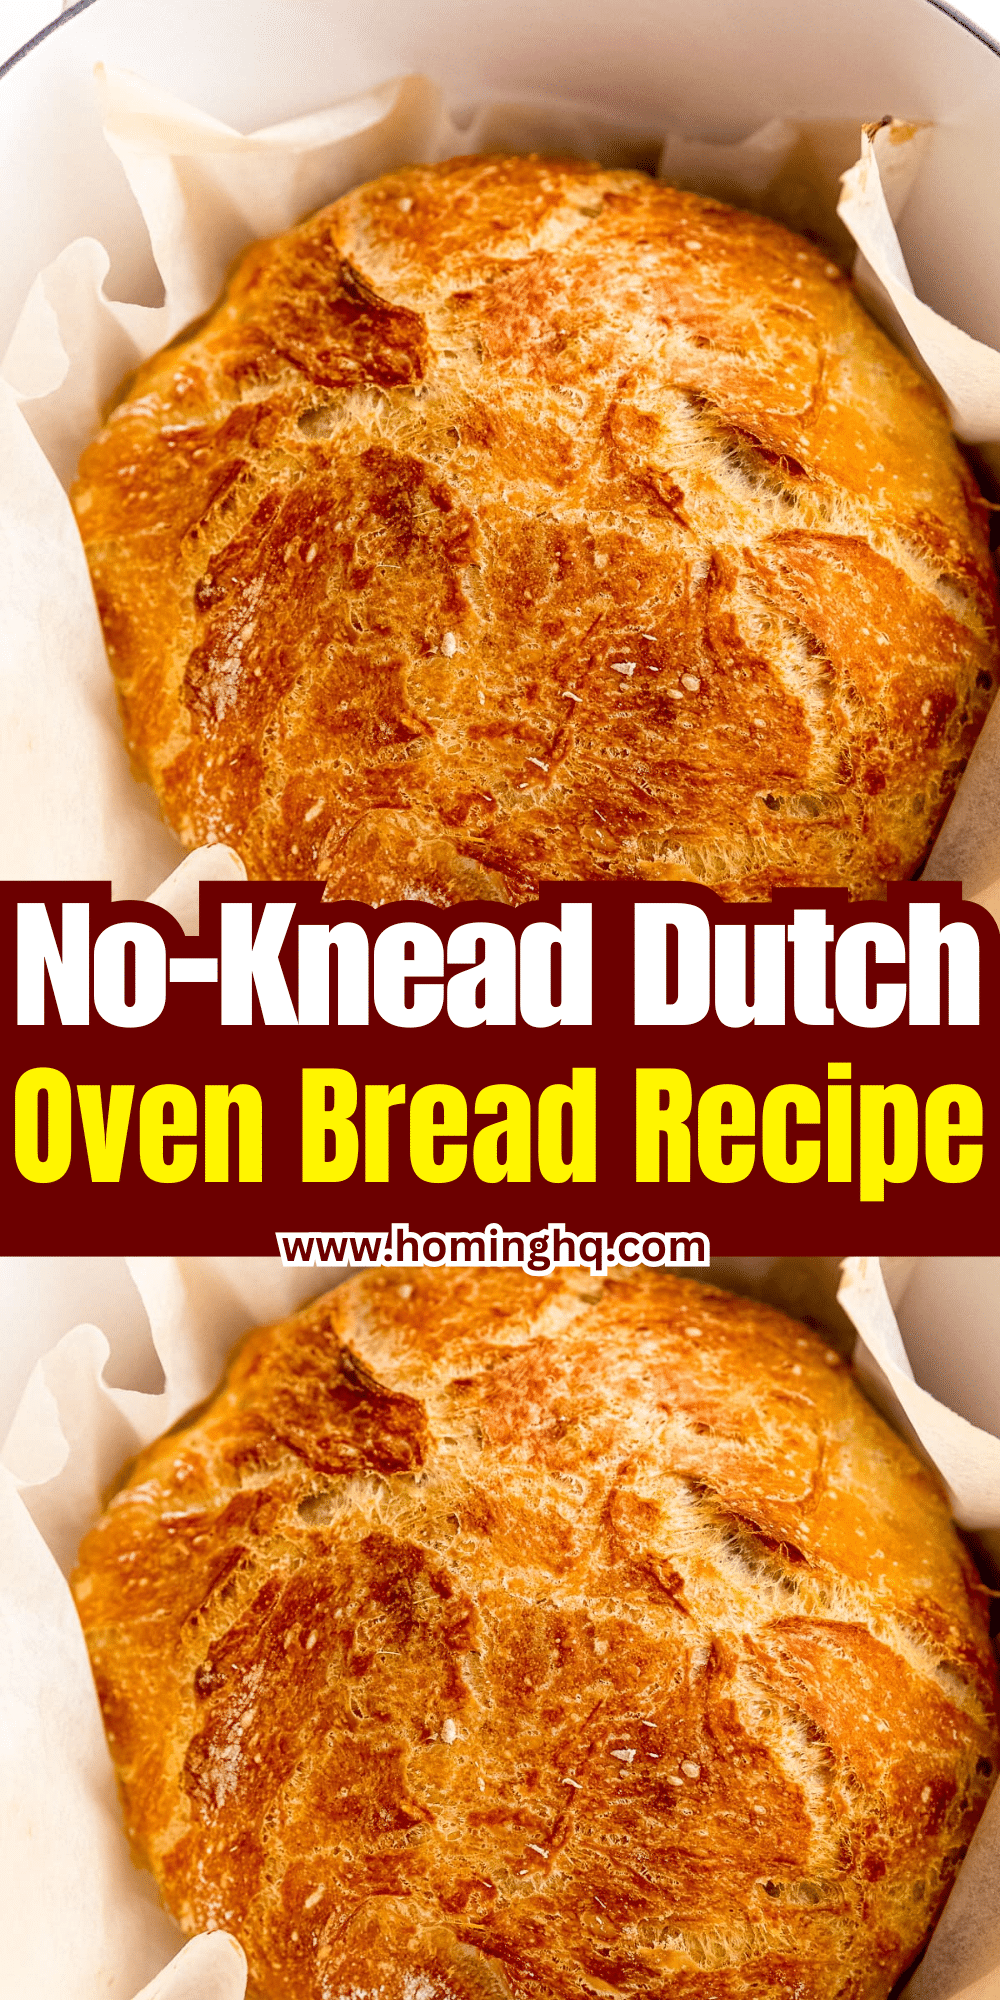
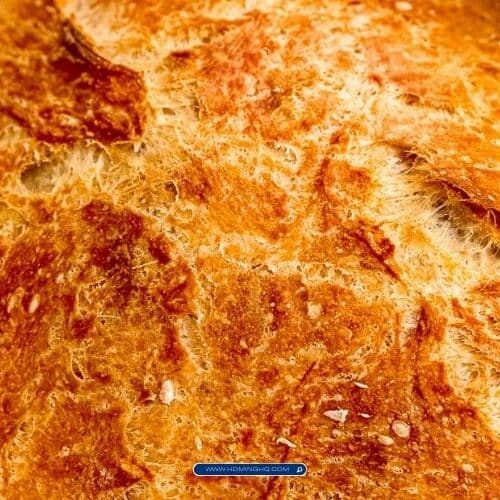
No-Knead Dutch Oven Bread is a simple and flavorful homemade bread recipe that delivers the perfect crust and chewy interior without the need for extensive kneading.
Ideal for beginners and seasoned bakers alike, this bread only requires a few basic ingredients and minimal effort.
What makes this recipe particularly special is the use of a Dutch oven, which helps create a wonderfully crisp crust, while the inside remains soft and airy.
Whether you’re a first-time bread maker or looking for an easy way to bake fresh bread at home, this no-knead version is sure to impress.
Let’s dive into how you can make this rustic, artisan-style bread in just a few simple steps.
Why Choose No-Knead Bread?
Time-Saving and Low Effort
One of the biggest advantages of making no-knead bread is the minimal time and effort involved.
Unlike traditional bread-making methods, which require kneading, resting, and more hands-on involvement, no-knead bread is a true hands-off experience.
With just a little mixing and patience during the long rise time, you’ll have fresh, homemade bread with very little active preparation.
It’s a great option for busy people who still want to enjoy the process of baking bread.
Perfect for Beginners
If you’re new to baking, the no-knead method is perfect for you. There’s no need to master complicated techniques like kneading, which can be tricky for beginners to get right. The dough’s natural rise and fermentation make this process nearly foolproof, allowing even the most inexperienced bakers to turn out a beautiful loaf of bread.
Flavorful and Rustic
The long, slow fermentation process of no-knead bread allows the dough to develop rich, deep flavors that you won’t find in quicker, more traditional bread recipes.
The result is a rustic, artisan-style loaf with a slightly tangy flavor and chewy crumb.
The Dutch oven enhances this by creating a crisp, golden-brown crust, giving the bread the perfect balance of texture and flavor.
Ingredients for No-Knead Dutch Oven Bread
Flour
The base of this recipe is simple all-purpose flour or bread flour.
Bread flour, with its higher protein content, will give you a slightly chewier loaf, while all-purpose flour will work just as well for a softer texture.
Either way, the flour is the foundation of your bread and gives it structure.
Water
Water is essential for activating the yeast and creating the right dough consistency.
The water should be lukewarm (about 100°F or 37°C), not too hot or cold, to ensure the yeast works efficiently without being killed or sluggish.
Yeast
You’ll need active dry yeast or instant yeast for this recipe.
Both types work well, but instant yeast is a bit more forgiving and doesn’t require activation in warm water, though it still works beautifully when mixed directly into the dry ingredients.
Yeast is what helps the dough rise and develop air pockets, resulting in a light, fluffy bread.
Salt
Salt not only adds flavor to the bread but also controls the fermentation process, slowing down the yeast and ensuring the dough rises at a steady pace.
Without it, the dough could rise too quickly or unevenly, affecting the final result.
Optional Add-ins
For extra flavor and texture, consider adding a handful of seeds (like sesame or sunflower), fresh herbs (like rosemary or thyme), or even a few cloves of garlic to the dough.
These additions can elevate the bread, making it even more special for different occasions.
Step-by-Step Instructions

1. Mixing the Dough
To start, combine your flour, salt, and yeast in a large mixing bowl.
Stir the dry ingredients together with a wooden spoon or your hands until they’re evenly distributed.
Then, add the water gradually, mixing it into the flour mixture until a shaggy dough forms.
You don’t need to knead the dough at all—just make sure all the flour is incorporated into the water.
The dough should be somewhat sticky and rough, but that’s exactly what you want.
2. Letting the Dough Rest and Rise
Once your dough is mixed, cover the bowl with a damp kitchen towel or plastic wrap.
Let it rest at room temperature for about 12 to 18 hours, depending on your schedule.
The dough will slowly rise and develop a slightly tangy aroma as it ferments.
You’ll know it’s ready when it has roughly doubled in size and shows plenty of bubbles on the surface.
3. Shaping the Dough (Optional)
After the dough has risen, gently turn it out onto a lightly floured surface.
You don’t need to punch it down; instead, simply fold the edges of the dough toward the center to form a rough ball.
This step helps to create tension on the surface of the dough, which will give your loaf a nice shape.
If you prefer a rustic, freeform loaf, you can skip this shaping step and bake the dough as is.
4. Preheating the Dutch Oven
While the dough rests, preheat your Dutch oven in the oven at 450°F (232°C) for about 30 minutes.
The Dutch oven will get incredibly hot and create an optimal environment for baking, ensuring the bread’s crust becomes beautifully crisp.
Be sure to handle it carefully when removing it from the oven as it will be extremely hot.
5. Baking the Bread
Once the Dutch oven is preheated, carefully transfer your dough into it.
If you’ve shaped it, simply place the dough seam-side down into the pot.
If you haven’t shaped it, you can just drop it in as it is. Cover the Dutch oven with its lid and bake for 30 minutes.
This steamy environment will help the dough rise further and create a golden, crunchy crust.
After 30 minutes, remove the lid and bake for an additional 10 to 15 minutes until the bread is golden brown and sounds hollow when tapped on the bottom.
6. Cooling the Bread
After baking, remove the bread from the Dutch oven and place it on a wire rack to cool.
Let it rest for at least 30 minutes to an hour before slicing—this allows the crumb to set and prevents it from being too doughy when you cut into it.
You’ll be rewarded with a perfectly airy, flavorful loaf when you do!
You have not enough Humanizer words left. Upgrade your Surfer plan.
Variations and Flavor Add-Ins
Herb-Infused No-Knead Bread
For a burst of fresh flavor, try adding herbs like rosemary, thyme, or oregano to the dough.
Fresh herbs can be gently kneaded in after the first rise or sprinkled on top of the dough before baking.
These aromatic additions will infuse the bread with a delightful fragrance and savory taste that pairs beautifully with soups, salads, and cheeses.
Cheese and Garlic Bread
If you love a savory twist, consider adding grated cheese and garlic to the dough.
Cheddar, mozzarella, or Parmesan work wonderfully, providing a rich, cheesy flavor that complements the bread’s natural texture.
Finely chop or crush a few garlic cloves and mix them into the dough for a subtle garlic aroma.
This variation is perfect for serving as a side dish to pasta or enjoying as a snack on its own.
Seeded and Nutty Bread
For added crunch and flavor, fold in a handful of sunflower seeds, sesame seeds, or even chopped nuts like walnuts or almonds.
These ingredients will add texture to the crumb, as well as a nutty undertone to the bread.
Seeds like flax or chia also work well, offering a healthful boost of fiber and Omega-3 fatty acids.
Sweet No-Knead Bread
To create a subtly sweet variation, consider adding dried fruits such as raisins, cranberries, or apricots.
You can also stir in a tablespoon of honey or a dash of cinnamon for a sweeter flavor profile.
This type of bread is wonderful for breakfast or as an accompaniment to a cheese platter, balancing savory flavors with a touch of sweetness.
Olive and Sun-Dried Tomato Bread
For a Mediterranean-inspired loaf, add chopped olives and sun-dried tomatoes to the dough.
The saltiness of the olives and the tanginess of the tomatoes make for a deliciously complex bread.
This variation is perfect for serving alongside pasta dishes or enjoying with a glass of wine.
How to Serve and Store No-Knead Dutch Oven Bread
Serving Suggestions
No-Knead Dutch Oven Bread is incredibly versatile and can be served in a variety of ways:
- Fresh with Butter: A classic way to enjoy your bread is to simply slice it and slather it with salted butter while it’s still warm. The crispy crust and soft, airy interior are an irresistible combination.
- With Soups and Stews: This bread is ideal for dipping into soups, stews, or chili. Its crusty texture makes it the perfect vehicle for soaking up flavorful broths.
- As a Sandwich: The sturdy yet soft crumb structure makes it excellent for sandwiches. Fill it with your favorite ingredients, from deli meats to roasted vegetables or cheese.
- With Cheese and Charcuterie: This bread pairs wonderfully with cheeses, cured meats, and olives for an impressive charcuterie board.
Storage Tips
While fresh No-Knead Dutch Oven Bread is best enjoyed within the first couple of days, it can be stored to keep it fresh for a longer period.
- Room Temperature: Store the bread in a paper bag or loosely wrapped in a clean kitchen towel.
- Avoid plastic bags, as they can cause the crust to soften. Kept at room temperature, the bread should stay fresh for about 2-3 days.
- Freezing for Later: If you have extra bread, freezing is a great option. Slice the loaf before freezing so you can thaw only the pieces you need. Wrap the slices tightly in plastic wrap or foil and place them in a freezer-safe bag. To thaw, simply let the slices come to room temperature or warm them in the oven for a few minutes for a freshly baked taste.
- Reheating Tips: To refresh leftover bread, you can wrap it in foil and place it in a 350°F (175°C) oven for about 10 minutes. This will help revive the crust and warmth, making it taste almost like it was just baked.
By following these storage tips, you can enjoy your No-Knead Dutch Oven Bread long after it’s been baked, maintaining its delicious flavor and texture.
Frequently Asked Questions
1. Can I use regular flour instead of bread flour?
Yes, you can use all-purpose flour in place of bread flour.
While bread flour has a higher protein content, which contributes to a slightly chewier texture, all-purpose flour will still give you a great result. The bread will be a bit softer, but still delicious.
2. Can I make this recipe without a Dutch oven?
If you don’t have a Dutch oven, you can still bake the bread. A heavy, oven-safe pot with a lid works similarly, or you can use a baking stone or a rimmed baking sheet.
To mimic the steamy environment that the Dutch oven provides, you can place a shallow pan of water in the oven while it preheats or spritz the bread with water before baking.
Just be sure to cover the bread during the first part of baking to achieve that perfect crust.
3. How long does no-knead bread take to rise?
The dough typically rises for about 12 to 18 hours, depending on the temperature of your kitchen.
Warmer environments will speed up the rise, while cooler ones may slow it down.
The key is to let the dough rise until it has roughly doubled in size and shows plenty of bubbles on the surface.
If you’re short on time, you can let the dough rise for a shorter period, but the flavor may be less developed.
4. Can I double the recipe to make two loaves?
Yes, you can easily double the ingredients to make two loaves.
You may need to use two separate Dutch ovens or bake them in batches.
Just be sure to adjust the baking time as necessary to ensure each loaf is properly cooked.
5. Why is my bread dense or flat?
If your bread turns out dense or flat, it could be due to a few reasons. Make sure you’re using the correct amount of yeast and that it’s still active. Additionally, check that you’re allowing enough time for the dough to rise and ferment fully.
Too little rise time or insufficient kneading (even though this recipe requires none) can result in a denser texture.
Finally, ensure your oven is fully preheated, and avoid opening the door too often during baking, as this can cause the bread to deflate.
Conclusion
No-Knead Dutch Oven Bread is a simple yet rewarding recipe that allows you to enjoy fresh, artisan-style bread without the fuss.
With minimal preparation and the use of a Dutch oven, you can bake a rustic loaf with a perfectly crisp crust and soft, airy crumb.
Whether you’re a beginner or an experienced baker, this recipe is foolproof, and the variations are endless, allowing you to customize the bread with your favorite ingredients.
From savory herb-infused loaves to sweet fruit-filled versions, the possibilities are as vast as your creativity.
Enjoy your homemade bread with meals, snacks, or simply as a comforting treat—and savor the joy of baking from scratch!
No-Knead Dutch Oven Bread
Equipment
- 1 large mixing bowl (for dough mixing)
- 1 Dutch oven (5 to 7-quart size)
- 1 kitchen towel or plastic wrap (for covering dough during rise)
- 1 wire rack (for cooling bread)
- Measuring spoons and cups (for accurate ingredient measurements)
Ingredients
- 3 cups 360g All-purpose flour
- 1 ½ teaspoons 9g Salt
- 1 teaspoon 3g Instant or active dry yeast
- 1 ½ cups 355ml Warm water (about 100°F or 37°C)
Instructions
- Mix the Dough: In a large bowl, combine the flour, salt, and yeast. Gradually add the warm water and stir with a wooden spoon or your hands until the dough comes together. It should be slightly sticky but not overly wet.
- Let the Dough Rise: Cover the bowl with a damp kitchen towel or plastic wrap and let the dough rise at room temperature for 12 to 18 hours, or until it has doubled in size and has bubbles on the surface.
- Shape the Dough (Optional): Once the dough has risen, gently turn it out onto a lightly floured surface. Fold the dough edges toward the center to form a rough ball. If you prefer a rustic, freeform loaf, you can skip this shaping step.
- Preheat the Dutch Oven: About 30 minutes before baking, preheat your oven to 450°F (232°C) and place your Dutch oven (with the lid on) inside the oven to heat.
- Bake the Bread: Once the Dutch oven is preheated, carefully remove it from the oven. Transfer your shaped dough into the hot Dutch oven, seam-side down.Cover with the lid and bake for 30 minutes. Then, remove the lid and bake for an additional 10–15 minutes, or until the bread is golden-brown and sounds hollow when tapped on the bottom.
- Cool the Bread: Remove the bread from the Dutch oven and place it on a wire rack. Allow the bread to cool for at least 30 minutes before slicing.
Notes
Recipe Notes
- Flour: You can use all-purpose flour or bread flour. Bread flour will yield a chewier texture, while all-purpose flour will give a slightly softer loaf.
- Yeast: Instant yeast doesn’t need to be activated, but if you’re using active dry yeast, ensure the water is lukewarm to help activate it.
- Resting Time: The rise time can vary depending on the temperature in your kitchen. If it’s colder, allow the dough to rise for a longer period.
- Dutch Oven: A Dutch oven is key for creating a perfect crust, but if you don’t have one, you can bake the bread in a heavy pot with a lid or even on a baking stone, though the result may be slightly different.
- Add-ins: Feel free to experiment with herbs, cheese, garlic, or even dried fruits to customize the flavor of your loaf.
