All products are selected by our editorial team for quality. If you buy through our links, we may earn a small commission at no extra cost to you.
There’s something truly magical about freshly baked bread, especially when it’s made from scratch and infused with the earthy flavors of herbs.
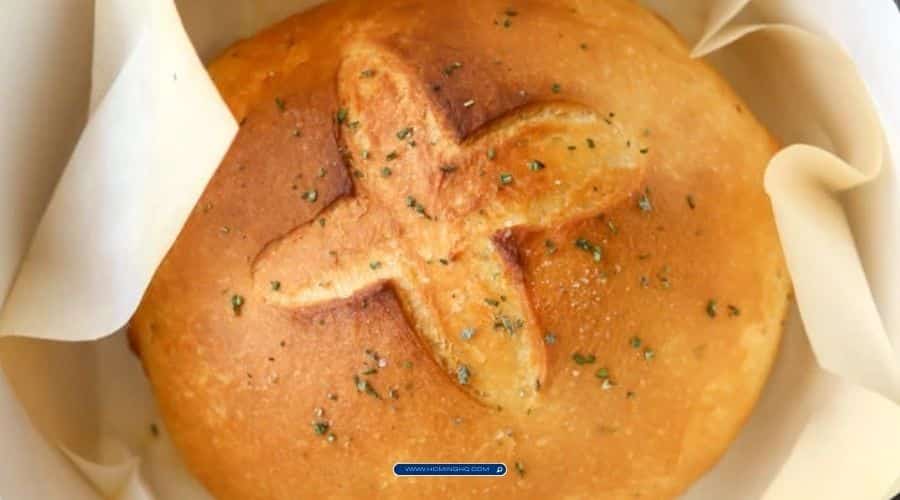
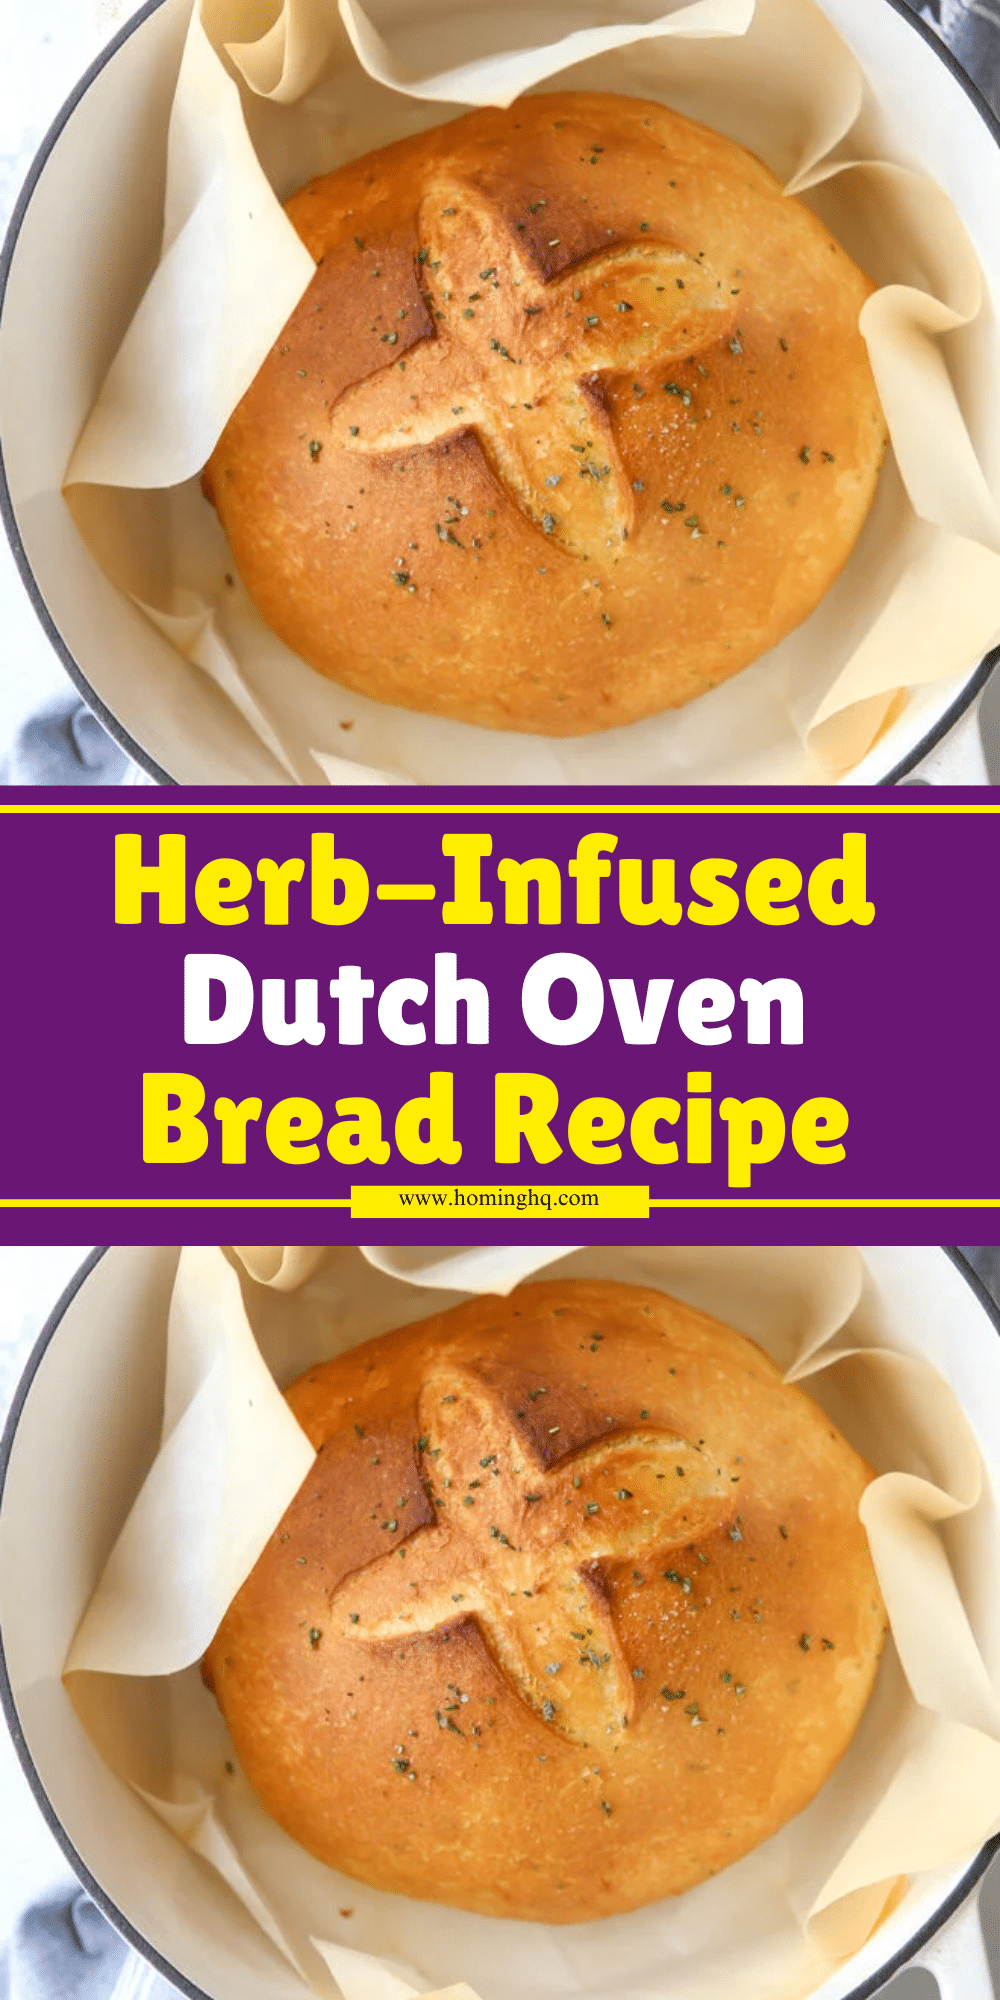
Herb-Infused Dutch Oven Bread is the perfect marriage of rustic, homemade goodness and aromatic herbaceous flair.
Whether you’re a seasoned baker or just starting your bread-making journey, this recipe offers an approachable yet delicious way to create bakery-quality bread at home.
What sets this bread apart is the use of fresh or dried herbs, which infuse every bite with fragrant, savory notes that elevate the flavor profile.
When baked in a Dutch oven, the bread develops a beautifully crisp, golden-brown crust, while remaining soft and airy on the inside.
The method is simple, the ingredients are basic, and the results are impressive—perfect for pairing with soups, stews, or simply enjoying with a generous spread of butter.
Why You’ll Love This Herb-Infused Dutch Oven Bread
If you’ve never baked bread in a Dutch oven before, you’re in for a treat.
The Dutch oven traps heat and moisture, creating the perfect conditions for a rustic, artisan-style loaf.
The result? A crunchy, golden crust and a tender crumb that’s almost impossible to achieve using other methods.
But what really makes this bread shine is the infusion of herbs.
As the bread rises and bakes, the herbs—whether it’s rosemary, thyme, or a combination of your favorites—fill your kitchen with a mouthwatering aroma.
Each slice offers a harmonious balance of the fragrant herbs, making it much more than just plain bread.
The subtle herbaceous flavor complements everything from a simple dinner spread to a gourmet sandwich.
The versatility of this bread is another reason to love it.
You can experiment with different herb combinations, add garlic or olives for an extra punch, and customize it to suit your tastes.
Whether you serve it alongside a hearty soup, as a side to your favorite pasta, or toasted with some jam, this bread is guaranteed to impress.
Even better, this recipe is incredibly easy to follow.
The process is straightforward, with minimal hands-on time, making it perfect for beginners who want to experience the joy of homemade bread without a steep learning curve.
Plus, you don’t need to be an expert to get the satisfying crackle of a well-baked crust.
In short, this Herb-Infused Dutch Oven Bread is an invitation to bring the comforting, wholesome pleasure of fresh-baked bread into your home with minimal fuss and maximum flavor.
You have not enough Humanizer words left. Upgrade your Surfer plan.
What You’ll Need
Essential Ingredients for Herb-Infused Dutch Oven Bread
To make this Herb-Infused Dutch Oven Bread, you’ll need just a few simple ingredients that you likely already have in your pantry. Here’s what you’ll need to gather:
- Flour: All-purpose flour works best for this recipe, offering the right structure and texture for a soft, airy loaf.
- Active dry yeast: This is the key ingredient to help the bread rise and develop its fluffy texture. Be sure to check the expiration date to ensure it’s active.
- Water: Use lukewarm water to activate the yeast properly.
- Salt: Enhances the flavor of the bread and balances the other ingredients.
- Olive oil: Adds moisture and richness to the bread, making it tender.
- Herbs: Fresh or dried herbs such as rosemary, thyme, oregano, or basil bring the wonderful flavor infusion to the bread. Feel free to mix and match according to your preference.
Optional Add-Ins
For an extra touch of flavor, you can add:
- Garlic: Fresh or roasted garlic adds a savory punch.
- Olives: Chopped green or black olives can create a Mediterranean twist.
- Cheese: A sprinkle of grated Parmesan or shredded mozzarella can elevate the flavor and texture.
Equipment You’ll Need
The right equipment is essential for achieving the perfect loaf of bread. Here’s what you’ll need:
- Dutch oven: A heavy, lidded pot that will help create the ideal baking environment for your bread.
- Mixing bowl: To combine all the ingredients and knead the dough.
- Measuring cups and spoons: To ensure accurate quantities of ingredients.
- Clean kitchen towel: For covering the dough during the rising process.
- Parchment paper: Helps with transferring the dough into the Dutch oven and prevents sticking.
Step-by-Step Guide to Making Herb-Infused Dutch Oven Bread
Step 1: Activate the Yeast
Start by activating your yeast. In a small bowl, combine warm water (around 110°F or 43°C) with a teaspoon of sugar.
Sprinkle the active dry yeast over the water and gently stir to dissolve.
Allow it to sit for about 5-10 minutes until it becomes frothy.
This indicates that the yeast is alive and ready to help your bread rise.
Step 2: Combine Dry Ingredients
In a large mixing bowl, whisk together flour and salt.
If you’re using dried herbs, now is the time to add them.
Incorporating the herbs into the dry ingredients ensures they’re evenly distributed throughout the dough.
If you prefer fresh herbs, you can chop them finely and add them later in the process.
Step 3: Add Wet Ingredients and Form the Dough
Once your yeast mixture is frothy, pour it into the bowl with your dry ingredients. Add the olive oil as well.
Stir the mixture with a wooden spoon until it starts to come together. The dough will be slightly sticky at this stage.
Turn the dough out onto a lightly floured surface and begin to knead it.
Knead the dough for about 8-10 minutes until it becomes smooth and elastic.
If the dough feels too sticky, sprinkle it with a little more flour, but avoid adding too much—just enough to make it manageable.
Step 4: Let the Dough Rise
Place the kneaded dough back into the bowl and cover it with a clean kitchen towel. Allow it to rise in a warm, draft-free area for about 1 to 1.5 hours, or until it has doubled in size.
If you’re in a hurry, you can place the bowl in a slightly warm oven (around 80°F or 27°C) to encourage quicker rising.
Step 5: Shape the Dough and Add More Herbs
Once your dough has risen, gently punch it down to release any air bubbles.
Turn it out onto a floured surface again and shape it into a round or oval loaf, depending on your preference.
If you’re using fresh herbs, now is the time to fold them into the dough.
Gently press them in, making sure the herbs are evenly distributed.
Step 6: Preheat the Dutch Oven
While your dough is resting for the second rise, preheat your Dutch oven.
Place the empty Dutch oven with its lid on into your oven and set the temperature to 450°F (230°C).
Preheating the pot helps to create the perfect baking environment for a crisp, golden crust.
Step 7: Bake the Herb-Infused Bread
Once the Dutch oven is preheated, carefully remove it from the oven.
Line the bottom of the pot with parchment paper for easy removal later.
Gently place your shaped dough into the pot, cover it with the lid, and return it to the oven.
Bake for about 30 minutes with the lid on, allowing the bread to steam and develop a crisp crust. After 30 minutes, remove the lid and bake for another 15-20 minutes until the bread is golden brown and sounds hollow when tapped on the bottom.
Step 8: Cool and Slice the Bread
Remove the bread from the Dutch oven and place it on a wire rack to cool for at least 30 minutes.
Cooling the bread before slicing ensures the interior sets properly.
Slice with a serrated knife, and get ready to enjoy the incredible aroma and flavor of your freshly baked Herb-Infused Dutch Oven Bread!
Tips for Success
Baking bread at home can seem daunting, but with a few key tips, you can ensure your Herb-Infused Dutch Oven Bread turns out perfect every time.
1. Use Fresh Yeast
Make sure your yeast is fresh and active. If the yeast doesn’t bubble or froth when mixed with warm water and sugar, it’s no longer good.
Always check the expiration date on your yeast package to ensure it will help your bread rise properly.
2. Don’t Overwork the Dough
When kneading the dough, be gentle.
Overworking it can result in a dense, tough loaf. Knead until the dough is smooth and elastic, but avoid excessive handling. The dough should be soft and a little tacky, but not too sticky.
3. Control the Rising Time
Allow the dough to rise fully, but don’t overproof it. If your dough rises too long, it may collapse during baking.
Keep an eye on it and make sure it has doubled in size before proceeding to the next step.
4. Keep Your Dutch Oven Preheated
Preheating the Dutch oven is crucial for a crispy, golden crust. Don’t skip this step!
The heat retained in the pot ensures that your bread gets a good oven spring and develops the perfect texture.
5. Experiment with Herbs
Feel free to get creative with the herb combinations.
Try adding a touch of garlic, oregano, or even a sprinkle of lemon zest for a unique twist.
Fresh herbs will give a more intense flavor, but dried herbs work wonderfully as well, especially when mixed into the dry ingredients.
Frequently Asked Questions
1. Can I make this bread without a Dutch oven?
Yes, you can still make this bread without a Dutch oven!
If you don’t have one, simply place the dough on a baking sheet lined with parchment paper and cover it with a large oven-safe pot or bowl to create a similar steaming effect.
Alternatively, you can bake it directly on a baking sheet.
2. How do I know if my bread is fully baked?
To check if your bread is fully baked, tap the bottom of the loaf. If it sounds hollow, it’s done.
You can also insert an instant-read thermometer into the center of the loaf; the bread is ready when it reaches an internal temperature of about 190°F (88°C).
3. Can I use whole wheat flour instead of all-purpose flour?
Absolutely! You can substitute whole wheat flour for part of the all-purpose flour to add a nutty flavor and denser texture.
However, you may need to adjust the water content slightly, as whole wheat flour absorbs more liquid than all-purpose flour.
4. Can I freeze the dough before baking?
Yes, you can freeze the dough before baking.
After the first rise, shape the dough and place it in a freezer-safe container or bag.
When you’re ready to bake, let the dough thaw in the fridge overnight, then proceed with the second rise and baking steps.
5. How should I store leftover bread?
Store any leftover bread in a paper bag or wrapped in a clean kitchen towel to keep the crust crispy.
For longer storage, you can freeze slices in an airtight container.
Reheat the slices in a toaster or oven for a fresh-baked taste.
Conclusion
Making Herb-Infused Dutch Oven Bread is a rewarding experience that fills your home with the comforting scent of freshly baked bread.
With just a few simple ingredients and the right technique, you can create a delicious, herb-packed loaf with a crispy exterior and soft, airy interior.
Whether you’re enjoying it with a warm bowl of soup or savoring it on its own, this bread is sure to become a favorite in your baking repertoire.
Don’t be afraid to get creative with the herbs and flavor combinations, and remember that practice makes perfect.
Once you master the art of Dutch oven bread, you’ll be baking loaves with confidence and delight. Happy baking!

Herb-Infused Dutch Oven Bread
Equipment
- 1 Dutch oven (5-6 quarts, with lid)
- 1 Mixing Bowl (Large)
- 1 wooden spoon or dough scraper
- 1 kitchen towel
- 1 parchment paper (optional for easy removal)
- 1 measuring cup (for water)
- 1 measuring spoons (for yeast and salt)
- 1 serrated knife (for slicing)
Ingredients
- 3 cups 360g All-purpose flour
- 1 ½ teaspoons Salt
- 2 teaspoons Active dry yeast
- 1 teaspoon Sugar
- 1 ¼ cups 300ml Warm water
- 2 tablespoons Olive oil
- 2 tablespoons or to taste Fresh rosemary or thyme (finely chopped) or 2 teaspoons dried
- Optional: 2 cloves of garlic minced or ½ cup Olives (chopped)
Instructions
Activate the Yeast
- In a small bowl, combine warm water (around 110°F or 43°C) and sugar. Sprinkle the active dry yeast over the water and let it sit for about 5-10 minutes, until the mixture is frothy.
Mix Dry Ingredients
- In a large mixing bowl, combine flour and salt. Stir in your desired herbs (fresh rosemary, thyme, or other herbs) and any optional add-ins, like minced garlic or chopped olives.
Combine Wet and Dry Ingredients
- Add the yeast mixture and olive oil to the dry ingredients. Stir with a wooden spoon until the dough comes together. If it feels too sticky, add a little more flour.
Knead the Dough
- Turn the dough onto a floured surface and knead for about 8-10 minutes, until the dough is smooth and elastic. You may add a bit more flour if the dough is too sticky.
First Rise
- Place the dough back into the bowl, cover it with a clean kitchen towel, and let it rise in a warm place for 1 to 1.5 hours, or until it doubles in size.
Shape the Dough
- Once risen, punch down the dough gently to release the air. Shape it into a round loaf or boule.
Preheat the Dutch Oven
- While the dough is resting, place your Dutch oven (with its lid) into the oven and preheat to 450°F (230°C) for at least 30 minutes.
Second Rise
- Let the dough rest on a parchment paper for another 20-30 minutes, allowing it to rise again while the Dutch oven heats.
Bake the Bread
- Once the Dutch oven is preheated, carefully remove it from the oven and place the dough inside, with the parchment paper for easy removal. Cover with the lid and bake for 30 minutes. After 30 minutes, remove the lid and bake for another 15-20 minutes, until the bread is golden brown and sounds hollow when tapped on the bottom.
Cool and Slice
- Allow the bread to cool on a wire rack for at least 30 minutes before slicing.This helps the bread set and prevents it from becoming too doughy inside.
Notes
Recipe Notes
- If you prefer to use fresh herbs, use about double the amount of dried herbs listed.
- If you don’t have a Dutch oven, a heavy pot with a lid or a baking stone can work, though the crust may not be as crispy.
- You can experiment with different combinations of herbs and even add shredded cheese for extra flavor.
- For a slightly different flavor, try using whole wheat flour instead of all-purpose flour. You may need to adjust the water content slightly for whole wheat.
