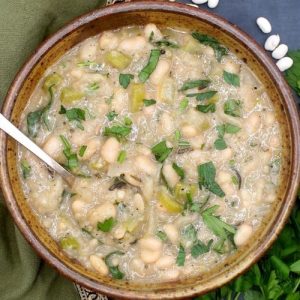
This creamy, garlicky white bean soup is a hearty plant-based delight, perfect for a quick and nourishing meal.
Packed with protein and fiber, it supports digestion and sustained energy, while olive oil and herbs provide heart-healthy fats and aromatic flavor.
Naturally gluten-free, soy-free, and low in saturated fat, this versatile soup is easy to prepare, ideal for weeknight dinners, and makes excellent leftovers for meal prep.
30-Minute Creamy Garlic White Bean Soup
Equipment
- 1 Dutch oven or large pot
- 1 Blender or immersion blender (optional)
Ingredients
- 1 tablespoon extra virgin olive oil
- 12 cloves garlic crushed or pressed (about 1 head)
- 2 bay leaves
- 1 medium onion thinly sliced
- 4 stalks celery finely chopped
- 1 –2 teaspoons dried rosemary or 1–2 tablespoons fresh, finely chopped
- 30 ounces white beans 2 cans, drained, or 1 cup dried, cooked with reserved cooking liquid
- Salt to taste
- Ground black pepper to taste
- Juice and zest of 1 lemon
- 2 tablespoons parsley chopped, for garnish
Instructions
- Prepare the Garlic and Oil: Begin by heating 1 tablespoon of extra virgin olive oil in a large Dutch oven or heavy-bottomed pot over medium-low heat. Once the oil is warm, add 12 crushed garlic cloves. Stir gently to coat the garlic in the oil. Cook slowly until the garlic becomes fragrant and turns a light golden blonde, which should take about 2–3 minutes. Be careful not to let the garlic brown, as this can create a bitter taste. This step infuses the base of your soup with a rich, aromatic flavor.
- Infuse with Bay Leaves: After the garlic has softened and released its aroma, add 2 bay leaves to the pot. Stir them gently into the garlic and oil mixture. The bay leaves will slowly release their subtle, earthy aroma, adding depth and warmth to the soup. Let them sit in the oil for about 30 seconds before moving to the next step, allowing their flavor to begin blending with the garlic.
- Sauté Onions and Celery: Add 1 medium thinly sliced onion and 4 finely chopped celery stalks to the pot. Sprinkle generously with salt and ground black pepper to help draw out their natural moisture. Stir continuously and cook over medium-low heat for 3–4 minutes, or until the onions become soft and translucent. Avoid browning; the goal is a gentle sauté that creates a delicate, flavorful base. The onions and celery will soften and combine with the garlic and bay leaves to create a savory foundation for the soup.
- Add Aromatic Rosemary: Sprinkle in 1–2 teaspoons dried rosemary (or 1–2 tablespoons fresh, chopped). Stir thoroughly so the rosemary evenly distributes among the onions and celery. Rosemary adds a fragrant, slightly piney flavor that complements the beans and garlic beautifully. Allow the mixture to cook for 30 seconds to 1 minute to let the herb’s flavor bloom before adding the beans.
- Incorporate the White Beans: Add 30 ounces of drained white beans (or your cooked beans with 2 cups of reserved cooking liquid) to the pot. Pour in 2 cups of vegetable stock or water, stirring well to combine all the ingredients. Raise the heat slightly to bring the soup to a gentle boil. Once boiling, reduce the heat to a simmer. Let the soup cook for about 10 minutes, allowing the beans to soak up the flavors of the garlic, rosemary, onions, and celery.
- Blend for Creaminess (Optional): For a smooth and creamy texture, carefully ladle 1 cup of the soup into a blender or use an immersion blender directly in the pot. Blend until smooth and then return the puree to the pot, stirring to combine. If you prefer a more rustic texture, simply mash a few beans with the back of a ladle in the pot. This step is optional but adds a luxurious creaminess without using dairy.
- Adjust Consistency: Check the thickness of your soup. If it seems too thick, gradually stir in up to 1 additional cup of water or vegetable stock until your desired consistency is reached. Whether you like a thicker stew-like soup or a lighter, more brothy version, this step lets you customize the texture to your preference.
- Final Seasoning and Flavor Boost: Taste your soup and adjust the seasoning as needed with salt and freshly ground black pepper. Then stir in the juice and zest of 1 lemon. The lemon brightens the flavors and balances the richness of the beans and garlic. Give everything a final stir to evenly distribute the flavors.
- Garnish and Serve: Ladle the soup into bowls and sprinkle 2 tablespoons of freshly chopped parsley over the top for a fresh, vibrant finish. Serve hot, accompanied by crusty bread or a light salad for a complete, nourishing meal. This soup is satisfying on its own and perfect for a quick dinner, lunch, or as a make-ahead meal for the week.
Notes
- For best flavor, lightly crush the garlic before cooking to release more aroma.
- If using dried beans, soak overnight and cook until tender; reserve some cooking liquid to enhance the soup’s richness.
- Adjust the rosemary amount to taste—fresh rosemary is more pungent, so add gradually.
- The soup can be made smooth with a blender or left slightly chunky for a rustic texture.
- Lemon juice and zest at the end brighten the flavors and balance the richness of beans and olive oil.
- Use low-sodium vegetable stock to control salt levels.
Chef’s Secrets for Maximum Flavor
To elevate this simple white bean soup, start by cooking garlic slowly over medium-low heat; this prevents bitterness and brings out a sweet, nutty aroma.
Toasting the dried rosemary briefly in the garlic oil releases essential oils, enhancing the soup’s herbal notes.
For a creamier texture without dairy, puree a portion of the soup or mash some beans directly in the pot.
Adding lemon juice and zest at the very end preserves the fresh, tangy brightness, creating a perfectly balanced bowl every time.
Serving Suggestions for Every Meal
This soup is versatile and pairs beautifully with a variety of accompaniments.
Serve it with a slice of toasted sourdough or a crisp green salad for a light, satisfying meal.
For heartier options, add roasted vegetables or whole-grain croutons on top.
Garnishing with fresh parsley or a drizzle of extra virgin olive oil not only adds color but also enhances the flavor.
This soup also works well as a starter for dinner parties or as a wholesome lunch packed in a thermos.
Storage Tips for Freshness
Store leftover soup in an airtight container in the refrigerator for up to 4–5 days.
To maintain a creamy texture, stir well before reheating and add a splash of water or vegetable stock if it has thickened.
For longer storage, freeze the soup in portions for up to 3 months.
Thaw overnight in the refrigerator and reheat gently on the stovetop.
Avoid boiling after freezing to preserve the flavor and texture of the beans.
Frequently Asked Questions
1. Can I use dried beans instead of canned?
Yes! Soak 1 cup of dried white beans overnight, then cook until tender.
Reserve some of the cooking liquid to use in place of water or stock—it adds extra flavor.
2. Is this soup vegan and gluten-free?
Absolutely. The recipe uses only plant-based ingredients, olive oil, vegetables, herbs, and beans, making it vegan, gluten-free, soy-free, and dairy-free.
3. How can I make the soup creamier?
Blend a portion of the soup using an immersion blender or a standard blender, or mash a few beans directly in the pot.
This creates a smooth, velvety texture without adding cream.
4. Can I make this soup ahead of time?
Yes! It tastes even better the next day as the flavors meld.
Store in the refrigerator for up to 5 days or freeze in individual portions for quick future meals.
5. What can I add to enhance flavor or variety?
Try adding a pinch of smoked paprika, a dash of cumin, or sautéed mushrooms for depth.
A swirl of tahini or a sprinkle of chili flakes also adds a unique, delicious twist.
