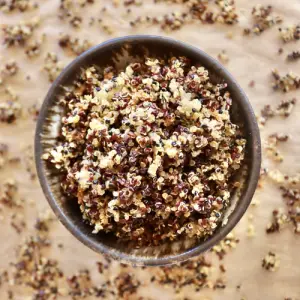
Crispy quinoa is a simple, wholesome recipe that transforms nutrient-packed quinoa into a crunchy, golden snack or topping.
High in plant-based protein, fiber, and essential minerals, it’s a heart-healthy option with virtually no saturated fat.
Naturally gluten-free and oil-free, this versatile recipe adds texture and nutrition to salads, soups, or yogurt.
Quick to prepare and easy to store, it’s an excellent choice for meal prep and everyday cooking.
Healthy Crispy Quinoa
Equipment
- 1 sheet pan
- 1 piece parchment paper
- 1 small saucepan with lid
- 1 Spatula
Ingredients
- 1 cup water
- ½ cup quinoa dry (any color or mixed)
Instructions
- Preheat and Prepare the Baking Sheet: Begin by setting your oven to 375°F (190°C) so it’s hot and ready when you need it. While the oven warms up, line a standard sheet pan with parchment paper. This step is important because parchment prevents the quinoa from sticking during roasting, ensures even cooking, and makes cleanup effortless. Set the prepared pan aside until the quinoa is ready to be spread.
- Cook the Quinoa Until Tender: In a small saucepan, combine ½ cup of dry quinoa with 1 cup of water. Place the pot on the stove over high heat and bring the mixture to a steady boil. Once boiling, reduce the heat to low, cover the pan with a tight-fitting lid, and allow the quinoa to simmer gently. Cook for about 15 minutes, or until all the water has been fully absorbed and the quinoa looks fluffy with little tails (germ rings) visible on each grain. This cooking step ensures the quinoa is tender and ready for roasting.
- Spread Out and Air-Dry: After cooking, carefully transfer the warm quinoa to your prepared parchment-lined baking sheet. Using a spatula, spread it out as evenly and thinly as possible. Try to create a single, flat layer so the quinoa crisps up evenly during roasting. Don’t worry if some grains clump together—these small clusters will turn into extra crunchy bites. Allow the quinoa to sit on the counter and air-dry for about 10 minutes before placing it in the oven. This short drying time helps remove excess steam and prevents sogginess.
- Roast Until Golden and Crisp: Place the baking sheet on the center rack of your preheated oven. Roast the quinoa for about 35 minutes, or until it turns lightly golden and becomes crisp. The exact time may vary depending on your oven and the color of your quinoa. If using red or black quinoa, keep in mind that it won’t show a golden color as clearly as white quinoa. To check for doneness, remove a small spoonful from the pan, let it cool for a minute, and taste it—it should be completely crunchy with no chewiness left.
- Cool Thoroughly Before Storing: Once the quinoa is perfectly crisp, remove the sheet pan from the oven and place it on a heat-safe surface. Allow the quinoa to cool directly on the pan for about 10 minutes. Cooling is crucial because it allows the quinoa to firm up and reach maximum crunch. After cooling, transfer the crispy quinoa into a clean, airtight container or jar with a lid. Store at room temperature for up to 24 hours to maintain its crunchiness.
Notes
- Use any quinoa variety (white, red, black, or tri-color). White quinoa will roast to a more visible golden shade, while darker quinoa varieties may require a taste test to check crispness.
- The air-dry step helps remove extra steam and is essential for crunch—don’t skip it.
- Spread the quinoa in a thin, even layer to ensure consistent crisping.
- Crispy quinoa is best enjoyed within 24 hours for maximum crunch.
- For extra flavor, you can season the quinoa with spices or herbs after roasting.
Chef’s Secrets for Perfect Crispiness
The key to achieving perfectly crunchy quinoa lies in moisture management.
Cooking the quinoa until all the water is absorbed ensures that the grains start drying immediately in the oven.
Spreading the quinoa out in a thin, even layer prevents steam pockets and allows heat to circulate freely, creating consistent crispness.
If your quinoa is clumped, don’t worry—these clusters often become delightful crunchy bites.
Another secret is to let the quinoa cool completely before storing, as this prevents trapped steam from softening the texture.
Finally, a quick taste test during roasting is the most reliable way to confirm doneness.
Serving Suggestions for Every Occasion
Crispy quinoa is one of those rare kitchen gems that can be used in countless ways.
As a topping, it adds irresistible crunch to salads, grain bowls, soups, or roasted vegetables, instantly elevating the dish.
You can sprinkle it over yogurt, smoothie bowls, or oatmeal for a healthy breakfast alternative to sugary granola.
It also works as a snack on its own—just enjoy it by the handful or mix it into homemade trail mix.
For a creative twist, try using it as a coating for baked chicken or tofu, or even as a crunchy garnish for avocado toast.
Storage Tips for Long-Lasting Freshness
While crispy quinoa is at its peak within the first 24 hours, a few tricks can extend its crunch.
Always allow it to cool completely before transferring it to an airtight container, as even a small amount of trapped steam can soften the texture.
Store it at room temperature away from direct sunlight or heat sources.
If your quinoa loses some of its crunch over time, simply spread it out on a baking sheet and re-toast it at 350°F for 5–7 minutes to revive its texture.
For meal prep enthusiasts, make smaller batches to ensure maximum freshness every time.
Frequently Asked Questions
1. Can I use pre-cooked or leftover quinoa?
Yes! If you already have cooked quinoa, you can spread it directly onto a parchment-lined baking sheet, allow it to air-dry, and roast it as instructed.
Just note that it may take slightly longer to crisp up.
2. Is crispy quinoa the same as puffed quinoa?
No, they’re different. Crispy quinoa is roasted in the oven until crunchy, while puffed quinoa is made by quickly heating raw quinoa under high pressure or heat, similar to puffed rice.
Both are delicious but offer different textures.
3. Can I season the quinoa before roasting?
It’s best to roast the quinoa plain first to ensure maximum crunch.
Once it’s out of the oven and cooled, you can toss it with spices, herbs, or even a sprinkle of sea salt for extra flavor.
4. How can I make this recipe oil-free but still flavorful?
This recipe is naturally oil-free, which keeps it light and healthy.
For extra flavor without oil, add seasoned spices, nutritional yeast, or citrus zest after roasting. This way, the flavor clings to the warm quinoa without softening it.
5. What dishes benefit most from crispy quinoa?
Crispy quinoa is incredibly versatile. It shines on salads, Buddha bowls, soups, and roasted veggies, but it’s also amazing as a granola replacement in breakfast dishes.
For a savory crunch, sprinkle it over pasta, stir-fries, or dips to add texture.
