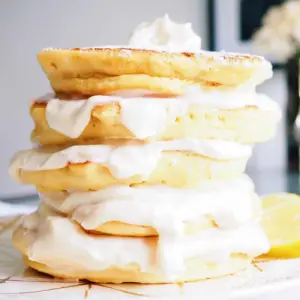
Start your morning with these light and fluffy lemon pancakes, a quick and satisfying breakfast that’s ready in just 30 minutes.
Bursting with fresh citrus flavor and a subtle sweetness, this recipe provides a balance of protein from eggs and good fats from butter, while remaining easily adaptable for dairy-free diets.
Perfect for a wholesome everyday meal or weekend brunch.
Creamy Lemon Pancakes
Equipment
- 1 large mixing bowl
- 1 large non-stick pan
- Measuring Cups and Spoons
- Whisk or fork
- Fine sieve or sifter
- Spatula
- Paper towels
Ingredients
For the Pancakes:
- 1 ½ cups all-purpose flour
- 3 ½ teaspoons baking powder
- 1 teaspoon salt
- 1 tablespoon granulated sugar
- 1 ¼ cups milk or dairy-free milk alternative
- 1 large egg
- 3 tablespoons melted butter or melted vegan butter/neutral oil
- 1 tablespoon fresh lemon zest
- 1 teaspoon butter for greasing the pan, or sub with vegan butter/neutral oil
Optional Lemon Cream:
- ½ cup cream cheese or vegan cream cheese
- ½ tablespoon fresh lemon zest
- 1 tablespoon lemon juice
- 3 tablespoons icing sugar
Instructions
- Prepare the Dry Ingredients: Start by gathering all your dry ingredients. In a large mixing bowl, sift together 1 ½ cups of all-purpose flour, 3 ½ teaspoons of baking powder, 1 teaspoon of salt, and 1 tablespoon of granulated sugar. Sifting ensures there are no lumps and incorporates air, giving your pancakes a light, fluffy texture. Once sifted, gently mix the ingredients with a whisk to evenly distribute the baking powder and salt.
- Create a Well for the Wet Ingredients: Make a small well in the center of your dry mixture. This is where you will pour your wet ingredients. Creating a well helps combine the batter gently without overmixing, which is key for tender pancakes.
- Add the Wet Ingredients: Into the well, add 1 ¼ cups of milk (or dairy-free alternative), 1 large egg, 3 tablespoons of melted butter (or vegan butter/neutral oil), and 1 tablespoon of fresh lemon zest. The lemon zest adds a fresh citrus aroma and flavor that makes these pancakes stand out.
- Gently Whisk the Batter: Using a whisk or a fork, gently combine the wet and dry ingredients. Mix just until incorporated—small lumps are okay. Overmixing can develop gluten in the flour, resulting in dense, chewy pancakes rather than light and airy ones. Aim for a smooth, slightly thick but pourable batter.
- Prepare the Pan for Cooking: Heat a large non-stick pan over medium heat. Lightly grease the pan with a small amount of butter or a neutral oil applied with a paper towel. Ensuring the pan is evenly greased prevents sticking and helps achieve a golden-brown exterior.
- Pour the Batter into the Pan: Once the pan is hot, scoop approximately ¼ cup of batter for each pancake and pour it gently into the center of the pan. Use the back of a spoon to spread it slightly into a round shape if needed. Do not overcrowd the pan; cook in batches if necessary.
- Cook the First Side: Cook the pancake on medium heat until bubbles start forming all over the surface and the edges begin to look set. This usually takes about 2–3 minutes. The bubbles indicate that the inside is cooking and the pancake is ready to flip.
- Flip the Pancake Carefully: Using a spatula, gently lift the pancake and flip it over. Cook for another 1–2 minutes on the other side until golden brown. Check for doneness by inserting a clean toothpick into the center; it should come out clean. Adjust the heat if the pancakes brown too quickly.
- Keep Pancakes Warm (Optional): If cooking multiple batches, keep finished pancakes warm by placing them on a plate covered loosely with foil. This prevents them from cooling too quickly while you finish the rest.
- Prepare the Optional Lemon Cream: In a separate bowl, combine ½ cup cream cheese (or vegan cream cheese), ½ tablespoon lemon zest, 1 tablespoon lemon juice, and 3 tablespoons icing sugar. Whisk until smooth and creamy. This optional topping adds a tangy sweetness that complements the pancakes beautifully.
- Serve the Pancakes: Stack the pancakes on a plate and, if desired, spoon over the lemon cream. You can also add fresh fruit, a drizzle of maple syrup, or a dusting of powdered sugar for extra flair. Serve immediately while warm for the best texture and flavor.
- Enjoy and Store Leftovers: Enjoy your fluffy lemon pancakes right away! Leftovers can be stored in an airtight container in the fridge for up to 2 days or frozen for longer storage. Reheat gently in a pan or toaster for the best results.
Notes
- Use fresh lemon zest for bright, aromatic citrus flavor; pre-packaged zest may lack freshness.
- Avoid overmixing the batter; small lumps are fine and help keep pancakes tender.
- Adjust batter consistency with a splash of milk if it feels too thick.
- Dairy-free alternatives (milk or butter) may cook slightly faster—watch the pan carefully.
- Rest the batter 5–10 minutes before cooking to allow baking powder to activate.
- Medium heat works best for evenly cooked, golden-brown pancakes.
- Minimal butter or oil is sufficient for greasing to prevent sticking.
Chef’s Secrets: Insider Pancake Tips
For the fluffiest pancakes, always sift your dry ingredients to incorporate air and remove clumps.
Let the batter rest for 5–10 minutes before cooking—this allows the baking powder to activate and gives a lighter texture.
When cooking, medium heat is ideal; too high, and the pancakes may brown outside while remaining raw inside.
Use a non-stick pan or well-seasoned skillet and minimal butter to prevent sticking.
For extra flavor, a tiny pinch of vanilla extract can elevate the taste without overpowering the lemon.
Serving Suggestions: Creative Presentation Ideas
Serve these pancakes stacked with a dollop of lemon cream, a drizzle of maple syrup, or a sprinkling of powdered sugar.
Fresh berries such as blueberries, raspberries, or sliced strawberries complement the citrus flavor beautifully.
For a heartier breakfast, pair with a side of Greek yogurt or scrambled eggs.
You can also make a dessert-style version by adding whipped cream or a handful of toasted nuts for texture and richness.
Storage Tips: Keep Pancakes Fresh Longer
Store leftover pancakes in an airtight container in the refrigerator for up to 2 days.
To keep them from sticking together, place parchment paper between each pancake.
For longer storage, pancakes freeze well for up to 1 month; simply stack them with parchment sheets and place in a freezer-safe bag.
Reheat in a skillet over low heat or in a toaster to maintain a soft, fluffy texture.
Avoid microwaving directly, as it can make pancakes rubbery.
Frequently Asked Questions
1. Can I make these pancakes dairy-free?
Absolutely! Replace milk with any plant-based milk and butter with a neutral oil or vegan butter.
The pancakes will remain fluffy and flavorful without dairy.
2. How can I make pancakes fluffier?
Sift your flour and baking powder, and avoid overmixing the batter.
Letting the batter rest for a few minutes before cooking also helps activate the leavening agents for a lighter texture.
3. Can I prepare the batter in advance?
Yes, you can mix the batter and store it in the refrigerator for up to 24 hours. Give it a gentle stir before cooking, as some separation may occur.
4. What’s the best way to prevent pancakes from sticking?
Use a non-stick pan or a well-seasoned skillet and lightly grease it with butter or oil.
Make sure the pan is preheated to medium heat before adding the batter.
5. Can I make these pancakes ahead for meal prep?
Definitely! Cook the pancakes in advance and store them in the fridge or freezer.
Reheat gently in a skillet or toaster for a quick, ready-to-eat breakfast during the week.
