All products are selected by our editorial team for quality. If you buy through our links, we may earn a small commission at no extra cost to you.
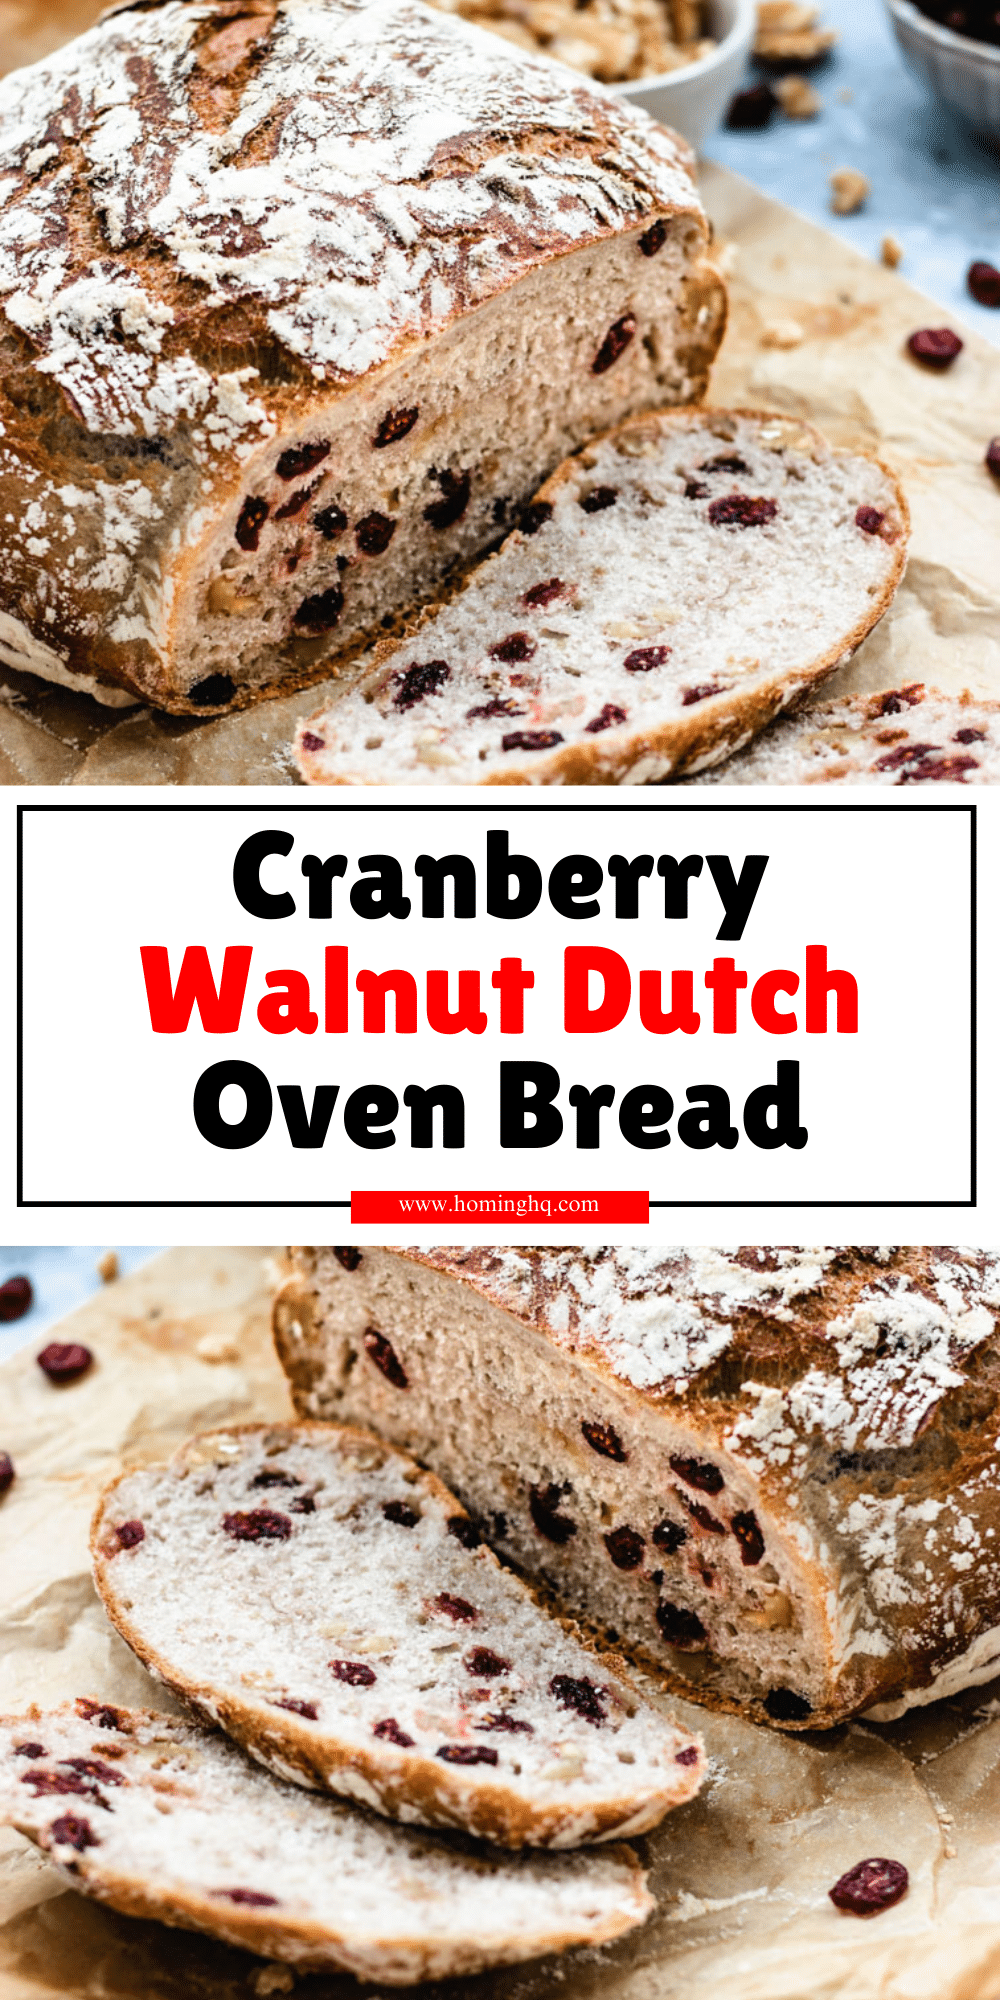
Cranberry Walnut Dutch Oven Bread is the kind of recipe that turns an ordinary baking day into something extraordinary.
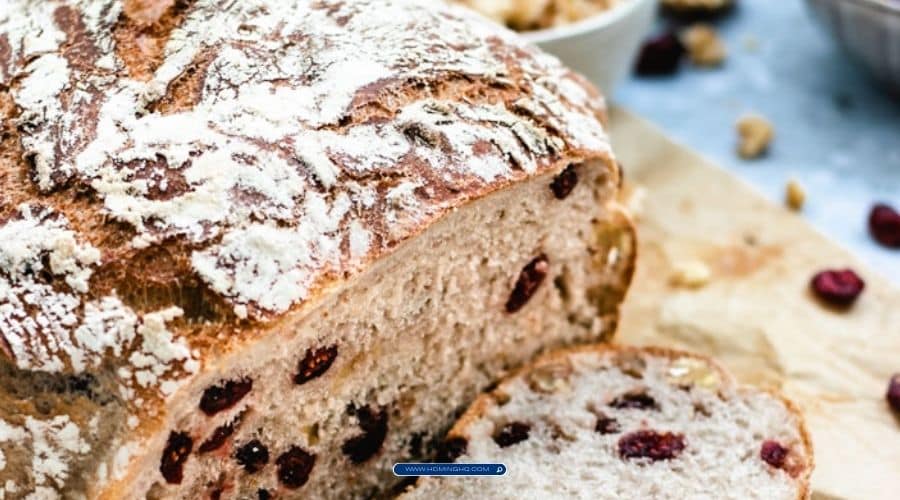
This rustic, artisan-style bread combines the tangy sweetness of dried cranberries with the nutty crunch of toasted walnuts, creating a loaf that is both hearty and full of flavor.
But what truly sets this recipe apart is the method: baking in a Dutch oven.
This simple technique results in a beautifully crisp crust and a soft, airy interior that will have your friends and family asking for seconds.
Whether you’re planning a cozy dinner at home or looking for a delicious gift idea, this bread is perfect for any occasion.
In this blog post, we’ll take you through the process of making this flavorful bread from start to finish.
You’ll learn how to master the Dutch oven technique, which helps to lock in moisture and creates a professional-quality loaf in the comfort of your own kitchen.
Why Bake Bread in a Dutch Oven?
Baking bread in a Dutch oven is an age-old method that’s become popular again for a reason.
This heavy, cast-iron pot is ideal for baking because it creates the perfect environment for your dough to rise and form a crisp, golden crust.
When you place the dough into the preheated Dutch oven, it traps heat and moisture, mimicking the conditions of a professional steam oven.
This process encourages a superior rise and promotes a beautiful, crackly crust.
The steam that builds up inside the pot during baking keeps the bread moist on the inside, while the intense heat helps the exterior develop a rich, golden-brown finish.
It’s this combination of crisp exterior and soft, airy interior that makes bread baked in a Dutch oven so irresistible.
For home bakers, the Dutch oven method also simplifies the baking process.
It eliminates the need for complicated techniques like steam injection or carefully monitoring oven temperatures.
With just a few simple steps, you’ll be able to bake a perfect loaf every time.
Ingredients for Cranberry Walnut Dutch Oven Bread
Making Cranberry Walnut Dutch Oven Bread requires just a few basic ingredients, but the combination of flavors is anything but basic.
Here’s everything you’ll need to get started:
Dry Ingredients
- Flour: Bread flour works best for this recipe, giving the bread structure and a chewy texture.
- Salt: Adds flavor and helps control yeast activity.
- Sugar: A small amount of sugar helps to activate the yeast and adds a slight sweetness that balances the tangy cranberries.
Wet Ingredients
- Active Dry Yeast: The key to making the dough rise and giving the bread its light, airy texture.
- Water: Warm water helps to activate the yeast and create the ideal dough consistency.
Mix-ins
- Dried Cranberries: The star ingredient, adding bursts of tartness and a chewy texture that complements the walnuts.
- Walnuts: Coarsely chopped walnuts bring a satisfying crunch and earthy flavor to every bite.
Optional Ingredients
- Honey: A touch of honey can enhance the sweetness of the cranberries and give the bread a lovely golden color.
- Olive Oil: For a slightly richer flavor, adding olive oil to the dough will contribute a subtle depth to the overall taste.
Each of these ingredients plays a vital role in the flavor and texture of the bread, ensuring a balanced, delicious result.
Additionally, feel free to make substitutions based on dietary preferences—such as using gluten-free flour or swapping in maple syrup for honey—while still achieving a tasty loaf!
You have not enough Humanizer words left. Upgrade your Surfer plan.
Step-by-Step Instructions
Making Cranberry Walnut Dutch Oven Bread is a straightforward process, but each step plays an important role in creating the perfect loaf.
Follow this guide, and you’ll be enjoying a beautifully baked, aromatic loaf in no time.
1. Activate the Yeast
Start by activating the yeast to ensure it’s active and ready to help the dough rise.
In a small bowl, combine the warm water and sugar.
Stir to dissolve the sugar, then sprinkle the active dry yeast over the surface of the water. Let it sit for about 5–10 minutes.
The yeast should begin to foam and bubble, indicating that it’s alive and ready to work its magic on your dough.
2. Mixing the Dough
In a large mixing bowl, combine the bread flour and salt.
Once the yeast mixture is bubbly, pour it into the flour mixture and stir to combine.
Add the honey and olive oil (if using), and stir until everything is well incorporated.
The dough will be sticky at first, but don’t worry—that’s exactly what you want.
Now, add the dried cranberries and chopped walnuts.
Gently fold them into the dough, ensuring they’re evenly distributed.
At this point, you can use your hands or a dough hook if you have a stand mixer.
3. First Rise
Once the dough is mixed, transfer it to a lightly oiled bowl.
Cover the bowl with a clean kitchen towel or plastic wrap and let it rise in a warm place for about 1–2 hours.
The dough should double in size.
If your kitchen is a bit chilly, placing the bowl in an oven that’s been warmed slightly (to about 80°F) can help speed up the process.
4. Shaping the Dough
After the first rise, gently punch down the dough to release the air bubbles. Transfer it to a floured surface and shape it into a round boule.
To do this, fold the edges of the dough toward the center and pinch them together.
Then, turn the dough seam-side down and gently tuck the sides under, shaping it into a tight ball.
Be careful not to overwork the dough, as this can affect its texture.
5. Second Rise
Place the shaped dough onto a piece of parchment paper and cover it again with a towel.
Let it rest for another 45 minutes to 1 hour, allowing it to rise again.
This second rise helps the dough become airy and soft, ensuring a light texture once baked.
6. Baking in the Dutch Oven
While the dough is rising, preheat your Dutch oven.
Place the empty Dutch oven (with its lid) in your oven and set the temperature to 450°F (230°C).
Let the Dutch oven heat up for at least 30 minutes.
Once the dough has finished its second rise, carefully remove the hot Dutch oven from the oven.
Using the parchment paper, transfer the dough into the pot.
Be cautious, as the Dutch oven will be extremely hot. Cover with the lid and return it to the oven.
Bake the bread with the lid on for 30 minutes.
After 30 minutes, remove the lid and bake for another 15–20 minutes to allow the bread to develop a rich, golden-brown crust.
To check for doneness, tap the bottom of the loaf—if it sounds hollow, it’s ready.
If you have a thermometer, the internal temperature should be around 200°F (93°C).
7. Cooling and Slicing
Once baked, carefully remove the bread from the Dutch oven and transfer it to a wire rack to cool.
Allow it to cool for at least 30 minutes before slicing.
This resting time helps the bread set and makes slicing easier.
Once cooled, slice the bread into thick wedges and enjoy it with butter, cheese, or just as is. Its slightly tangy, nutty flavor will be a delightful addition to any meal.
Tips and Tricks for Perfect Cranberry Walnut Dutch Oven Bread
Achieving the perfect loaf of Cranberry Walnut Dutch Oven Bread is easy once you know a few helpful tips and tricks to ensure success at every stage of the process.
Don’t Skip the Rest Periods
Patience is key when it comes to bread making.
The dough needs time to rise properly, so don’t rush the proofing process.
Allowing the dough to rise for the full 1–2 hours during the first rise and giving it enough time to rise again after shaping will ensure a light, fluffy texture.
Perfecting the Texture of the Dough
If your dough feels too sticky to handle, add a little more flour, a tablespoon at a time.
However, be careful not to overdo it, as adding too much flour can result in a dense loaf.
The dough should be slightly tacky but not unmanageable.
Incorporating Cranberries and Walnuts
To prevent the cranberries and walnuts from sinking to the bottom of the loaf, fold them in gently after the initial mixing phase.
You can also lightly coat the dried cranberries and walnuts in a little flour before adding them to the dough.
This can help distribute them more evenly throughout the bread.
Achieving the Perfect Crust
For an extra-crusty loaf, place a few ice cubes or a small pan of water in the bottom of your oven when you first place the Dutch oven inside.
This will create steam, contributing to a crispy, golden crust.
However, this step is optional, as the Dutch oven method already creates great results without it.
Storage and Freshness
To store your bread, let it cool completely, then wrap it in parchment paper or a clean kitchen towel.
This will help retain moisture while preventing the crust from becoming too soft.
The bread can stay fresh at room temperature for 2–3 days, or you can freeze it for longer storage.
Freezing and Reheating
To freeze the bread, slice it first and place the slices in an airtight bag.
When you’re ready to enjoy it, simply toast the slices or heat them in a warm oven for a few minutes to bring back that fresh-baked taste.
By following these tips and paying attention to each step, you’ll be able to bake a loaf of Cranberry Walnut Dutch Oven Bread that’s both beautiful and delicious!
Frequently Asked Questions (FAQs)
1. Can I use fresh cranberries instead of dried?
While fresh cranberries can technically be used, dried cranberries are preferred for this recipe.
Fresh cranberries contain a lot of moisture, which could affect the dough’s texture.
If you do use fresh cranberries, make sure to chop them into smaller pieces and reduce the amount of water in the dough to account for the extra moisture.
2. What if I don’t have a Dutch oven?
If you don’t have a Dutch oven, don’t worry!
You can still bake this bread in a regular oven-safe pot with a lid, or even on a baking sheet.
To mimic the effects of a Dutch oven, you can place a shallow pan of water at the bottom of the oven to create steam, which helps develop the bread’s crispy crust.
Alternatively, you can cover the dough with aluminum foil for part of the baking time to trap moisture.
3. How can I make this bread gluten-free?
To make this bread gluten-free, substitute the bread flour with a gluten-free flour blend that includes xanthan gum (or add xanthan gum separately).
The texture may be slightly different, but the bread will still have the delicious cranberry and walnut flavors.
Be sure to follow any additional instructions provided with your gluten-free flour for best results.
4. Can I double the recipe for larger gatherings?
Yes, you can easily double the recipe if you’re baking for a larger group. Simply double all of the ingredients and divide the dough into two separate loaves.
Follow the same instructions, but be sure to give each loaf enough space to rise properly in your Dutch oven.
You may need to bake them one at a time, depending on the size of your Dutch oven.
5. How do I know when the bread is fully baked?
To check if your bread is done, tap the bottom of the loaf—if it sounds hollow, it’s ready.
You can also use a kitchen thermometer to measure the internal temperature; the bread is done when it reaches around 200°F (93°C).
If you don’t have a thermometer, rely on the golden color of the crust and the hollow sound when tapping.
Conclusion
Cranberry Walnut Dutch Oven Bread is a perfect balance of sweet, tart, and nutty flavors, all wrapped up in a beautifully crispy, rustic crust.
Baking in a Dutch oven guarantees that your bread will have the ideal texture—light, airy, and tender on the inside, with a crunchy, golden exterior.
Whether you’re a seasoned baker or a beginner, this recipe offers a rewarding experience and results in a loaf that will impress everyone at your table.
With simple ingredients and a few straightforward steps, you can make this bread from scratch and enjoy the satisfaction of pulling a perfect loaf out of your oven.
So, grab your Dutch oven, gather your ingredients, and get ready to bake a loaf of Cranberry Walnut Dutch Oven Bread that’s sure to become a new favorite in your home.
Happy baking, and don’t forget to share your beautiful loaves with us!
Cranberry Walnut Dutch Oven Bread
Equipment
- Dutch oven (1, 5–6 quart size)
- Mixing bowl (1, large)
- Measuring spoons (1 set)
- Measuring cups (1 set)
- Kitchen towel (1, clean)
- Parchment paper (1 sheet)
- Wire rack (1, for cooling)
- Small bowl (1, for proofing yeast)
Ingredients
- 3 ½ cups 440g bread flour
- 1 ½ tsp 8g salt
- 1 tbsp 12g sugar
- 1 ½ tsp 7g active dry yeast
- 1 ¼ cups 300ml warm water
- ½ cup 80g dried cranberries
- ½ cup 60g walnuts, chopped
- 1 tbsp 15g honey (optional)
- 1 tbsp 15g olive oil (optional)
Instructions
- Activate the yeast: In a small bowl, combine the warm water and sugar. Sprinkle the yeast over the surface, stir lightly, and let it sit for 5–10 minutes until it becomes bubbly and frothy.
- Mix the dough: In a large mixing bowl, combine the bread flour and salt. Add the activated yeast mixture to the flour and stir until the dough comes together. Add the honey and olive oil (if using) and mix well.
- Add cranberries and walnuts: Gently fold in the dried cranberries and chopped walnuts, making sure they’re evenly distributed throughout the dough.
- First rise: Cover the dough with a clean kitchen towel or plastic wrap. Let it rise in a warm place for 1–2 hours, or until it has doubled in size.
- Shape the dough: Punch down the dough to release the air. Transfer it to a floured surface, shape it into a round boule by folding the edges in and pinching the seams together. Tuck the dough under to form a tight ball.
- Second rise: Place the shaped dough on a piece of parchment paper, cover it with a towel, and let it rise for another 45 minutes to 1 hour.
- Preheat the Dutch oven: While the dough rises, preheat your oven to 450°F (230°C). Place your Dutch oven with the lid inside the oven to heat up for 30 minutes.
- Bake the bread: Once the dough has finished rising, carefully remove the hot Dutch oven from the oven. Using the parchment paper, transfer the dough into the pot.Cover with the lid and bake for 30 minutes. After 30 minutes, remove the lid and continue baking for another 15–20 minutes, or until the bread is golden-brown and sounds hollow when tapped on the bottom.
- Cool the bread: Remove the bread from the Dutch oven and let it cool on a wire rack for at least 30 minutes before slicing.
Notes
Recipe Notes
- Texture tips: If your dough is too sticky, add flour a little at a time, but be cautious not to add too much, as it can result in a denser loaf.
- Cranberry alternatives: If fresh cranberries are available, they can be used in place of dried cranberries, though it’s important to note that fresh cranberries have more moisture and may change the texture of the dough.
- Storage: This bread can be stored at room temperature, wrapped in parchment paper or a kitchen towel, for up to 3 days. For longer storage, freeze slices and reheat in a toaster or warm oven.
- Dutch oven alternatives: If you don’t have a Dutch oven, you can use an oven-safe pot with a lid or bake the bread on a baking sheet covered with foil to mimic the steam baking effect.
