All products are selected by our editorial team for quality. If you buy through our links, we may earn a small commission at no extra cost to you.
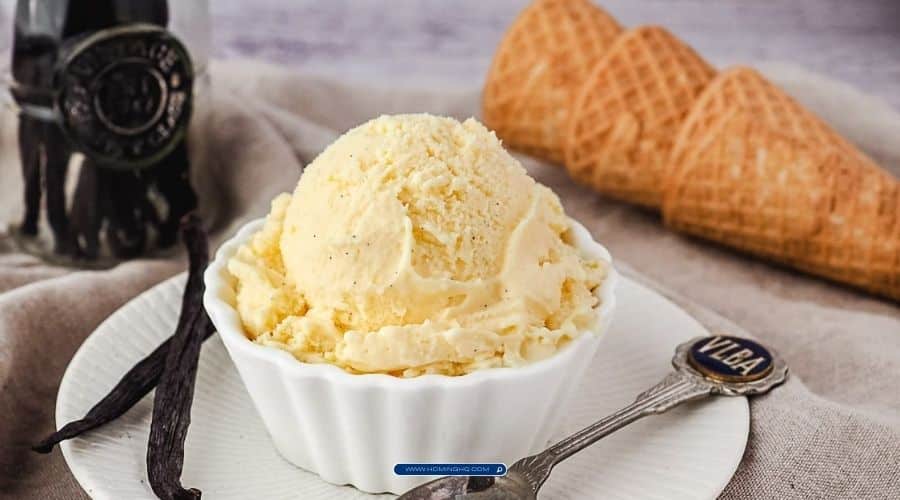
Classic Vanilla Bean Ice Cream is a timeless treat that evokes nostalgia with every creamy bite.
Unlike store-bought versions, homemade vanilla bean ice cream is rich, velvety, and packed with the pure flavor of real vanilla beans.
This recipe is perfect for anyone who craves a premium ice cream experience without the added preservatives or artificial flavors.
Whether you’re enjoying it on its own, paired with a warm dessert, or simply serving it in a cone, this ice cream will undoubtedly elevate any occasion.
With just a few ingredients and a bit of patience, you’ll have the perfect homemade vanilla bean ice cream that will impress family and friends alike.
Ingredients for Classic Vanilla Bean Ice Cream
To make the best classic vanilla bean ice cream, you only need a handful of high-quality ingredients. Here’s a list of what you’ll need for this delicious treat:
Main Ingredients
- 2 cups heavy cream – This is the key to a rich, creamy base that gives your ice cream its luxurious texture.
- 1 cup whole milk – Whole milk adds a balance of creaminess while keeping the flavor light and not too heavy.
- 3/4 cup granulated sugar – This provides the perfect amount of sweetness without overpowering the vanilla.
- 1 vanilla bean – The star ingredient that gives this ice cream its signature, natural vanilla flavor. You’ll scrape the seeds from this bean to get the true essence.
- 5 large egg yolks – The egg yolks act as a natural thickening agent, resulting in a smooth custard base that creates a luscious ice cream.
Optional Add-Ins
- A pinch of sea salt – To enhance the sweetness and balance out the richness.
- Vanilla extract – While the vanilla bean provides the primary flavor, a drop of pure vanilla extract can amplify the taste if desired.
Each ingredient plays a specific role in achieving the perfect vanilla bean ice cream.
Choosing fresh, quality ingredients will make a noticeable difference in the flavor and texture of your final product.
Equipment You’ll Need
To make your classic vanilla bean ice cream, you’ll need some essential tools.
Here’s a list of equipment that will make the process smoother and more enjoyable:
Ice Cream Maker
The most important piece of equipment for this recipe is an ice cream maker.
It churns the mixture while freezing it, preventing ice crystals from forming and giving the ice cream its smooth, creamy texture.
There are various types of ice cream makers, but a countertop version works best for home use.
Medium and Large Saucepan
You’ll need two saucepans: one for heating the milk and cream mixture, and another to prepare the egg yolk mixture.
A medium saucepan is perfect for heating the milk and cream, while a large one is ideal for tempering the egg yolks.
Mixing Bowls
Having a heatproof mixing bowl for the egg yolks is essential.
A larger bowl will make it easier to whisk the yolks without worrying about spills or splashes.
Whisk and Spatula
A whisk is necessary for both beating the egg yolks and stirring the custard mixture, ensuring everything is well combined.
A rubber spatula will come in handy for scraping down the sides of the saucepan or mixing bowl without wasting any of that delicious custard.
Strainer or Fine Mesh Sieve
A strainer is important for removing any solid bits from the custard mixture, such as leftover vanilla bean seeds or any coagulated egg particles, giving you a silky smooth custard.
Thermometer
A candy or kitchen thermometer is a great tool for ensuring the custard reaches the perfect temperature.
This step is important to avoid scrambling the eggs and ensuring the custard thickens correctly.
Freezer-Safe Container
Finally, you’ll need a freezer-safe container with a tight-fitting lid to store your ice cream once it’s churned and frozen.
An airtight container will help preserve the texture and flavor for longer.
Having these tools on hand will ensure your ice cream-making process goes smoothly and results in the perfect homemade vanilla bean ice cream.
You have not enough Humanizer words left. Upgrade your Surfer plan.
Step-by-Step Instructions
Now that you’ve gathered all your ingredients and equipment, it’s time to make your Classic Vanilla Bean Ice Cream.
Follow these detailed steps to create a smooth and delicious homemade ice cream that will rival any store-bought version.
Step 1: Preparing the Vanilla Bean
To begin, you’ll need to prepare the vanilla bean, which is the key to giving your ice cream its signature flavor.
- Use a sharp knife to slice the vanilla bean lengthwise down the center.
- Scrape the seeds from the inside of the pod using the back of the knife. These tiny black seeds contain the rich vanilla flavor and will be added to the cream mixture.
- Set aside the vanilla pod—you’ll use it later to infuse more vanilla flavor into the milk and cream mixture.
Step 2: Making the Custard Base
The custard base is what gives vanilla bean ice cream its signature creamy texture.
- In a medium saucepan, combine the heavy cream and whole milk. Add the vanilla bean seeds and the empty vanilla pod to the pan. Heat this mixture over medium heat, stirring occasionally, until it begins to steam, but don’t let it come to a boil.
- While the cream mixture is heating, whisk the egg yolks and sugar together in a separate bowl. Whisk until the mixture becomes light and pale, indicating the yolks are well incorporated.
- Once the cream mixture is steaming, gradually pour a small amount of the hot milk mixture into the egg yolks, whisking constantly to temper the eggs. This prevents them from scrambling.
- Slowly add the tempered egg yolk mixture back into the saucepan, stirring constantly. Continue to cook over medium heat, stirring continuously, until the custard reaches 170°F (77°C) and thickens slightly, coating the back of a spoon. Be careful not to overcook or boil the custard.
Step 3: Cooling and Chilling the Mixture
After cooking the custard, it’s important to cool it down quickly to preserve its smooth texture and prevent curdling.
- Remove the pan from the heat and discard the vanilla pod.
- Pour the custard through a fine-mesh sieve into a clean bowl to strain out any coagulated egg bits or vanilla pod remnants.
- Cool the custard to room temperature, then cover it and refrigerate for at least 4 hours or preferably overnight. Chilling the custard ensures it churns into ice cream more efficiently.
Step 4: Churning the Ice Cream
Once your custard is chilled, it’s time to churn the ice cream.
- Follow the manufacturer’s instructions for your ice cream maker. Generally, you’ll want to pour the chilled custard into the machine and churn for about 20-25 minutes. The mixture should thicken and become smooth and creamy.
- Keep an eye on the consistency—once it reaches a soft-serve texture, it’s ready for the next step.
Step 5: Freezing the Ice Cream
To achieve the perfect scoopable consistency, the ice cream must be frozen after churning.
- Transfer the churned ice cream to a freezer-safe container, smoothing the top with a spatula.
- Cover the container tightly with a lid or plastic wrap, and freeze for at least 4 hours, or until the ice cream is firm enough to scoop.
Now, your classic vanilla bean ice cream is ready to be enjoyed! Serve it in cones, bowls, or alongside your favorite dessert.
Tips for Perfect Vanilla Bean Ice Cream
To ensure your homemade ice cream turns out smooth, creamy, and full of flavor, keep these tips in mind:
1. Use Fresh Ingredients
The flavor of your ice cream depends heavily on the quality of ingredients.
Opt for fresh, high-quality vanilla beans and heavy cream to get the best results.
Fresh vanilla beans have a more complex flavor than vanilla extract, so they really shine in this recipe.
2. Don’t Overcook the Custard
When cooking the custard base, it’s crucial to monitor the temperature carefully.
If the custard is overcooked or boiled, it can become grainy and lose its smooth texture.
Use a kitchen thermometer to keep the custard at the ideal temperature of 170°F (77°C) and stir constantly.
3. Chill the Custard Thoroughly
Patience is key when making ice cream.
Chill the custard mixture for several hours before churning to achieve a smoother, more stable texture.
If you’re in a hurry, placing the bowl in an ice bath for quicker cooling can help speed up the process.
4. Don’t Skip the Churning Process
Churning is essential for incorporating air into the mixture, which creates that light and creamy texture we all love.
Be sure to follow your ice cream maker’s instructions closely for the best results.
5. Store Properly
For the best texture and flavor, always store your ice cream in an airtight container.
This prevents ice crystals from forming and helps maintain the creamy consistency.
If you have any leftovers, allow the ice cream to sit at room temperature for a few minutes before scooping to make it easier to serve.
By following these tips, you’ll achieve a perfect batch of Classic Vanilla Bean Ice Cream that’s rich, velvety, and bursting with flavor.
Frequently Asked Questions About Classic Vanilla Bean Ice Cream
1. Can I make vanilla bean ice cream without an ice cream maker?
Yes, it’s possible to make vanilla bean ice cream without an ice cream maker!
You’ll need to freeze the custard mixture in a shallow pan and stir it every 30 minutes for the first few hours of freezing to break up ice crystals.
This manual method helps create a smoother texture, though it may not be as creamy as the churning method.
2. Can I use vanilla extract instead of a vanilla bean?
While vanilla extract is a great alternative, using a real vanilla bean provides a more intense and authentic flavor.
If you prefer to use extract, about 1 tablespoon of pure vanilla extract can be substituted for the vanilla bean, though it won’t have the same speckled look and richness that the bean provides.
3. How do I store homemade vanilla bean ice cream?
Store your homemade ice cream in an airtight container in the freezer.
Make sure to press plastic wrap or parchment paper directly on the surface of the ice cream to minimize air exposure, which can lead to freezer burn.
It will keep in the freezer for up to 2-3 weeks.
4. Why is my ice cream too icy or grainy?
If your ice cream turns out icy or grainy, it might be due to overcooking the custard or not churning it long enough.
Make sure to cook the custard to the proper temperature and churn until it reaches a thick, soft-serve consistency before freezing.
5. Can I add mix-ins like chocolate chips or fruit to this recipe?
Yes, you can add mix-ins like chocolate chips, crushed cookies, or fruit to customize your vanilla bean ice cream.
Wait until the last few minutes of churning to add your mix-ins, so they are evenly distributed without disrupting the texture of the ice cream.
Conclusion
Making Classic Vanilla Bean Ice Cream at home is an incredibly rewarding experience that allows you to enjoy a rich and velvety dessert crafted from simple, quality ingredients.
By following this easy-to-understand recipe, you’ll unlock the full flavor potential of real vanilla beans and create a truly indulgent treat for yourself, your family, and your friends.
Whether enjoyed on its own, paired with a warm dessert, or added to your favorite sundae, this ice cream is guaranteed to impress.
Don’t forget to take your time and savor the process—it’s worth every step for the perfect homemade vanilla bean ice cream!
Enjoy creating, sharing, and most importantly, eating your delicious ice cream!
Classic Vanilla Bean Ice Cream
Equipment
- 1 medium saucepan – for heating milk and cream
- 1 large saucepan – for cooking the custard
- 1 mixing bowl – for whisking the egg yolks and sugar
- 1 whisk – for mixing the egg yolks and custard
- 1 rubber spatula – for scraping and stirring
- 1 fine-mesh sieve – for straining the custard
- 1 ice cream maker – for churning
- 1 freezer-safe container – for storing the ice cream
Ingredients
For the Ice Cream Base:
- 2 cups heavy cream
- 1 cup whole milk
- 3/4 cup granulated sugar
- 5 large egg yolks
- 1 vanilla bean
- 1 pinch sea salt optional
Optional:
- 1 teaspoon vanilla extract for a richer flavor
Instructions
Prepare the Vanilla Bean:
- Split the vanilla bean lengthwise and scrape out the seeds. Set the seeds and the empty pod aside.
Make the Custard Base:
- In a medium saucepan, combine the heavy cream and whole milk. Add the vanilla pod and seeds. Heat the mixture over medium heat, stirring occasionally, until it’s steaming but not boiling.
- In a separate mixing bowl, whisk the egg yolks and granulated sugar until light and pale.
- Gradually temper the egg yolks by adding a small amount of the hot milk mixture to the yolks while whisking constantly. Once tempered, slowly pour the egg yolk mixture back into the saucepan with the rest of the milk and cream, stirring continuously.
- Cook the mixture over medium heat, stirring constantly, until it thickens and reaches 170°F (77°C), or until it coats the back of a spoon.
Cool and Chill the Custard:
- Remove the custard from the heat and strain it through a fine-mesh sieve into a clean bowl to remove any curdled egg particles.
- Let the custard cool to room temperature, then cover and refrigerate for at least 4 hours, or overnight for best results.
Churn the Ice Cream:
- Once chilled, pour the custard into an ice cream maker and churn according to the manufacturer’s instructions, typically for about 20-25 minutes, until it reaches a soft-serve consistency.
Freeze the Ice Cream:
- Transfer the churned ice cream to a freezer-safe container, smoothing the top with a spatula. Cover tightly and freeze for at least 4 hours, or until firm.
Serve:
- Scoop the ice cream into bowls or cones and enjoy! Optionally, you can top it with chocolate sauce, fruit, or any other desired toppings.
Notes
Recipe Notes
- Chilling the custard before churning is essential for the best texture and to ensure the ice cream churns properly.
- Vanilla Bean vs. Extract: The vanilla bean gives a more intense and natural vanilla flavor, but if you don’t have one, you can substitute with 1 tablespoon of pure vanilla extract.
- The egg yolks are crucial for creating the creamy texture and preventing ice crystals from forming, so do not skip them.
- If you don’t have an ice cream maker, you can make this ice cream by placing the chilled custard in a shallow container and stirring every 30 minutes as it freezes to break up ice crystals.
