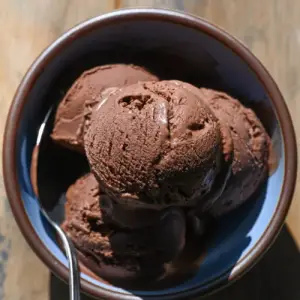
Indulge in rich, creamy chocolate ice cream without the fuss of an ice cream maker.
This no-churn recipe combines wholesome ingredients like dairy or plant-based milk, heavy cream, and cocoa for a velvety texture.
High in protein and healthy fats, it’s naturally satisfying and makes a quick, easy dessert that’s perfect for everyday enjoyment or meal-prep-friendly treats.
Quick & Creamy Chocolate Ice Cream
Equipment
- Small saucepan (1)
- Fine-Mesh Sieve – 1
- Mixing Bowl – 1
- Hand Mixer or Stand Mixer – 1
- Airtight container – 1
Ingredients
- 50 g ½ cup Dutch-process cocoa powder
- 120 g ½ cup whole milk (or plant-based milk alternative)
- 1 can 396 g sweetened condensed milk
- 480 g 2 cups heavy whipping cream, cold
- ¼ tsp fine sea salt
- 2 tsp pure vanilla extract
Instructions
- Prepare the Cocoa Milk Base: Start by gathering all your ingredients and equipment. In a small saucepan, pour the whole milk (or your chosen milk alternative) and place it over low heat. Sift the Dutch-process cocoa powder directly into the milk to prevent lumps, then whisk continuously until fully combined. Add the sweetened condensed milk and a pinch of fine sea salt, stirring gently to incorporate. Keep the heat low—your goal is to create a smooth, velvety mixture without boiling.
- Heat and Blend for Smoothness: Continue whisking the mixture as it warms. You’ll notice the cocoa will fully dissolve and the mixture will start to steam lightly. This gentle heating intensifies the chocolate flavor and ensures no graininess in the ice cream. Be patient, and keep whisking evenly along the bottom and sides of the pan to avoid scorching. Once small steam wisps appear, remove the saucepan from the heat.
- Strain and Chill the Base: Place a fine mesh sieve over a large mixing bowl and pour the warm chocolate mixture through it. This removes any tiny lumps, giving you a silky smooth ice cream base. Let the mixture cool slightly at room temperature for a few minutes. Then, transfer it to the refrigerator and chill for at least 2 hours. For a faster approach, place the bowl in the freezer for 20–30 minutes, stirring gently at the halfway point, but avoid freezing it solid.
- Whip the Heavy Cream: While the chocolate base is chilling, take your cold heavy whipping cream and pour it into a separate mixing bowl. Using a hand mixer or a stand mixer fitted with the whisk attachment, beat the cream on medium-high speed until it reaches soft peaks. The cream should be thick yet still light and airy. This step is crucial, as it incorporates air that makes the ice cream creamy and scoopable later.
- Combine Chocolate and Cream: Once the chocolate base has fully chilled, remove it from the refrigerator. Add the vanilla extract to the chocolate mixture for a rich aromatic flavor. Gently fold the whipped cream into the chocolate base using a spatula, starting with a small portion to lighten the mixture, then gradually fold in the rest. Take care to fold slowly and evenly to maintain the airy texture; you don’t want to deflate the whipped cream.
- Transfer to Freezer Container: Once fully combined, transfer the ice cream mixture into an airtight container. Smooth the top with a spatula for even freezing. If you don’t have an airtight container, a regular container covered tightly with plastic wrap works perfectly. This step ensures your ice cream freezes uniformly without absorbing any freezer odors.
- Freeze Until Firm: Place the container in the freezer for at least 6 hours or overnight for best results. For easier scooping, remove the ice cream 5–10 minutes before serving to allow it to soften slightly. This short wait ensures perfect, creamy scoops without being too hard.
- Serve and Enjoy: When ready to enjoy, scoop the ice cream into bowls or cones. For added flair, sprinkle with chocolate shavings, nuts, or a drizzle of chocolate syrup. This no-churn recipe delivers a rich, creamy texture and deep chocolate flavor that rivals traditional ice cream. Store any leftovers in the freezer in an airtight container for up to 2 weeks.
Notes
- Always use cold heavy cream straight from the fridge for optimal whipping. Warm cream will not whip properly.
- Sifting the cocoa powder into the milk prevents lumps and ensures a smooth, velvety base.
- Chill the chocolate mixture thoroughly before folding in whipped cream; this helps maintain a light and airy texture.
- Avoid over-whipping the cream—it should form medium peaks for best incorporation without becoming butter.
- If the ice cream is too firm after freezing, let it sit at room temperature for 5–10 minutes before scooping for the perfect consistency.
Chef’s Secrets: Insider Tips For Success
To elevate this no-churn chocolate ice cream, start with high-quality Dutch-process cocoa—it provides a deep, rich flavor and smooth finish.
Using a fine mesh sieve ensures your base is lump-free, which is crucial for that professional, creamy texture.
When folding in whipped cream, always use gentle movements to retain air and prevent deflation.
For an extra indulgent twist, fold in chocolate chips, chopped nuts, or swirls of caramel before freezing.
These small touches can transform a simple dessert into a luxurious treat.
Serving Suggestions: Creative Ways To Enjoy
This chocolate ice cream is wonderfully versatile.
Serve it in classic bowls or cones for a casual treat, or elevate it with toppings such as fresh berries, shaved chocolate, or toasted coconut.
Pair it with warm desserts like brownies, chocolate lava cake, or fruit crisps for an indulgent contrast of textures and temperatures.
For a playful presentation, try layering it with crumbled cookies or adding a drizzle of chocolate or caramel sauce for an eye-catching and delicious dessert experience.
Storage Tips: Keep Ice Cream Fresh Longer
Store your ice cream in an airtight container to prevent freezer burn and maintain its creamy texture.
Plastic wrap pressed directly on the surface works well if you don’t have a lid.
Keep it in the coldest part of your freezer rather than the door to avoid temperature fluctuations.
Homemade ice cream is best enjoyed within 2 weeks for peak flavor and texture.
If it hardens too much in the freezer, allow it to soften slightly at room temperature for easier scooping.
Frequently Asked Questions
1. Can I use plant-based milk instead of dairy?
Yes! Almond, oat, or soy milk can replace whole milk, though using full-fat versions will yield the creamiest texture.
2. How do I prevent ice crystals from forming?
Ensure the chocolate base is fully chilled before folding in whipped cream, and store the ice cream in an airtight container. Gentle folding helps retain air and smooth texture.
3. Can I add mix-ins like chocolate chips or nuts?
Absolutely! Fold in any mix-ins after combining the base and whipped cream, just before transferring to the freezer.
4. How long should I let it sit before scooping?
Remove from the freezer for 5–10 minutes to soften slightly. This ensures easy scooping without melting or breaking the ice cream.
5. Can I make this recipe ahead of time for gatherings?
Yes, it’s ideal for meal prep or entertaining. Make it a day in advance and store in the freezer until ready to serve. Just allow a few minutes to soften before serving.
