All products are selected by our editorial team for quality. If you buy through our links, we may earn a small commission at no extra cost to you.
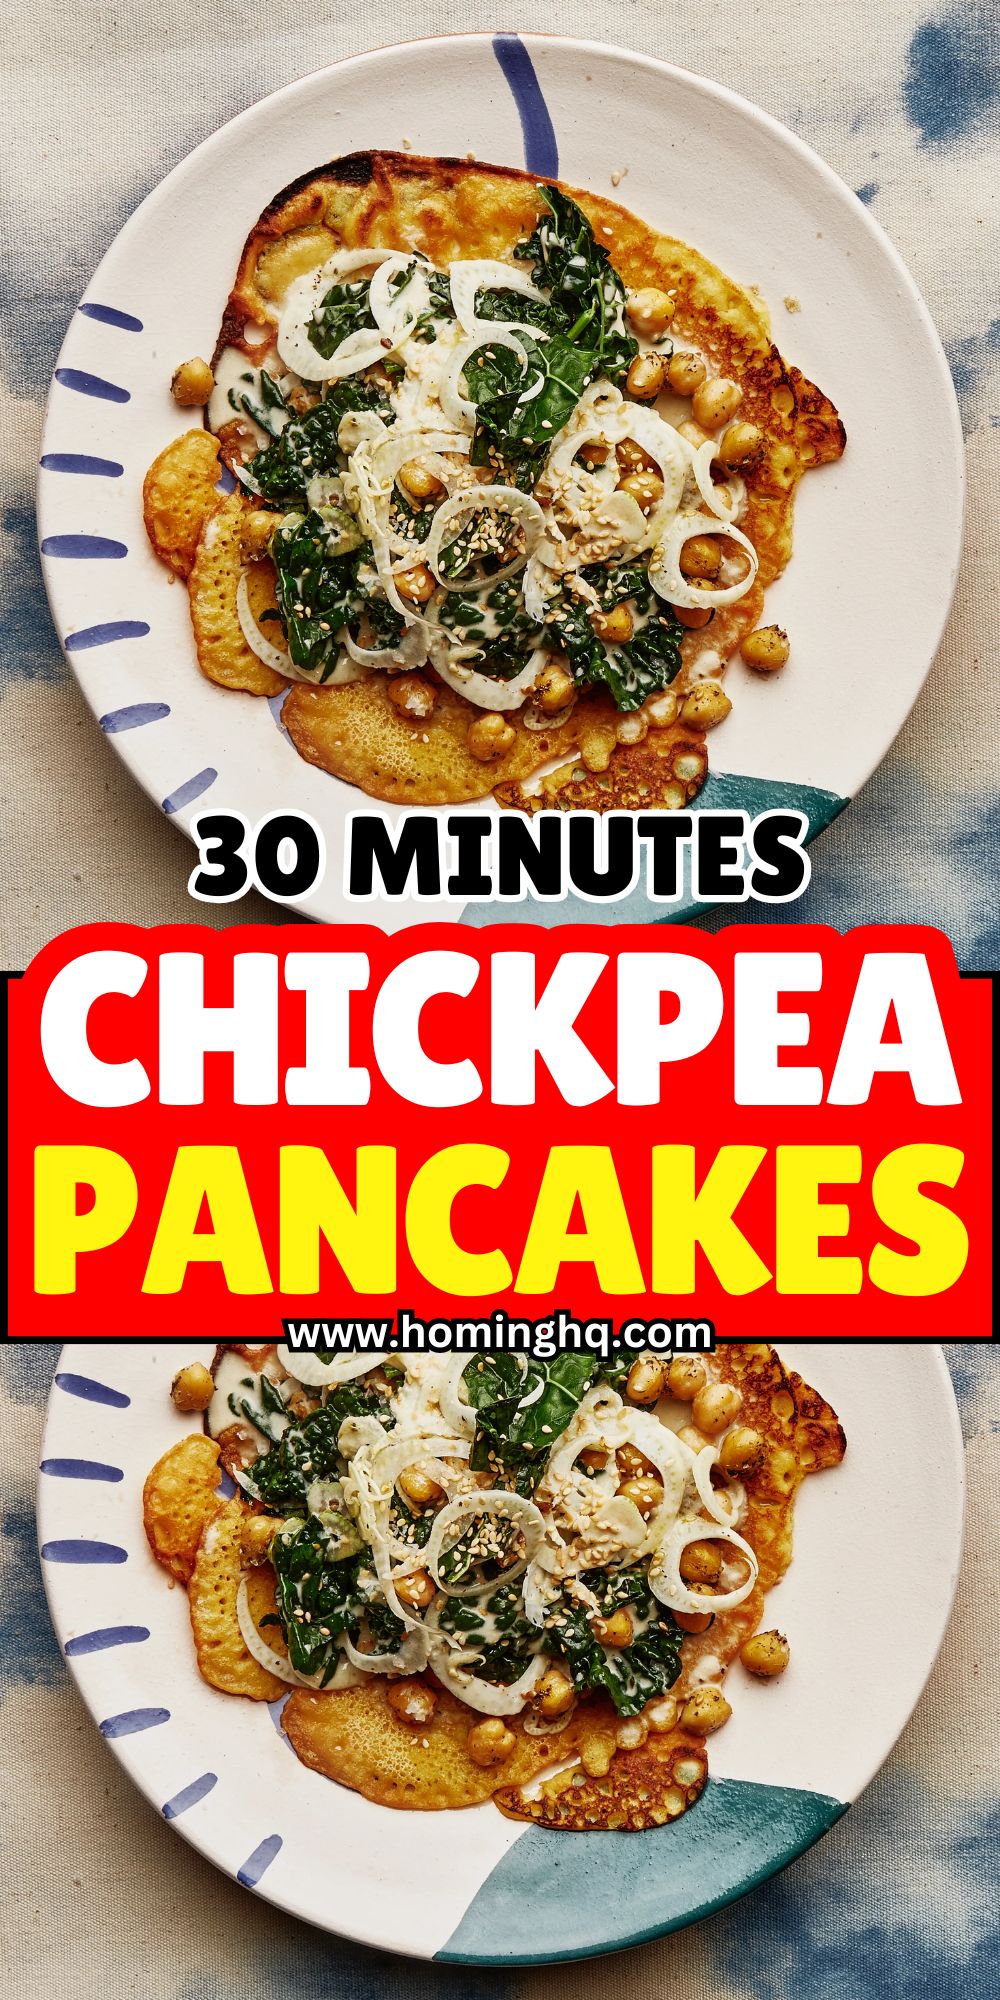
Chickpea pancakes are a flavorful and nutritious alternative to traditional pancakes.
Made primarily from chickpea flour, they are packed with protein, fiber, and essential nutrients.
These pancakes are an excellent choice for anyone looking to enjoy a gluten-free, plant-based, or vegan breakfast (or even lunch or dinner). What makes chickpea pancakes so appealing is their versatility.
Whether you prefer them savory or sweet, you can customize them with various spices, herbs, and toppings to suit your taste.
The best part? They are quick and easy to prepare, making them a go-to option for busy mornings or meal prepping.
Health Benefits of Chickpea Pancakes
Chickpea pancakes aren’t just delicious—they are also a powerhouse of nutrition.
Thanks to the chickpea flour base, these pancakes are rich in protein, which makes them a perfect meal for vegetarians, vegans, or anyone looking to boost their protein intake.
The high fiber content of chickpeas helps with digestion and supports long-lasting energy.
These pancakes are also packed with essential vitamins and minerals such as folate, iron, and magnesium, which are important for overall health.
For those managing blood sugar levels, chickpea pancakes are an excellent choice as chickpea flour has a low glycemic index, meaning it doesn’t cause rapid spikes in blood sugar.
Additionally, because chickpeas are naturally gluten-free, chickpea pancakes are a great option for those following a gluten-free diet.
Whether you’re focused on boosting your protein, supporting digestion, or simply looking for a delicious meal, chickpea pancakes offer a wealth of health benefits.
Ingredients You’ll Need for Chickpea Pancakes
Making chickpea pancakes is simple, and you don’t need many ingredients to get started.
Here’s a breakdown of what you’ll need:
- Chickpea flour: This is the star ingredient. Chickpea flour (also called besan or gram flour) is made from ground chickpeas and provides a unique flavor and texture to the pancakes. It’s gluten-free, high in protein, and gives the pancakes a satisfying, hearty feel.
- Water or plant-based milk: To make the batter smooth and easy to pour, you’ll need some form of liquid. Water works perfectly fine, but using plant-based milk (like almond or oat milk) adds a slightly creamier texture and subtle flavor.
- Baking powder (optional): If you like your pancakes fluffy, a small amount of baking powder can help provide some lift. However, chickpea pancakes tend to be denser, so this step is optional.
- Olive oil or vegetable oil: A bit of oil is needed for the batter and to grease the pan. It also adds richness to the pancakes.
- Salt and pepper: Simple seasoning for the basic pancake flavor. You can adjust the salt depending on whether you prefer your pancakes more savory or neutral.
- Optional spices and herbs: This is where the customization begins! You can add spices like cumin, turmeric, or smoked paprika for a savory twist. Fresh herbs such as cilantro, parsley, or chives can be mixed into the batter for extra flavor.
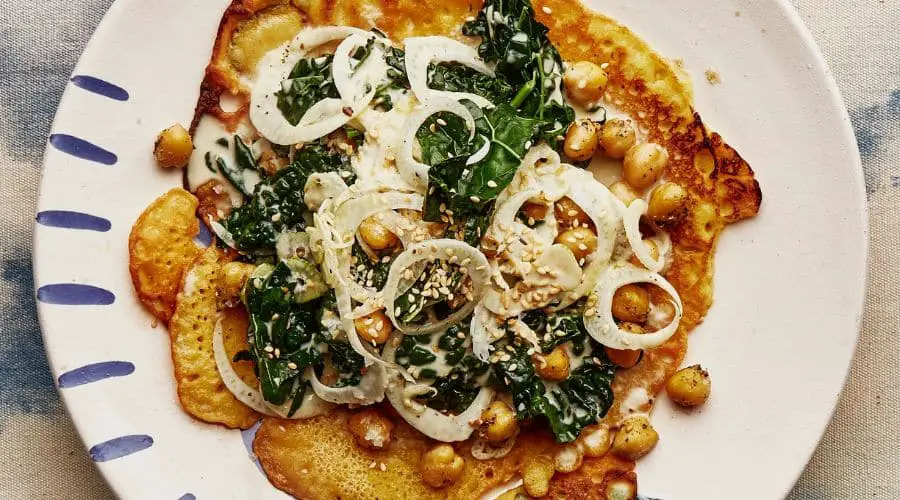
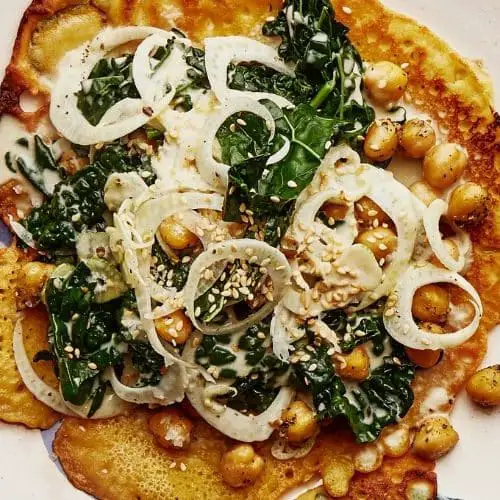
- Optional toppings: Chickpea pancakes pair well with various toppings. You can go savory with hummus, avocado, or sautéed vegetables, or opt for something sweeter with maple syrup, fruit, or plant-based yogurt.
These ingredients come together to create a delicious and nutritious meal, perfect for any time of the day.
How to Make Chickpea Pancakes: Step-by-Step Instructions
Making chickpea pancakes is straightforward and quick. Follow these simple steps to create your own batch of delicious pancakes:
Step 1: Prepare the Chickpea Pancake Batter
Start by measuring out your chickpea flour into a mixing bowl.
For every cup of chickpea flour, add approximately 1 cup of water or plant-based milk.
Whisk the mixture until it forms a smooth, lump-free batter.
Depending on your preference, you can adjust the consistency by adding a little more liquid if you want a thinner batter, or a bit more chickpea flour for a thicker one.
Add salt and pepper to taste. If you’re using any optional spices or herbs, such as cumin, turmeric, or cilantro, now’s the time to stir them into the batter.
Allow the mixture to sit for about 5-10 minutes to ensure everything is well combined and the flavors have had time to meld together.
Step 2: Cook the Pancakes
Heat a non-stick skillet or griddle over medium heat. Once hot, lightly grease the surface with olive oil or your preferred cooking oil.
Use a ladle or measuring cup to pour the batter into the pan, forming pancakes about 3 to 4 inches in diameter.
Allow the pancakes to cook for about 3-4 minutes on the first side until the edges begin to firm up and the bottom turns golden brown.
Flip the pancakes using a spatula and cook for an additional 2-3 minutes on the other side until golden brown and cooked through.
Repeat the process with the remaining batter, adding more oil to the pan if necessary.
Step 3: Serve and Enjoy
Once your pancakes are cooked, it’s time to serve! You can enjoy chickpea pancakes with a variety of toppings.
For a savory meal, try pairing them with fresh vegetables, hummus, avocado, or a dollop of plant-based yogurt.
For a sweeter touch, drizzle with maple syrup, add fresh fruit, or even top with coconut yogurt for a creamy addition.
Tips for Perfect Chickpea Pancakes Every Time
To ensure your chickpea pancakes turn out perfectly every time, keep these tips in mind:
1. Achieve the Right Batter Consistency
The batter should be thick enough to hold its shape when poured into the pan but still flow smoothly.
If your batter is too thick, it may result in dense pancakes, while a batter that’s too runny can cause them to spread too much and not hold together.
Adjust the consistency by adding small amounts of water or flour until you reach the desired texture.
2. Preheat the Pan
Make sure your skillet or griddle is heated to the right temperature before you pour the batter in.
If the pan is too cool, the pancakes might stick or not cook properly.
Medium heat works best for even cooking, so be patient and allow the pan to heat up before you begin.
3. Don’t Overcrowd the Pan
Cook your pancakes in batches if necessary, especially if you’re making a large batch.
Giving each pancake enough space ensures they cook evenly and don’t stick together.
Overcrowding can lead to uneven cooking and pancakes that aren’t as fluffy.
4. Experiment with Flavor Add-ins
Feel free to get creative with your spices and flavorings. Chickpea flour has a neutral taste, which means you can easily infuse it with different flavors.
Spices like cumin, turmeric, paprika, and garlic powder can give your pancakes an extra kick.
Fresh herbs like parsley, cilantro, or basil are also great additions for a fresh, vibrant flavor.
5. Let the Batter Rest
Allowing the batter to rest for a few minutes before cooking helps the chickpea flour absorb the liquid more effectively, resulting in smoother pancakes.
This can also help to improve the texture, making the pancakes a bit lighter.
By following these tips, you’ll be able to make perfect chickpea pancakes each time—fluffy, flavorful, and easy to enjoy.
How to Store and Reheat Chickpea Pancakes
Storing Chickpea Pancakes
If you have leftover chickpea pancakes, storing them properly will help maintain their freshness for later.
Allow the pancakes to cool completely before storing them to prevent excess moisture buildup.
Place the pancakes in an airtight container or wrap them in plastic wrap. Store them in the refrigerator for up to 3 days.
Reheating Chickpea Pancakes
When it’s time to enjoy your leftover pancakes, there are a few simple ways to reheat them:
- Skillet Method: Heat a non-stick skillet over medium heat. Place the pancakes in the pan and cook for about 1-2 minutes on each side, or until warmed through and slightly crispy on the outside.
- Microwave Method: For a quicker option, microwave the pancakes for 30-45 seconds, or until they are hot. However, be aware that microwaving may cause the pancakes to lose some of their crispiness.
- Oven Method: Preheat your oven to 350°F (175°C). Place the pancakes on a baking sheet and heat them in the oven for about 5-7 minutes, or until they are warm and crispy.
By following these methods, your chickpea pancakes will remain delicious and ready to enjoy at any time!
Conclusion
Chickpea pancakes are a versatile, nutritious, and easy-to-make dish that can be enjoyed at any time of day.
Whether you prefer them savory with fresh vegetables and hummus or sweet with maple syrup and fruit, they offer a delicious and filling meal.
Packed with protein, fiber, and essential nutrients, chickpea pancakes are a great choice for anyone looking for a healthy alternative to traditional pancakes.
With just a few simple ingredients, you can whip up a batch in no time and customize them to suit your tastes.
Give chickpea pancakes a try next time you’re in the mood for something different—it’s a meal that’s as satisfying as it is nutritious!
Frequently Asked Questions
1. Can I use regular flour instead of chickpea flour?
Chickpea flour is a key ingredient in this recipe, offering a unique flavor and texture that regular flour cannot fully replicate.
If you’re not on a gluten-free diet, you could experiment with all-purpose flour, but the pancakes may turn out differently in taste and texture.
2. Can I make chickpea pancakes ahead of time?
Yes! You can prepare the batter ahead of time and store it in the refrigerator for up to 24 hours.
Just give it a quick stir before cooking. Alternatively, you can make the pancakes in advance and store them for later use, as described above.
3. How can I make chickpea pancakes fluffier?
For fluffier pancakes, you can add a small amount of baking powder to the batter.
This helps give the pancakes a bit more rise and a lighter texture. Also, make sure not to overmix the batter, as this can make the pancakes denser.
4. Are chickpea pancakes vegan?
Yes, chickpea pancakes are naturally vegan since they contain no animal products.
They are made with chickpea flour, water (or plant-based milk), and optional spices or herbs, making them perfect for a plant-based diet.
5. Can I freeze chickpea pancakes?
Absolutely! Chickpea pancakes freeze well. After cooking, allow them to cool completely, then layer them between sheets of parchment paper and place them in a freezer-safe bag or container.
When you’re ready to eat, simply reheat them using one of the methods mentioned above.
Chickpea Pancakes
Equipment
- Non-stick skillet or griddle – 1
- Mixing Bowl – 1
- Whisk (1)
- Ladle or measuring cup – 1
- Spatula (1)
Ingredients
- 1 cup chickpea flour
- 1 cup water or plant-based milk such as almond or oat milk
- 1 tsp baking powder optional, for fluffiness
- 2 tbsp olive oil or vegetable oil
- ½ tsp salt
- ¼ tsp black pepper
- Optional: ½ tsp cumin ½ tsp turmeric, fresh herbs (cilantro, parsley, etc.)
Instructions
- Prepare the Batter: In a mixing bowl, whisk together the chickpea flour and water (or plant-based milk) until smooth.If desired, add baking powder, salt, pepper, and any optional spices or herbs. Let the batter sit for 5-10 minutes for better consistency.
- Heat the Skillet: Preheat a non-stick skillet or griddle over medium heat. Lightly grease the surface with olive oil or vegetable oil.
- Cook the Pancakes: Pour the batter onto the pan, forming pancakes about 3-4 inches in diameter.Cook each pancake for 3-4 minutes on one side until golden brown, then flip and cook for an additional 2-3 minutes on the other side.
- Serve: Once cooked, remove the pancakes from the pan. Serve with your choice of toppings, such as avocado, hummus, sautéed vegetables, or fresh fruit.
Notes
- Consistency of the batter: Adjust the amount of water or flour to achieve the desired thickness of the batter. For fluffier pancakes, you can add baking powder.
- Toppings: Experiment with different savory or sweet toppings based on your preference. For a savory option, try adding sautéed spinach, avocado, or vegan cheese. For a sweet version, go for fruit, maple syrup, or plant-based yogurt.
- Storage: Store leftover pancakes in an airtight container in the refrigerator for up to 3 days. You can also freeze them for up to 2 months and reheat them as needed.
