This Buttery Popcorn Ice Cream is a playful twist on a classic treat, blending creamy custard with the nostalgic flavor of buttered popcorn.
The recipe balances indulgence with nutrition, offering protein from egg yolks, calcium-rich dairy, and fiber from popcorn.
It’s lower in saturated fat than many store-bought desserts, making it a smarter choice for sweet cravings.
Easy to prepare, it’s perfect for everyday enjoyment or weekend entertaining.
Creamy Buttery Popcorn Ice Cream
Equipment
- 1 Heavy-bottom saucepan
- 1 Fine mesh sieve
- 1 Electric mixer
- 1 large mixing bowl
- 1 whisk
- 1 Instant-read thermometer
- 1 Measuring cup (large, liquid-safe)
- 1 Ice Cream Maker
Ingredients
- 2 cups heavy cream
- 2 cups whole milk or 2% milk divided
- 6 cups popped buttered popcorn about 1 standard bag, 3.5 oz
- 6 large egg yolks
- ⅔ cup granulated sugar
- ¼ teaspoon table salt
- ½ teaspoon pure vanilla extract
- Homemade Cracker Jack for serving, optional
- Caramel sauce for serving, optional
Instructions
- Infuse the Cream with Popcorn: Pour the heavy cream and 1 cup of the milk into a heavy-bottomed saucepan. Place it over medium heat and warm gently until it reaches a light scald (you should see small bubbles forming around the edges, but do not let it boil). Remove the pan from heat and stir in the popped buttered popcorn. Press the popcorn down lightly with a spoon so it is submerged in the warm liquid. Cover the pan and let the mixture steep for about 1 hour, allowing the milk and cream to absorb the savory, buttery flavor of the popcorn.
- Strain and Measure the Base: After the steeping time, set a fine-mesh sieve over a large liquid measuring cup or bowl. Carefully pour the popcorn-infused cream through the sieve, pressing down gently on the softened popcorn with the back of a spoon to extract as much liquid as possible. Discard the soggy popcorn. You should have a little less than 3 cups of liquid. Top it off with enough of the remaining plain milk to make exactly 3 cups total. Stir to combine.
- Whisk the Egg Mixture: In a large mixing bowl, add the egg yolks, sugar, and salt. Using an electric mixer set on high speed (or a sturdy whisk if mixing by hand), beat the mixture until it becomes pale, thick, and fluffy. This should take about 2 minutes. The sugar should be well dissolved, and the texture should resemble a smooth ribbon when lifted with the whisk. This step creates the foundation for a rich and creamy custard.
- Temper the Egg Yolks: Return the strained popcorn milk to the saucepan and warm it gently over medium heat until it is hot but not boiling. Remove about 1 cup of the hot milk and slowly drizzle it into the egg yolk mixture while whisking vigorously. This process, called tempering, gradually warms the eggs so they don’t scramble when added to the saucepan. Continue whisking until the eggs are fully incorporated and silky smooth.
- Cook the Custard Base: Pour the tempered egg mixture back into the saucepan with the remaining milk. Reduce the heat to low or medium-low and cook slowly, whisking constantly. As the custard heats, it will gradually thicken. Use an instant-read thermometer to check the temperature — when it reaches 185°F (85°C), it should be thick enough to coat the back of a spoon. Be patient and stir constantly, especially near the end, to prevent curdling or lumps.
- Flavor and Strain the Custard: Once the custard reaches the proper consistency, immediately remove the pan from heat. Stir in the vanilla extract for warmth and aroma. If you prefer a smoother texture, pour the custard through a fine-mesh sieve into a clean bowl to catch any small bits of cooked egg. Continue stirring for another minute or two to release steam and help the custard cool slightly.
- Chill the Mixture Completely: Cover the bowl with plastic wrap, pressing it directly against the surface of the custard to prevent a skin from forming. Transfer to the refrigerator and chill for at least 2 hours, or until the mixture is thoroughly cold. For best results, you can leave it overnight. A well-chilled base ensures a creamier ice cream texture during churning.
- Churn the Ice Cream: When the custard is fully chilled, pour it into your ice cream maker and churn according to the manufacturer’s instructions. The mixture will transform into a thick, soft-serve consistency in about 20–25 minutes, depending on your machine.
- Freeze to Set: Scoop the churned ice cream into a freezer-safe container. Smooth the top with a spatula and press a piece of parchment or wax paper directly onto the surface to prevent ice crystals. Cover tightly with a lid and freeze for at least 4 hours, or until firm enough to scoop.
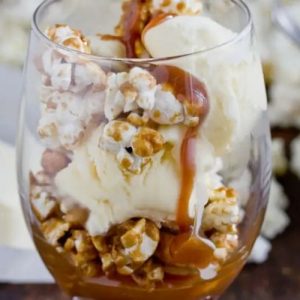
- Serve and Enjoy: To serve, scoop the ice cream into bowls, glasses, or cones. For an extra treat, drizzle with caramel sauce and sprinkle with homemade Cracker Jack or additional popcorn for crunch. The result is a luxurious blend of creamy sweetness and buttery, salty nostalgia — the perfect balance of comfort and creativity.
Notes
- The popcorn flavor is subtle — for a stronger taste, simply double the amount of popped popcorn.
- Always strain the custard for the smoothest, silkiest texture.
- Make sure the custard is completely chilled before churning for the best consistency.
- If you don’t have an ice cream maker, the custard can be frozen in a loaf pan, whisking every 30–40 minutes until firm.
- Caramel sauce and crunchy toppings enhance both flavor and texture, but they are optional.
Chef’s Secrets for Perfect Results
The magic of this recipe lies in infusing the dairy with real buttered popcorn.
To capture the best flavor, make sure the popcorn is freshly popped and still warm when you steep it — this releases more of its buttery, salty notes.
Another secret is careful tempering of the eggs. Rushing this step can cause curdling, so take your time and whisk constantly.
For an ultra-smooth texture, don’t skip straining the custard through a sieve.
Finally, chilling the mixture overnight before churning makes a noticeable difference, producing ice cream that’s creamier, firmer, and easier to scoop.
Serving Suggestions and Pairing Ideas
This ice cream shines on its own, but it’s even better when paired with complementary toppings.
A drizzle of caramel sauce or chocolate syrup enhances its sweet-and-salty profile, while a sprinkle of homemade Cracker Jack or caramel corn adds crunch and nostalgia.
You can also serve it alongside a warm brownie or slice of apple pie for a comforting dessert duo.
For a fun twist, use it in an ice cream sundae bar at movie nights, offering toppings like pretzels, peanuts, or candy pieces to keep with the playful theme.
Storage Tips for Freshness and Flavor
Store the ice cream in an airtight, freezer-safe container to maintain its flavor and texture.
Pressing parchment or wax paper directly onto the surface before sealing helps prevent ice crystals from forming.
For best taste, enjoy within 2 weeks, as homemade ice cream tends to harden and lose its creaminess over time.
If it becomes too firm, simply let it sit at room temperature for 5–10 minutes before scooping.
Avoid frequent thawing and refreezing, as it can compromise texture and flavor.
Frequently Asked Questions
1. Can I make this without an ice cream maker?
Yes! After chilling the custard, pour it into a freezer-safe pan and freeze.
Every 30–40 minutes, whisk or stir vigorously to break up ice crystals until it reaches a creamy consistency.
2. How strong is the popcorn flavor?
The flavor is subtle but noticeable. If you prefer a bolder popcorn taste, double the amount of popped popcorn during steeping.
3. Can I use air-popped or plain popcorn instead of buttered?
Yes, but the flavor will be lighter. For richness, you can add a tablespoon of melted butter along with the popcorn.
4. How do I prevent the custard from scrambling?
Whisk constantly while tempering the eggs and cooking the custard. Keep the heat low and never let it boil.
A thermometer helps ensure it doesn’t exceed 185°F (85°C).
5. How long does homemade ice cream last?
For best quality, enjoy within 1–2 weeks. After that, it may still be safe to eat but can become icy or lose flavor.
