All products are selected by our editorial team for quality. If you buy through our links, we may earn a small commission at no extra cost to you.
Banana Pudding Ice Cream is the ultimate dessert to satisfy your sweet tooth on a warm day or after a hearty meal.
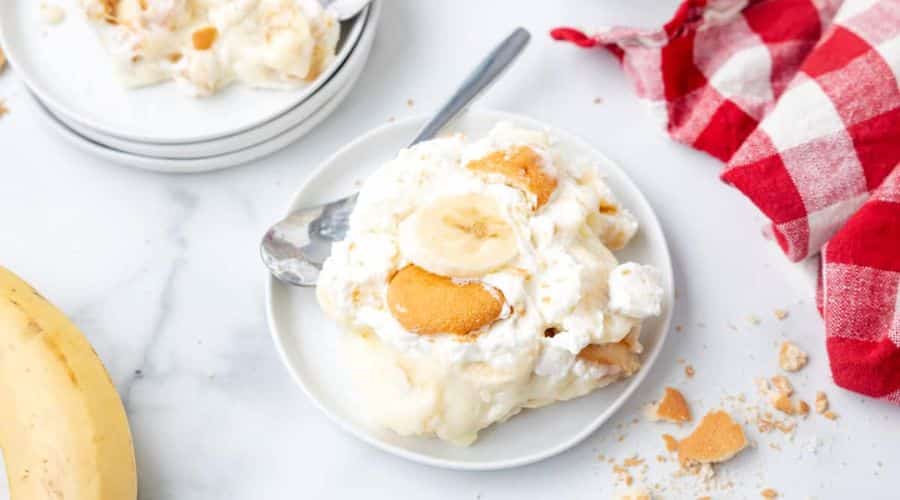
With its creamy texture and a delightful combination of banana flavor, vanilla pudding, and crunchy cookies, this frozen treat is a perfect twist on the classic Southern dessert.
It’s rich, smooth, and packed with flavor, making it an irresistible treat for all ages.
Whether you’re hosting a summer gathering or simply indulging in a personal dessert craving, this Banana Pudding Ice Cream will quickly become your go-to recipe.
The best part? You can make it at home with just a few simple ingredients and a bit of patience.
Ingredients You’ll Need
To make Banana Pudding Ice Cream, you’ll need a handful of basic ingredients. Here’s what you’ll need:
- Bananas – Choose ripe bananas for the best flavor and texture.
- Heavy Cream – For a rich and creamy consistency.
- Whole Milk – Adds smoothness to the ice cream base.
- Granulated Sugar – To sweeten the mixture.
- Vanilla Extract – For that classic flavor that complements the banana.
- Vanilla Pudding Mix – Adds an extra layer of sweetness and richness.
- Nilla Wafers – These iconic cookies provide a crunchy element and texture contrast.
How to Make Banana Pudding Ice Cream: Step-by-Step
Step 1: Prepare the Banana Base
Start by mashing the ripe bananas until they are smooth.
Set them aside to allow the natural sugars to release and combine well.
In a large mixing bowl, whisk together the heavy cream, whole milk, sugar, and vanilla pudding mix.
Continue whisking until the sugar dissolves completely and the mixture thickens slightly.
Step 2: Add the Mashed Bananas
Once your base is smooth and creamy, gently fold in the mashed bananas. Stir until they are fully incorporated into the mixture.
This adds that delicious, natural banana flavor to the ice cream.
Step 3: Churn the Ice Cream
Pour the banana mixture into your ice cream maker and churn according to the manufacturer’s instructions.
The churning process usually takes about 20-25 minutes. You should notice the mixture thickening as it freezes.
Step 4: Fold in Nilla Wafers
When the ice cream reaches a soft-serve consistency, it’s time to add the Nilla Wafers.
Break them into smaller pieces and fold them into the ice cream gently, so they don’t completely crumble.
Step 5: Freeze to Firm Up
Transfer the ice cream to an airtight container and place it in the freezer for at least 4 hours, or overnight, to allow it to firm up.
The longer you let it freeze, the better the texture will be.
Pro Tips for Perfect Banana Pudding Ice Cream
To make your Banana Pudding Ice Cream extra special, follow these expert tips:
1. Use Ripe Bananas
Ripe bananas are key to achieving the perfect flavor in your ice cream.
The natural sweetness of ripe bananas will elevate the taste and give your ice cream a rich, banana-forward flavor.
Look for bananas that are fully yellow with a few brown spots—this indicates peak ripeness.
2. Chill Your Ice Cream Base
Before churning your ice cream, chill the banana mixture in the fridge for at least an hour.
This helps to ensure a smoother texture and makes the churning process more efficient.
Cold ingredients freeze more evenly, leading to a creamier consistency.
3. Don’t Overmix the Bananas
When adding mashed bananas to your ice cream base, be sure to fold them in gently.
Overmixing can cause the banana pieces to break down too much, affecting the overall texture.
A few gentle folds are all you need for that perfect balance of banana flavor.
4. Freeze Nilla Wafers Separately
If you want the Nilla Wafers to remain crunchy and not get soggy, freeze them separately for about 10 minutes before adding them to the ice cream.
This short freezing time helps preserve their crunch, providing the ideal contrast in texture when mixed into the ice cream.
5. Allow Enough Freezing Time
After churning, make sure to freeze the ice cream for at least 4 hours (preferably overnight) to ensure it firms up and achieves the perfect consistency.
The waiting time might be tempting, but this step is crucial to getting the ice cream to hold its shape when scooped.
Common Mistakes to Avoid
While making Banana Pudding Ice Cream is relatively easy, there are a few common mistakes to avoid to ensure you get the best results:
1. Using Overripe Bananas
Although ripe bananas are essential for flavor, overripe bananas—those with black, mushy skins—can result in a slightly off-putting taste.
They might also make the ice cream too watery. Stick with bananas that are ripe but not overripe for optimal flavor and consistency.
2. Skipping the Chilling Step
If you don’t chill the base before churning, the ice cream will be harder to freeze and could end up with an undesirable icy texture.
Chilling the mixture allows for a smoother consistency and better results in the final product.
3. Overchurning the Ice Cream
While it’s important to churn the ice cream until it thickens, be careful not to overdo it.
If you churn the mixture for too long, the ice cream may become too dense or begin to melt before it has frozen enough.
Follow the instructions for your ice cream maker for the perfect texture.
4. Not Using Enough Cream
A common mistake is not using enough cream in the base. Heavy cream is what gives the ice cream its rich, smooth texture.
If you use too little, your ice cream may turn out too icy and not have that signature creaminess.
5. Adding Too Many Nilla Wafers Too Early
If you add too many Nilla Wafers before freezing, they may dissolve into the ice cream, losing their crunchy texture. Instead, fold them in just before you place the ice cream in the freezer, or freeze them separately to maintain their crunch.
Conclusion
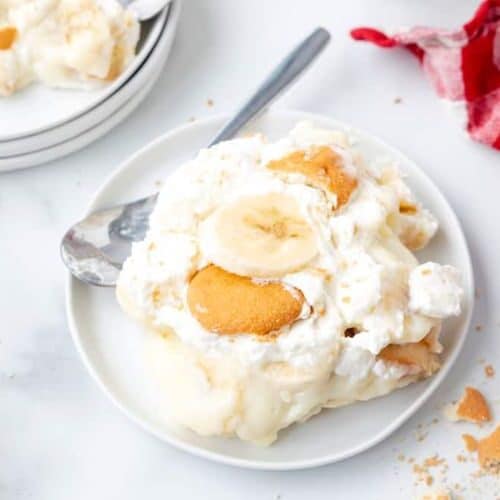
Banana Pudding Ice Cream combines the best elements of a classic Southern dessert with the creamy coolness of homemade ice cream.
Its delicious banana flavor, velvety smooth texture, and crunchy Nilla Wafers create a treat that’s truly unforgettable.
Whether enjoyed as a special dessert for a gathering or a sweet indulgence on a quiet evening, this recipe is sure to impress.
With simple ingredients and easy steps, you can create an ice cream that rivals any store-bought variety, bringing joy with every spoonful.
So go ahead and treat yourself and your loved ones to this homemade delight!
Frequently Asked Questions (FAQ)
1. Can I use frozen bananas instead of fresh ones?
Yes, you can use frozen bananas! In fact, using frozen bananas can give your ice cream a thicker texture.
Just be sure to let them thaw slightly before mashing so they mix evenly into the base.
2. Do I need an ice cream maker for this recipe?
While an ice cream maker is ideal for the best texture, you can make this without one.
Simply pour the mixture into a container and freeze, stirring every 30 minutes for the first 2 hours to prevent ice crystals from forming.
3. Can I substitute the heavy cream with something lighter?
You can substitute heavy cream with half-and-half or full-fat coconut milk for a lighter alternative.
However, this may affect the creaminess of the ice cream.
4. How long can I store Banana Pudding Ice Cream?
Banana Pudding Ice Cream can be stored in an airtight container in the freezer for up to 2-3 weeks.
Just be sure to let it soften for a few minutes before serving for the best scoopability.
5. Can I add other mix-ins to this ice cream?
Absolutely! You can add chocolate chips, chopped nuts, or even swirls of caramel or peanut butter for an extra flavor boost.
Just be sure to add mix-ins near the end of the churning process to keep them evenly distributed.
Banana Pudding Ice Cream
Equipment
- Ice Cream Maker (if available)
- Large Mixing Bowl
- whisk
- Spatula
- Container for Freezing (preferably airtight)
Ingredients
- 2 Ripe Bananas mashed
- 1 ½ Cups Heavy Cream or 360 ml
- 1 Cup Whole Milk or 240 ml
- ¾ Cup Granulated Sugar or 150 g
- 1 Tbsp Vanilla Extract or 15 ml
- 1 Package Vanilla Pudding Mix instant
- 1 ½ Cups Nilla Wafers broken into pieces
Instructions
- Prepare the Banana Base: Mash the ripe bananas in a bowl until smooth and set aside.
- Mix the Cream Base: In a separate bowl, whisk together heavy cream, whole milk, sugar, and vanilla pudding mix until smooth and thickened.
- Combine the Bananas: Gently fold the mashed bananas into the cream mixture until fully incorporated.
- Churn the Ice Cream: Pour the mixture into your ice cream maker and churn according to the manufacturer’s instructions, usually for 20-25 minutes.
- Add the Nilla Wafers: When the ice cream reaches a soft-serve consistency, fold in the Nilla Wafers, ensuring they are evenly distributed.
- Freeze the Ice Cream: Transfer the ice cream into an airtight container and freeze for at least 4 hours, or overnight, until firm.
Notes
- Bananas: The riper the bananas, the sweeter and more flavorful your ice cream will be. Avoid overly brown or mushy bananas for the best results.
- Ice Cream Maker: If you don’t have an ice cream maker, you can still make this ice cream by stirring it every 30 minutes while it freezes for the first 2 hours to break up any ice crystals.
- Nilla Wafers: Freezing the Nilla Wafers for 10 minutes before adding them helps them maintain their crunch in the ice cream.
- Storage: Store in an airtight container in the freezer for up to 2-3 weeks. Allow the ice cream to sit out for a few minutes before scooping for the best texture.
