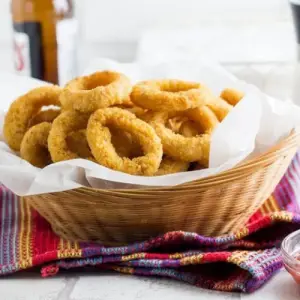
Crispy baked onion rings are the perfect guilt-free twist on a classic favorite.
Unlike traditional deep-fried versions, these rings are oven-baked, giving you all the crunch without the excess oil.
Made with wholesome onions, whole-grain breadcrumbs, and seasoned with smoky spices, they’re a lighter option that’s low in saturated fat yet big on flavor.
Quick, satisfying, and easy to prepare, they’re ideal for everyday cooking, snacking, or even healthy meal prep.
Healthy Crispy Baked Onion Rings
Equipment
- 2 large baking sheets
- 2 sheets of parchment paper
- 3 Medium mixing bowls
- 1 whisk
- Measuring Cups and Spoons
- 1 cooking spray bottle
Ingredients
- 1 cup all-purpose flour
- 1 teaspoon smoked paprika
- 1 teaspoon paprika
- 2 teaspoons salt divided
- ½ teaspoon ground black pepper
- 1 teaspoon garlic powder
- 1 cup low-fat buttermilk
- 2 large eggs
- 2 cups plain breadcrumbs
- 2 large yellow sweet onions sliced ¼–½ inch thick
- Cooking spray as needed
Instructions
- Preheat and Prepare Baking Sheets: Start by preheating your oven to 450°F (230°C). While the oven warms up, line two large baking sheets with parchment paper. This prevents sticking and helps the onion rings crisp evenly without the need for excess oil. Set the trays aside until ready to use.
- Slice and Separate the Onions: Peel your sweet yellow onions and slice them into thick, even rings, about ¼ to ½ inch wide. Gently push out the centers so that you have individual rings. Use both large and small rings for variety, but keep them uniform in thickness for even cooking. Pat them dry with a paper towel to remove extra moisture, which will help the coating stick better.
- Mix the Seasoned Flour Base: In a medium bowl, combine the flour, smoked paprika, regular paprika, half of the salt, ground black pepper, and garlic powder. This spice-infused flour forms the first coating and helps the batter cling to the onion slices. Stir until all the spices are evenly distributed, ensuring every bit of flour carries flavor.
- Prepare the Buttermilk Batter: In a second bowl, whisk together the buttermilk and eggs until smooth and frothy. To thicken the mixture, add about half of the seasoned flour mixture into the buttermilk and whisk again until it forms a slightly thick, creamy batter.This step gives the onion rings their golden, crunchy coating once baked.
- Season the Breadcrumb Coating: In a third shallow dish or wide bowl, add the breadcrumbs and mix them with the remaining salt. Stir to combine. These breadcrumbs are the final layer of crunch, and seasoning them ensures that every bite has flavor from start to finish.
- Coat the Onion Rings: First Layer: Working with a few onion rings at a time, lightly dredge them in the seasoned flour mixture. Shake off any extra flour, then dip them into the buttermilk batter, letting the excess drip off. Finally, press the rings gently into the breadcrumb mixture, coating all sides thoroughly. Place the coated rings onto the prepared baking sheet in a single layer.
- Optional Double Coating for Extra Crunch: If you prefer a thicker and crunchier coating, transfer the first-coated rings to the refrigerator for about 45–60 minutes. Once chilled, repeat the dipping process: flour → buttermilk → breadcrumbs. This double layer creates an ultra-crispy shell that mimics deep-fried texture without the oil.
- Arrange on Baking Sheets Properly: Spread the onion rings in a single layer across the baking sheets. For efficiency, you can place smaller rings inside larger ones, but make sure they are not touching so hot air can circulate. Proper spacing is key to achieving even crispiness all around.
- Spray for Golden Crispiness: Generously coat the tops of the onion rings with cooking spray. This step is crucial—it helps the coating brown beautifully and creates that fried-like crunch in the oven. Don’t skip spraying the rings, as it replaces the oil used in traditional frying.
- Bake and Flip for Even Cooking: Transfer the trays to the preheated oven and bake for 20–30 minutes. Halfway through the cooking time, carefully flip each ring with tongs or a spatula, then spray the other side with cooking spray. This ensures both sides develop the same golden color and crisp texture.
- Check for Doneness and Serve: When the onion rings are crisp, golden, and fragrant, remove them from the oven. Let them cool for just a couple of minutes on the tray so the coating sets. Serve them immediately while hot, paired with your favorite dipping sauces such as spicy ketchup, garlic aioli, or ranch dressing.
Notes
- Sweet yellow onions work best for a mild, balanced flavor.
- Slice rings evenly so they bake at the same rate.
- A double coating gives extra crunch without frying.
- Cooking spray is essential for a golden finish.
- Serve hot for the best crispy texture.
- Breadcrumbs can be swapped for panko for added crunch.
- These onion rings taste great with dips like ranch, ketchup, or chipotle mayo.
Chef’s Secrets for Perfect Crispiness
The key to irresistible baked onion rings lies in balancing flavor and texture.
Using both smoked paprika and regular paprika adds depth while keeping the coating vibrant in color.
Whisking flour into the buttermilk creates a light batter that clings to the onions, making the breadcrumbs stick better.
If you want restaurant-style crunch, don’t skip the chilling step—it helps the coating firm up before the second dip.
Finally, a generous spray of cooking oil mimics frying without extra fat, delivering that golden crisp finish straight from the oven.
Serving Suggestions and Pairing Ideas
These crispy onion rings are versatile and pair well with just about any meal.
Serve them as a healthier alternative to fries alongside burgers, sandwiches, or grilled chicken.
For a fun appetizer platter, combine them with baked potato wedges, roasted chickpeas, or mozzarella sticks.
Dips make all the difference—try smoky barbecue sauce, creamy ranch, sriracha mayo, or a tangy yogurt dip for variety.
They also work beautifully as a crunchy topping for salads, grain bowls, or even casseroles, adding both flavor and texture.
Storage Tips for Maximum Freshness
Onion rings are best enjoyed immediately while hot and crispy, but if you have leftovers, let them cool completely before storing.
Place them in an airtight container lined with parchment paper and refrigerate for up to 3 days.
To reheat, avoid the microwave, as it softens the coating—instead, use an oven or air fryer at 375°F for 8–10 minutes to restore crispiness.
Freezing is also an option: arrange baked rings on a tray, freeze until solid, then store in freezer bags for up to 1 month.
Reheat directly from frozen for a quick snack.
Frequently Asked Questions
1. Can I use panko instead of regular breadcrumbs?
Yes! Panko breadcrumbs give the onion rings an extra-light and airy crunch.
They’re a great substitute and will make the coating even crispier than plain breadcrumbs.
2. Do I need to soak the onions before coating?
No soaking is required for this recipe. However, patting the onion slices dry helps the batter stick better.
Some people soak onions in buttermilk for a milder flavor, but it’s optional.
3. Can I make these onion rings gluten-free?
Absolutely. Use gluten-free flour and gluten-free breadcrumbs in place of regular ones.
The texture will be just as delicious, and the recipe works beautifully with these swaps.
4. How do I keep the coating from falling off?
Make sure the onions are dry before coating, and don’t rush the dipping process.
Press the breadcrumbs gently into the onion rings so they adhere well. Chilling the coated rings before baking also helps lock everything in place.
5. Can I make these ahead of time for a party?
Yes. Coat the onion rings in advance, arrange them on a tray, and refrigerate for a few hours until ready to bake.
This not only saves time but also makes the coating firmer, giving you a crispier result when baked.
