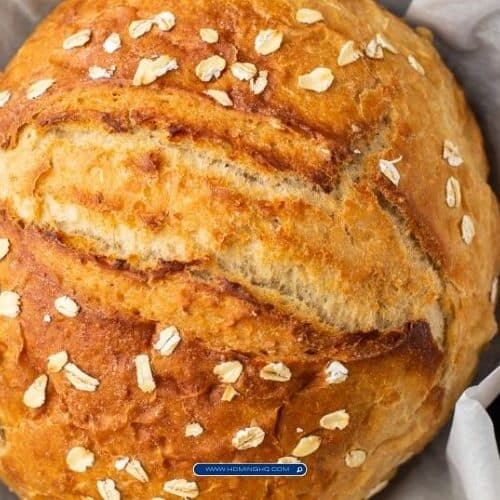
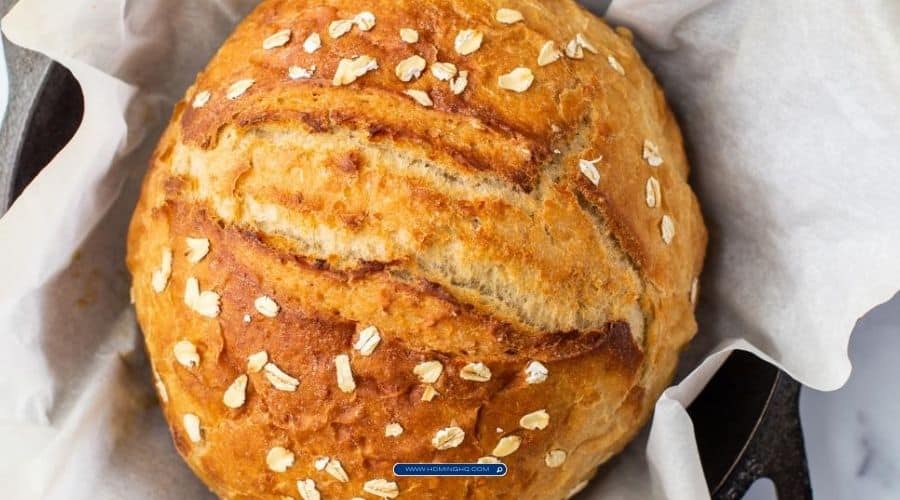
There’s something truly magical about homemade bread, and this Honey Oat Dutch Oven Bread is no exception. Imagine a loaf with a golden, crusty exterior that gives way to a soft, airy interior.
The combination of honey and oats brings a subtle sweetness and heartiness, making this bread perfect for any occasion.
Whether you’re serving it alongside a warm bowl of soup, turning it into a sandwich, or enjoying it with a slather of butter, this bread will become your new favorite recipe.
What makes this bread even more special is the use of a Dutch oven, which allows the bread to bake to perfection.
The enclosed environment helps create the ideal conditions for a crispy crust and soft, chewy center.
Plus, it’s incredibly easy to make—no need for a bread machine or special equipment. Ready to impress your friends and family with this delicious homemade bread? Let’s get started!

Why You’ll Love This Honey Oat Dutch Oven Bread
Deliciously Balanced Flavor
One of the standout features of this Honey Oat Dutch Oven Bread is its unique flavor. The touch of honey adds a delicate sweetness that pairs beautifully with the earthy, slightly nutty flavor of oats. It’s not overly sweet, just the right amount to complement the savory richness of the bread. The result is a loaf that tastes fantastic with everything—from a simple slice of buttered toast to hearty soups and stews.
Incredible Texture
This bread strikes the perfect balance between a crisp, golden-brown crust and a soft, airy interior. The oats give the bread a rustic, hearty texture, while the honey contributes to a subtle sweetness and moisture. The combination makes for a chewy, satisfying loaf that’s sure to become a staple in your kitchen.
Effortless to Make
You might think that homemade bread requires advanced skills or special equipment, but with this recipe, that’s simply not the case. Using a Dutch oven to bake the bread creates a professional result with minimal effort. The process is straightforward, and you don’t need to be an experienced baker to achieve perfect results. Plus, the dough comes together quickly and easily, with very little hands-on time required.
Versatile for Any Meal
This Honey Oat Dutch Oven Bread is incredibly versatile. You can enjoy it for breakfast, lunch, or dinner. It’s the perfect base for sandwiches, a great side to soups, or simply served warm with butter for a comforting snack. Whether you’re hosting a dinner party or just enjoying a quiet meal at home, this bread will fit right in.
Ingredients You’ll Need for Honey Oat Dutch Oven Bread
Making this Honey Oat Dutch Oven Bread requires a few simple ingredients, most of which you likely already have in your pantry. Here’s what you’ll need:
- All-Purpose Flour: The base of the dough, providing structure and texture.
- Old-Fashioned Oats: These oats contribute to the bread’s rustic feel and provide a wonderful chewiness.
- Honey: Adds a gentle sweetness that enhances the bread’s flavor. It also helps keep the bread soft.
- Active Dry Yeast: The key to helping the dough rise and develop a light, airy texture.
- Warm Water: Activates the yeast and helps the dough come together.
- Salt: A small amount of salt is essential for balancing the flavors and bringing out the sweetness of the honey.
- Olive Oil: Adds moisture to the dough, giving the bread a tender crumb and a slightly rich flavor.
These ingredients come together to create a loaf that’s as delicious as it is easy to make. And the best part? You don’t need any fancy tools or techniques to bake this beautiful bread—just your trusty Dutch oven and a little patience!
You have not enough Humanizer words left. Upgrade your Surfer plan.
Step-by-Step Instructions for Honey Oat Dutch Oven Bread
Step 1: Activate the Yeast
Start by activating your yeast. In a small bowl, combine 1 cup of warm water (around 110°F/43°C) with 2 teaspoons of active dry yeast and 1 tablespoon of honey. Stir gently to dissolve the yeast, then let it sit for about 5-10 minutes. The mixture should become frothy or bubbly—this means the yeast is active and ready to go.
Step 2: Prepare the Dough
In a large mixing bowl, combine 3 cups of all-purpose flour, 1 cup of old-fashioned oats, and 2 teaspoons of salt. Stir them together until evenly mixed. Once the yeast mixture is frothy, pour it into the dry ingredients along with 2 tablespoons of olive oil. Stir the mixture until a sticky dough begins to form.
Step 3: Knead the Dough
Transfer the dough onto a lightly floured surface and knead it for about 8-10 minutes, or until it becomes smooth and elastic. If you have a stand mixer, you can use the dough hook attachment to knead the dough on medium speed for 5-7 minutes. The dough should be soft but not too sticky—add a little more flour if necessary, but be careful not to overdo it.
Step 4: First Rise
Place the kneaded dough into a lightly greased bowl. Cover it with a clean kitchen towel or plastic wrap, and let it rise in a warm place for about 1-1.5 hours, or until it has doubled in size. The warmth helps the yeast do its job and ensures a light, airy loaf.
Step 5: Shape the Dough
Once the dough has doubled in size, gently punch it down to release any air bubbles. Turn it out onto a floured surface and shape it into a round loaf. You can also fold the dough to create more structure. If you like, sprinkle some additional oats on top for extra texture and visual appeal.
Step 6: Second Rise
Place the shaped dough onto a piece of parchment paper or a lightly floured surface. Cover it with a kitchen towel and let it rise for another 30 minutes to 1 hour, or until it has puffed up again. This second rise gives the dough even more time to develop flavor and texture.
Step 7: Preheat the Dutch Oven
While the dough is completing its second rise, preheat your Dutch oven. Place the empty Dutch oven with its lid into the oven and set the temperature to 450°F (232°C). Allow it to preheat for about 30 minutes, which will help achieve a crispy, bakery-style crust on your bread.
Step 8: Bake the Bread
Once the dough has risen, carefully remove the hot Dutch oven from the oven. Use the parchment paper to lift the dough and gently place it into the preheated Dutch oven. Cover the Dutch oven with its lid and bake for 30 minutes. After 30 minutes, remove the lid and bake for an additional 10-15 minutes, or until the bread is golden brown and sounds hollow when tapped on the bottom.
Step 9: Cool the Bread
After baking, carefully remove the bread from the Dutch oven and transfer it to a wire rack to cool completely. Let the bread rest for at least 30 minutes before slicing to ensure the crumb sets properly.
Tips for Perfect Honey Oat Dutch Oven Bread
1. Use Fresh Yeast
Make sure your yeast is fresh and active. Check the expiration date on the packet, and always proof the yeast (as described in Step 1) to ensure it’s bubbly before proceeding. This is crucial for achieving a good rise and light texture.
2. Don’t Overwork the Dough
While kneading is important, be careful not to overwork the dough. Knead just until it becomes smooth and elastic. Over-kneading can result in dense bread, which is the opposite of the light, airy texture you want.
3. Let the Dough Rise in a Warm Spot
For the best rise, let the dough rest in a warm, draft-free environment. If your kitchen is cold, you can place the dough in an oven with the light on or in a warm corner of the kitchen. The dough should double in size in about 1-1.5 hours.
4. Preheat the Dutch Oven Thoroughly
Ensure that your Dutch oven is preheated before placing the dough inside. This step is vital for creating that crisp, golden crust that’s characteristic of well-baked bread. The heat of the pot helps the bread rise quickly at the start of the baking process.
5. Adjust the Oats for Texture
If you prefer a chewier texture, consider using steel-cut oats instead of rolled oats. Steel-cut oats will give the bread a heartier, more rustic feel. Alternatively, for a smoother texture, you can pulse the oats in a food processor before adding them to the dough.
6. Control the Crust Texture
If you like a softer crust, you can cover the Dutch oven with foil during the last 10-15 minutes of baking to prevent it from getting too crispy. On the other hand, if you love a thick, crunchy crust, leave the Dutch oven uncovered for the entire baking process.
7. Don’t Rush the Cooling Process
Allow your bread to cool completely before slicing. While it might be tempting to cut into the warm loaf, this step is crucial for the bread’s structure to set. Cutting too soon can result in a doughy, undercooked interior.
By following these tips, you’ll have a beautifully baked loaf of Honey Oat Dutch Oven Bread with a perfect balance of flavor, texture, and visual appeal. Happy baking!
Frequently Asked Questions (FAQs)
1. Can I use whole wheat flour instead of all-purpose flour?
Yes, you can substitute whole wheat flour for all-purpose flour, but the bread may turn out a bit denser. If you want to maintain a lighter texture, try using a blend of 50% whole wheat flour and 50% all-purpose flour. This will still give you the hearty flavor of whole wheat without sacrificing the fluffiness of the bread.
2. Can I make this bread without a Dutch oven?
While the Dutch oven creates the ideal baking environment for a crispy crust and soft interior, you can bake this bread on a baking sheet if needed. To mimic the effects of the Dutch oven, place a shallow pan of water in the oven during baking to create steam. This will help the bread rise and form a nice crust. However, keep in mind that the crust may not be as thick and crispy as it would be with a Dutch oven.
3. Can I use instant yeast instead of active dry yeast?
Yes, you can use instant yeast in place of active dry yeast. Instant yeast doesn’t need to be proofed in warm water, so you can mix it directly into the dry ingredients. Use the same amount (2 teaspoons), and proceed with the recipe as directed.
4. How can I store Honey Oat Dutch Oven Bread?
For best results, store your bread in a paper bag or wrap it in a clean kitchen towel. This will help keep the crust crispy while preventing it from becoming too soft. If you want to keep the bread fresh for longer, you can freeze it. Slice the bread before freezing, then wrap the slices in plastic wrap or foil and store them in an airtight container.
5. Can I add other ingredients, like seeds or nuts, to the dough?
Absolutely! You can get creative by adding ingredients like sunflower seeds, pumpkin seeds, or chopped nuts to the dough. Just fold them in after the first rise, before shaping the dough. Keep in mind that these additions may slightly change the texture of the bread, but they’ll add extra flavor and crunch.
Conclusion
There’s nothing quite like the satisfaction of baking your own bread at home, and this Honey Oat Dutch Oven Bread is sure to become a favorite in your baking repertoire. With its perfect balance of a crunchy, golden crust and a soft, chewy interior, this bread is the ideal companion for everything from soups and stews to sandwiches and breakfast spreads. The simplicity of the ingredients and the ease of using a Dutch oven make this recipe approachable for even the most novice bakers.
Whether you’re enjoying it fresh out of the oven or making sandwiches for the family, this homemade bread will elevate any meal. Don’t be surprised if it becomes a staple in your kitchen, bringing both comfort and delicious flavor to your table.
Happy baking, and enjoy the wonderful aroma and flavor of homemade Honey Oat Dutch Oven Bread!

Honey Oat Dutch Oven Bread
Equipment
- Dutch oven (1, 5-7 quarts)
- Mixing bowl (1, large)
- Measuring spoons (1 set)
- Measuring cups (1 set)
- Wooden spoon or spatula (1)
- Wire rack (1, for cooling)
- Parchment Paper – 1 sheet (optional)
Ingredients
- 3 cups all-purpose flour 360g
- 1 cup old-fashioned oats 90g
- 2 teaspoons salt 10g
- 2 teaspoons active dry yeast 6g
- 1 tablespoon honey 15g
- 1 cup warm water 240ml
- 2 tablespoons olive oil 30ml
Instructions
- Activate the yeast: In a small bowl, combine the warm water (about 110°F/43°C), active dry yeast, and honey. Stir gently and let it sit for 5-10 minutes until it becomes frothy and bubbly.
- Mix dry ingredients: In a large bowl, combine the all-purpose flour, oats, and salt. Stir to combine.
- Add the yeast mixture: Pour the activated yeast mixture and olive oil into the dry ingredients. Stir until a sticky dough begins to form.
- Knead the dough: Transfer the dough onto a lightly floured surface and knead for 8-10 minutes until it becomes smooth and elastic. Alternatively, use a stand mixer with the dough hook attachment to knead for 5-7 minutes.
- First rise: Place the dough in a lightly greased bowl and cover it with a clean kitchen towel. Allow it to rise in a warm place for 1-1.5 hours, or until doubled in size.
- Shape the dough: Punch down the dough to release air. Turn it out onto a floured surface and shape it into a round loaf.
- Second rise: Place the shaped dough on parchment paper or a floured surface. Cover it and let it rise for another 30 minutes to 1 hour.
- Preheat the Dutch oven: While the dough is rising, place your Dutch oven (with the lid) into the oven and preheat it to 450°F (232°C) for 30 minutes.
- Bake the bread: Carefully remove the hot Dutch oven from the oven. Lift the dough using the parchment paper and place it into the preheated Dutch oven. Cover with the lid and bake for 30 minutes. After 30 minutes, remove the lid and bake for an additional 10-15 minutes until golden brown and the bread sounds hollow when tapped on the bottom.
- Cool the bread: Remove the bread from the Dutch oven and place it on a wire rack to cool completely before slicing.
Notes
Recipe Notes
- Storage: Store the bread in a paper bag or wrapped in a kitchen towel at room temperature for up to 2-3 days. To keep the crust crisp, avoid storing it in plastic.
- Freezing: Slice the bread before freezing, and wrap each slice in plastic wrap or foil. Store in an airtight container or freezer bag for up to 3 months. To reheat, simply toast or thaw the slices as needed.
- Oats: You can experiment with different types of oats. Steel-cut oats will make the bread heartier, while rolled oats give a softer texture. Both work well in the recipe!
- Honey substitution: You can swap the honey for maple syrup or agave nectar if you prefer a different sweetness. Keep in mind this may slightly alter the flavor.
- Add-ins: Feel free to add seeds, nuts, or dried fruit to the dough for extra texture and flavor.


